
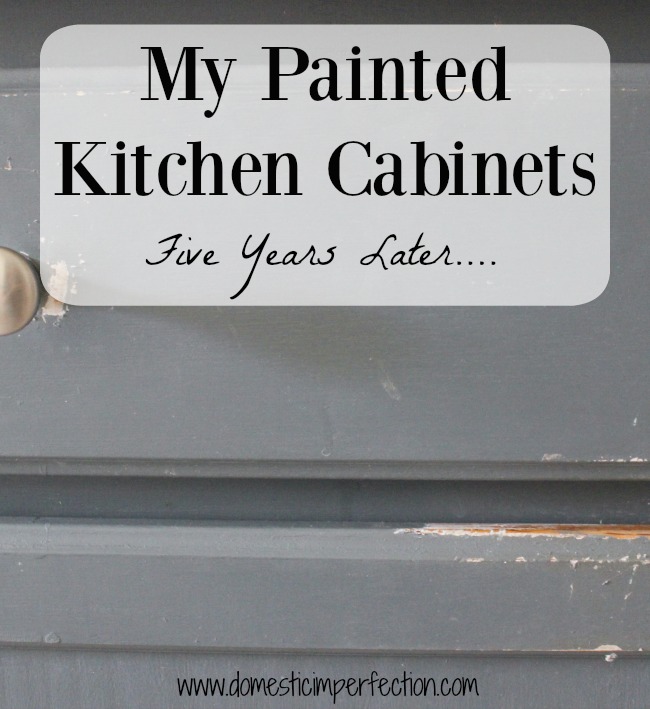
My Painted Kitchen Cabinets – Five Years Later
Since we have been on the subject of kitchen cabinets lately, I thought perhaps y’all would appreciate an update on the ones I painted five years ago. Truth be told they aren’t holding up that well, so if I can keep someone from making the same mistakes I did, that would be great.
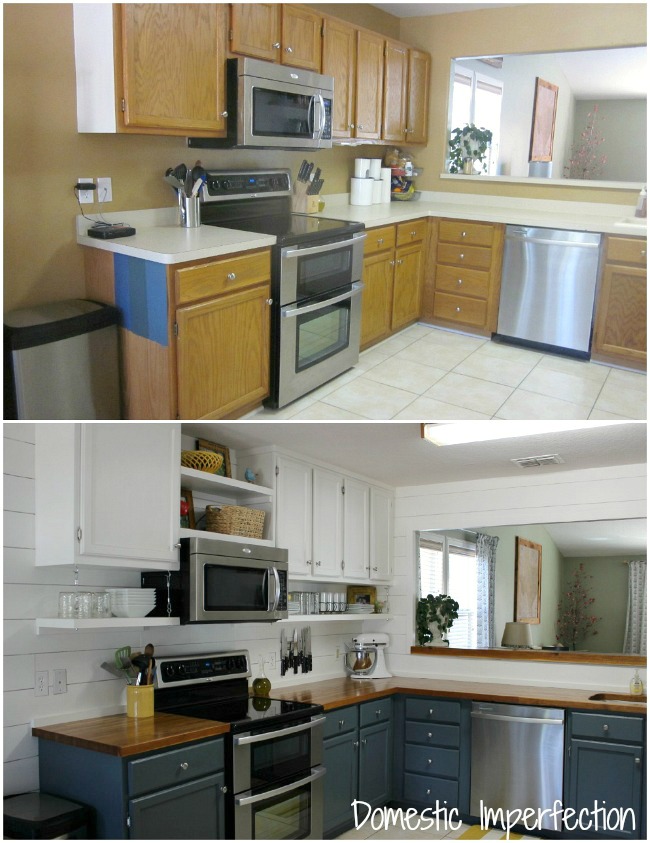
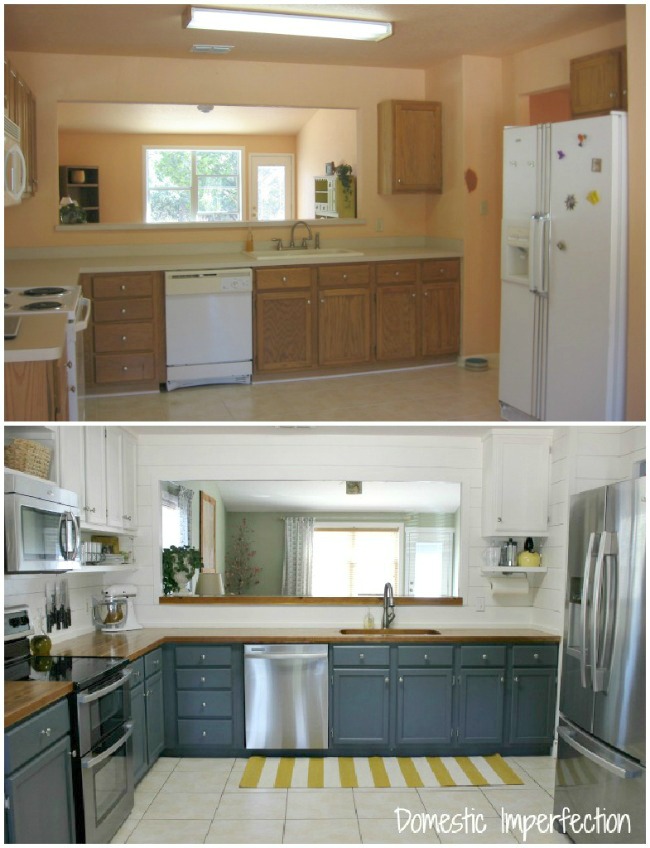
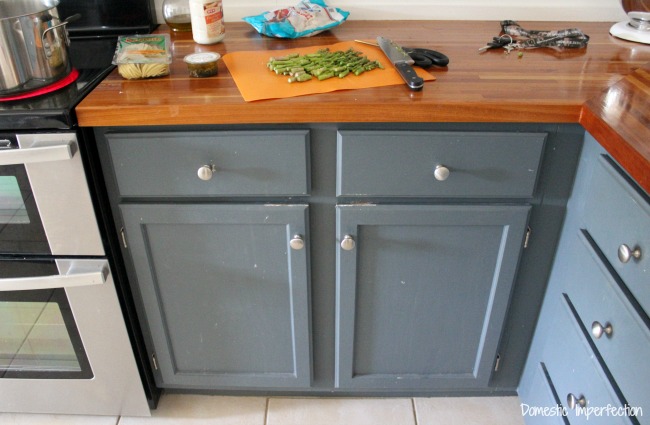
So five years ago Adam and I took this dated, boring, builder-grade kitchen…

and turned it into this…
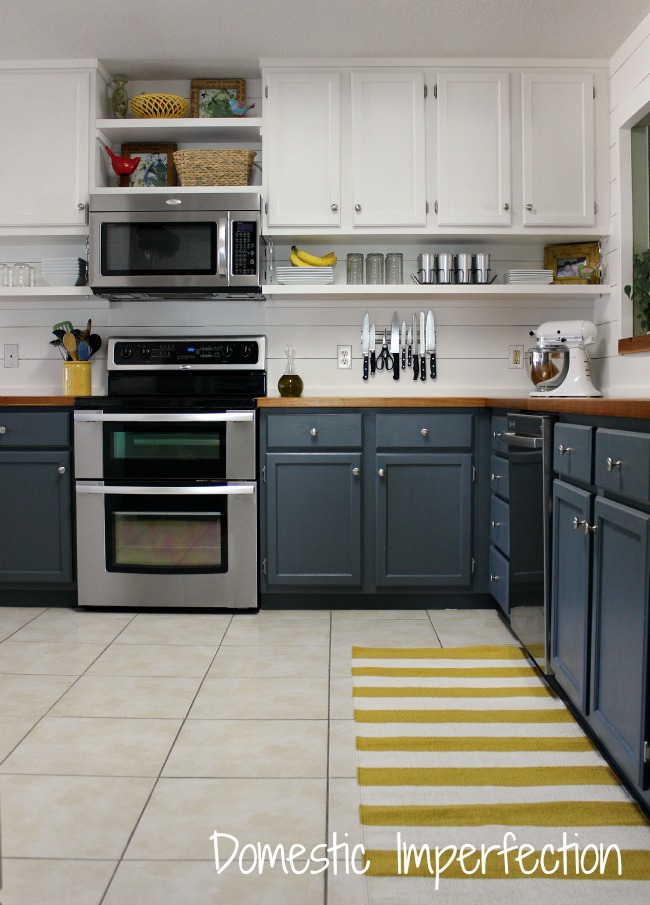
The total price on the kitchen renovation was about $3,800 ($2,200 on new appliances + $1,600 on everything else), and one of the biggest changes was the cabinets. We decided just to paint (and raise) the ones we had, which cost basically nothing and made a world of difference.
So five years ago, as a young and innocent DIYer, I ventured into Sherwin Williams and picked out a paint color for my new kitchen renovation. I talked to the guy that worked there, told him that I was painting cabinets and needed something that would hold up. He said “You definitely want our Duration paint then, it will hold up to anything.” “Great” I said “So I just sand, prime, paint, and seal?” To which he says “Oh this paint doesn’t need sealer, it will do great without it”. And for some reason, I believed him (don’t worry, I am much older, skeptical, and pessimistic now, haha).
So we sanded, primed, and painted our cabinets… and didn’t seal them. Honestly the paint went on like a dream and I had no doubts that my Sherwin Williams guy was wrong.
But wrong he was.
Fast forward five years, and this is what they looked like…
Don’t see it? How about a closer look?

Yeah….they looked terrible and didn’t hold up at all. The main problem was the top of the doors where the baby proof latches were. Years of fiddling with those latches and constantly rubbing the cabinets in the same place took its toll. Even without that they wouldn’t look great though, you can see that they are also worn around the drawer knobs and edges.
Since we were about to list our house for sale Adam and I decided it was worth redoing the cabinets, correctly this time. So we spent many nights removing cabinets parts, sanding, priming, painting and sealing.
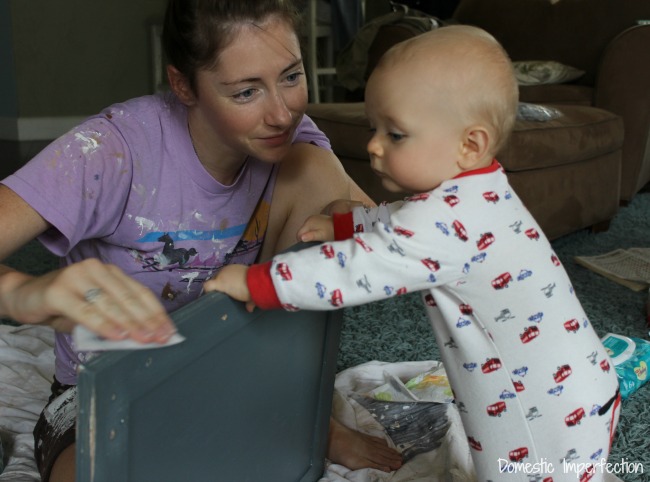
I don’t have any pictures of the process besides the one above, since it was one of the first times Judah pulled himself to standing and had to be caught on film.
After the lower cabinets were finished the white uppers started to look a little dingy, so we took those down and painted and sealed them as well.
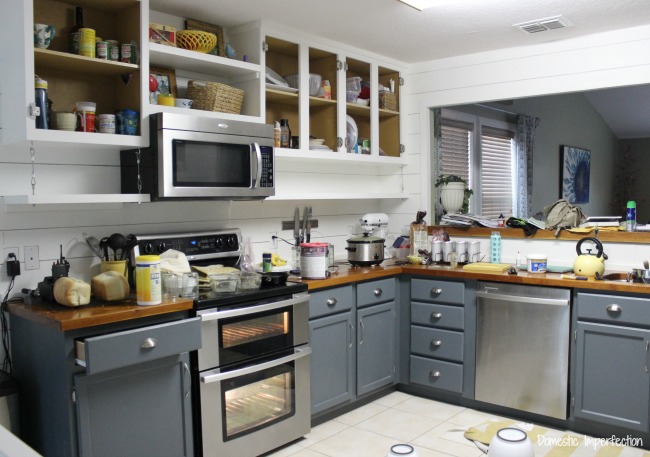
Then the fresh white cabinets made the shelves and backsplash look dingy, so I repainted those too. Then all the planked white walls in the kitchen and dining room looked off, so everything got a fresh coat of paint. Moral of the story is, if you don’t do something right the first time you will end up spending a week repainting entire rooms of your home. You’ve been warned.
Anyway, after it was all said and done our kitchen looked like this for the listing photos…

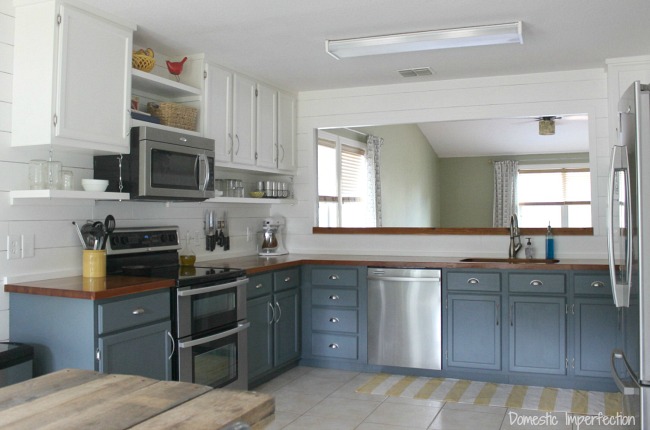
So fresh, so clean…and entirely for someone else.
We also decided to put on new hardware and entice buyers with shiny new cabinet bling.
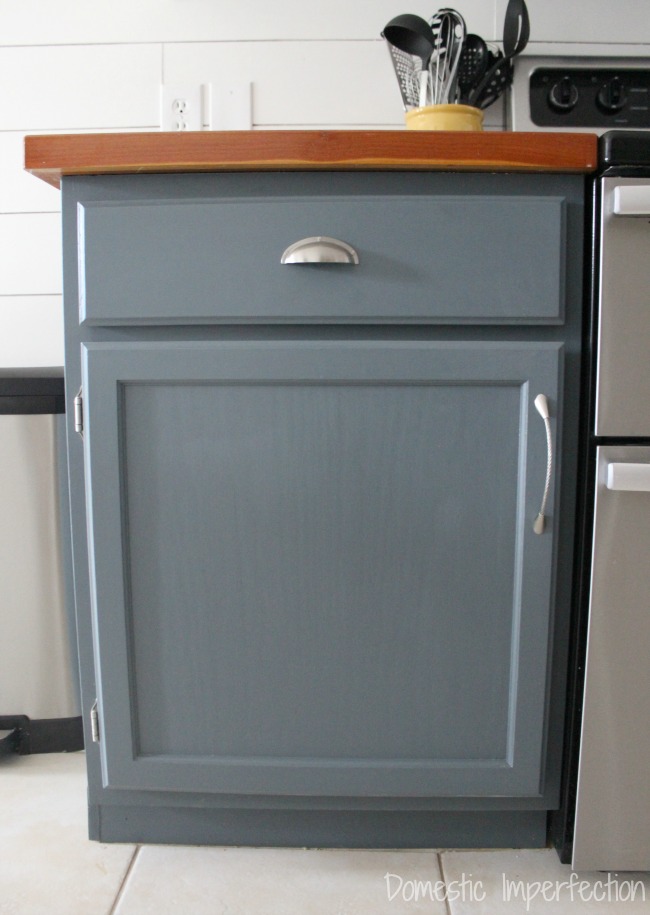
These are from D. Lawless Hardware, the drawers have these cup pulls and the doors have flexible stainless cable hardware.
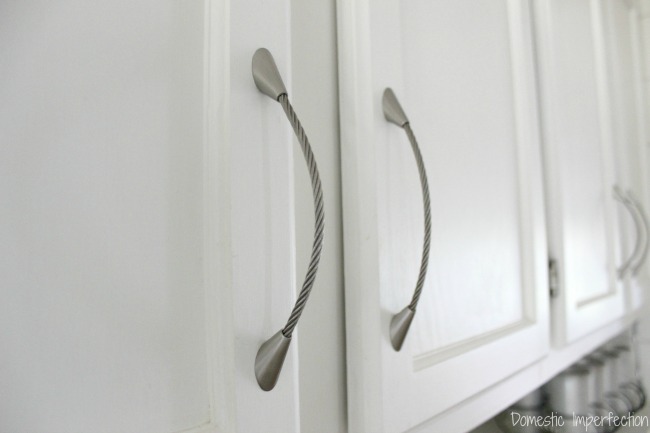
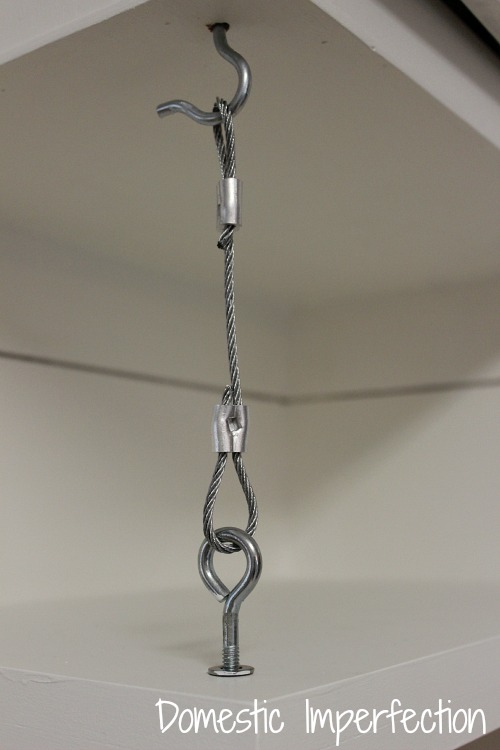
I really love these, they are unique and kinda match the cable we used to support our floating shelves.
Now that we are building a home and DIYing another kitchen, I have jumped back into painting cabinets. This time though I have a lot more DIY experience and research behind me and feel very confident that our new painted cabinets will hold up. So here are the correct steps (and products to use) if you are planning to paint your cabinets.
- Sand – If they aren’t already, take you cabinets down to bare wood. I usually just sand them until they are clean, but you may also need to use a stripper if you have lots of paint or clear sealer on them (this one is my favorite).
- Prime – It is very important to use a good primer. For our old cabinets I used Kilz, but for the new ones I have chosen a good oil-based sealer (this one). Normally I hate oil-based paint because they are impossible to clean up, smell terrible, and yellow…but primer is different and no so bad. I recommend using and oil-based primer even if you plan on using latex paint. I know it goes against everything you’ve been taught about oil+water, but trust me.
- Paint – Use a good latex paint for painting the cabinets (I chose Sherwin Williams ProClassic). If you want to use oil you can, but I have never, EVER, used oil-based paint or sealer and not had it yellow. For a smooth finish use a combination of a quality brush (this one is the best EVER) and roller. You can also add a paint conditioner called Floetrol to your paint, and make sure you do thin coats and sand lightly with a high grit sandpaper (300 or so) between coats.
- Seal – Seal no matter what. I have experimented with a lot of sealers over the years (thanks paper bag floors!) and have chosen to use Vermont Natural Coatings furniture finish for our new cabinets. It’s actually a green product made from whey (yes, like cheese) and is stronger than water based sealers and doesn’t yellow like oil-based sealers. I’m pretty excited about it. It is kinda pricey though, and if you want something more budget-friendly you can just pick up a water-based poly at the hardware store.
So there you go, that is my brain dump for all things cabinet related…hopefully you find something in it helpful!
Kitchen Remodel Links
Shop the Look

The kitchen looks beautiful! Good job well done, and it paid off in the quick sale of the house.
Oh I am so envious! I have never been a fan of the upper and lower cabinets being painted different colors but yours look absolutely stunning! Of course the two of you both have great taste. If only I could have you in my house for a week!! Lol!! What a remarkable job you did in your kitchen, and I love those cabinet pulls too. They are really unique and they look great. That must have been a lot of work, but it looks fantastic!
Your kitchen is beautiful well done and thank you so much for all the information on paint wearing over time etc. We did our kitchen in annie sloan and thankfully we used layers and layers of wax over the paint so it’s still fine today but it would be so much easier to just paint on a sealer so I”m glad to hear you can use a water based non yellowing sealant. I think I’l try the water based seal on my next project . Thanks again. Marie:-)
Thanks for the honest update. So many times everyone states, “their project is perfect” and I know better.
I have been skeptical about painting my kitchen cabinets for about a year, or maybe just procrastinating. Thanks for the tips, and if I do paint I will definitely use a sealer. I know the guys at SW and Ben Moore both told me no sealer necessary.
Just a scary job, wish I could raise my cabinets, but I have sofits [fur-downs] on the top of mine. It made a world of difference in your kitchen. I love it. Great job, and don’t forget to tell us about your new house.
Man I love that kitchen! However I’m going to look forward to the new one… I can’t wait to see the results!
Question: When you repainted the cabinets this go around, did you strip/sand them down to wood? My hubs and I are in the process of redoing our kitchen and after having painted them with what was recommended to me, the paint did this weird bubbling thing and I am going to have to repaint them when I get the time (baby no. 2 is coming any day now). I am at a loss how to fix the problem. Any input wound be greatly appreciated
I sanded them down, but not all the way to the wood again. If they are having bubbling issues than I probably would though, as much as I hate to recommend more work right as a new baby is coming. I’m afraid that if you just paint over the bubbling paint then the new layer would just do the same thing….I think they may need a fresh new start.
I painted my cabinets the first time with Cabinet Coat from INSL-X. It was ok, kind of thick going on, and more expensive than normal paint. Seemed to hold up pretty well, but I wanted to try something thinner and less expensive. This time I painted with regular Behr satin and two coats of polycrylic to finish. Note that the polycrylic folks say to wait 30 days after painting to apply so the paint can cure (or something). (My Home Depot paint buddy says they advise a week, not a month.) They told me to paint with a flat or satin finish, wait 30 days, then wash with a TSP solution, which will help the poly to stick, then 2 – 3 coats of poly. Pretty easy, we’ll see how it holds up.
My biggest low-tech wonder this time around is making my own “painters pyramids”. Take a 3″ x 3″ piece of plywood or other, screw a 2″ drywall screw into each corner. Put this beauty under the cabinet door, screw points up. Now you can paint both sides at once, touching up the side that rested against the screw points if needed. These were great!
Thanks– I’m really enjoying your site
I really like that you spelled out the prep work steps needed to paint cabinets the right way. We also went from oak cabinets to white and did it all ourselves; cleaning, sanding, priming and painting.
I think it’s very important to point out to people who are considering doing the work themselves that selecting the correct paint is key to long-lasting results. Don’t use latex paint that’s intended for walls. We used Sherwin Williams ProClassic Interior water-based Acrylic-Alkyd Enamel paint in semi-gloss. Water-based enamel is the key. (Oil based paint is too much work with clean-up.) The ProClassic water-based enamel self-levels very well and hardens to a very durable finish – we did not seal our cabinets. We’ve used this enamel paint on all our woodwork as well as our cabinets and they’ve held up great. Thanks for a great blog!
What color paint did you use on the bottom cabinets? I love it! Thanks
What color paint are the bottom cabinets i love them!
Thank you so much for these tips- my husband wants to paint our kitchen cabinets too and so I will be showing him this post!
I can only imagine the hours and sweat that must have taken! Your kitchen looks amazing and will surely help you sell your house. I love the new touches you did along with the two colors. Great job! Happy Thoughts of Home. :)
Have the primer tinted to match the paint.
Makes everything better.
I painted my oak cabinets about 5 years ago and was told by Benjamin Moore that I did not need a sealer either. We don’t have babies so no door latches but I do have some spots that the paint has come off here and there. It is a very long and tedious job to paint cabinets but so worth the look after. Thank you for the update. I plan on sealing mine and am glad to know about the sealer you used.
Very timely as I am in the process of painting my kitchen cabinets. Thanks for an honest update! Btw, I love the darker lower cabinets with the white uppers! Very refreshing!
Wow you did a great job , they look beautiful!
When you paint drawers do you paint the whole drawer or just the face? Drawers in my kitchen don’t have rollers so I’m afraid painting will just scrap off from wood-wood contact. Thoughts?
Thank you so much for this tutorial. I’d like to paint my cabinets but have a three-year old boy what seems like a dozen ride-on trucks, etc. Naturally, the cabinets tend to get run into. I see that you have a child too. How have they held up to being driven into? Thanks.
Man, that’s a rough lesson to learn. With that said, you made your kitchen look fantastic TWICE – that has to count for something!
Did you sand all the way down to the wood? We’re redoing ours, painted by previous owners, and can’t decide if we need to just sand the chipped/rubbed areas smooth or all the way down to wood. But thank you so much for the product recommendations; I want to make sure we do it right!
I just stumbled across your blog for the first time. I can’t tell you how refreshing it is to find a blog that shows what really goes into a DIY project. I’ve only read 3 posts and I’ve already made half of those mistakes :) My motivation (or at least partial motivation) on all of my DIYs is to save some money. I REALLY appreciate your real approach to everything so I know what’s actually worth spending money on. I’m about to stain some wood and I can tell you right now I would have skipped the pre-stain conditioner. Basically, I can’t wait to read more! Keep up the amazing work!
Thank you so much for this comment Kelly… comments like this are why I blog :) Happy DIYing!
Could you share what color you painted your lower cabinets?
They are Grays Harbor from Sherwin Williams
I was happy to find this! I did the same thing you did the first time around. Having 8 people in the house on a daily basis has really taken a toll.
I plan to re-do them over spring break. Thanks for all of the tips!
I actually find this while looking at your butcher block countertops. Which is a choice I am definitely making for the kitchen re-do.
I used Benjamin Moore Cabinet coat, did everything right, clean, sand, prime, paint – it lasted less than 6 months before wear started showing. I emailed the company to complain and told them I would have to seal them all. They said that I shouldn’t have to. They are wrong. I repaired the worn areas and repainted, then sealed everything with a satin clear coat two coats. It has lasted longer but now it is showing wear again. I absolutely love the look but I will never paint cupboards again.
How many coats of paint did you apply? I am painting our builder grade cabinets white too!
Originally we did primer plus two coats of paint, but make sure you do a sealer as well.
How many coats of sealant did you use/do you recommend at the end?
We painted our cabinets about 2 weeks ago. We used the Pro classic in satin. I bought the Polyurethane in semi gloss. Will this work over the Satin Pro classic? I called Sherwin Williams and he ofcourse said NOT to seal!? But I DO NOT want them chipping in a few months/years. Also will the Polyurethane will this yellow on the white cabinets? I did my top cabinets in white and my bottom cabinets in the grays harbor. Thanks for any help.
I appreciate the heads up on the Vermont Natural Coatings sealer and will be applying it to wear surfaces and surfaces exposed to moisture. We are in the process of installing new cabinets and they are white. I feel it important to seal them in order to protect them from the wear and tear they’ll receive.
In using petroleum based sealers I have been most disappointed in the yellowing of the finish over time.
Just so you know, the Vermont Natural Coatings is yellowing on my white cabinets (it been two years). It’s not terrible and is very even, but I wouldn’t want you to think that it won’t yellow at all. I have yet to find a sealer that never yellows over white paint.
Hello!! I’m a new reader (thanks, Pinterest) and i would love to know there color of the paint you used for your upper and lower kitchen cabinets! I hate picking colors and would love a place to start! Would you email me the names?!
Hey Liz! I don’t remember the name of the white, but the lower cabinets are Grays Harbor from Sherwin Williams.
I know this post is old, but I had to share a tip I learned when painting my cabinets and they’ve held up great so far. Not long before the kitchen reno I had painted my front porch and thought to myself one day “if this stuff can hold up to being walked on SURELY it can withstand cabinet use and abuse, too”. And it can! The paint dries to a smooth rock-hard finish and is super durable. I didn’t seal mine after since the paint doesn’t need sealing even on floors, and it’s held up fine. The paint guy at Lowes actually told me “you can’t use that on cabinets”, but I’m glad I ignored his pessimism and gave it a shot because it turned out to be the best decision I made during my kitchen remodel!
Ha, left out the most important part and completely failed to mention that the paint was Valspar Porch Floor & Patio paint. It’s been so good that I will definitely use it for any painting in the future that needs to be super durable.
t
looks fantastic! we are in the process of painting our kitchen cabinets. Just read about the sealer, thanks godness! also, where did you get the hinges? don’t seem to find anything I like. Old hinges are too rustic and we want to give a modern and affordable touch. Thjanks in advance!
I enjoyed your post! We are finishing our cabinets now and were just about to hang the doors back up, but now I’m considering adding a seal. How glossy was the natural sealant you used? Thanks!
We JUST went to Sherwin Williams today and got their Pro Classic. I asked the employee about sealer and he SWORE we didn’t need it. And that it might not even look good. I’m tempted to just get the sealer anyway,
The link for your favorite paint stripper no longer works. Can you replace the link or tell me what brand it is?
Awesome results!! Thank you for sharing!
This might be a silly question, but do you seal the shelves as well or just the doors?
I didn’t seal anything on the inside, just the doors and the face frames.
Beautiful kitchen! My husband and I redid our small kitchen and added butcher block counters and shiplap walls. We always knew our end product would have blue cabinets on the bottom. As we search for blues we love we have separately pinned your kitchen multiple times (on accident) and keep coming back to that blue.. anyway you would share the Sherwin Williams color with us??
Hi! What finish did you use for your sealer for the cabinets? We are just finishing up painting with a semi-gloss Sherwin Williams paint, so was wondering if you used Satin or semi-gloss?
YOU Missy are a talented girl!! My y question is pretty simple. Could you tell me where you. bought the seven shelves on the pantry wall on the left. Such a great idea and I have the same type pantry.. thanks in advance
Blessings
did you use anything to fill in the grain of the oak before painting them the first time? You may have said but I did not see the original post.
If you don’t mind me asking but what color is this for the cabinets? ♡
What is the color you used for the cabinets??
I feel the only way you can say that the last way you did it was correct is if you have several years of experience with the cabinets that prove the paint was durable on the cabinets. (the proof is in the pudding).
Loved your blog. You’re inspiring me to try hey DIY on my kitchen cabinets!
I love this look so much that I just did the same to my kitchen. My kitchen has been reborn, and I just love it. Thank you so much.
It’s many years after this post was published, but if anyone reads this I would recommend to NOT listen to the people at the paint stores. I had several tell me incorrect information and had to start all over and sand down to bare wood. Do a LOT of research. And I know a lot of blogs out there give conflicting info. I always go with the most conservative approach, even if that means more work (sanding to bare wood, buying higher priced products, and sealing). I just painted my kitchen cabinets and have read over and over, not to seal. I had a professional cabinet painter tell me to seal it. So I will. Crossing my fingers that all this work lasts for a very long time.