
Installed Cabinets
Happy Fourth of July everyone! I was scrolling through Facebook today and looking at all the festive pictures and memes, and interspersed between and the red white and blue was this gem…

It made me laugh out loud…so I had to share, of course.
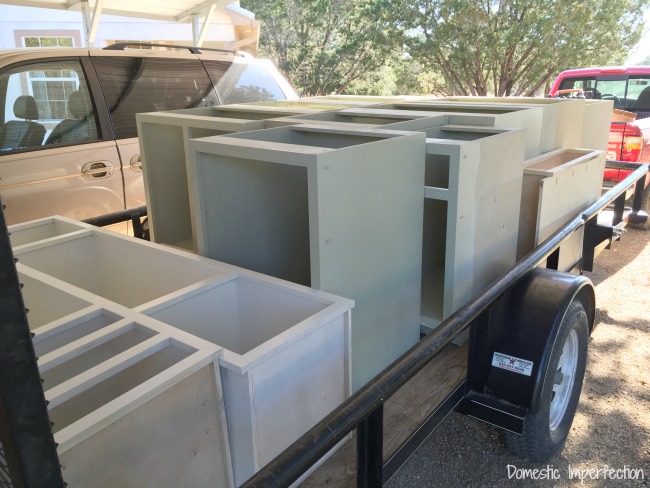
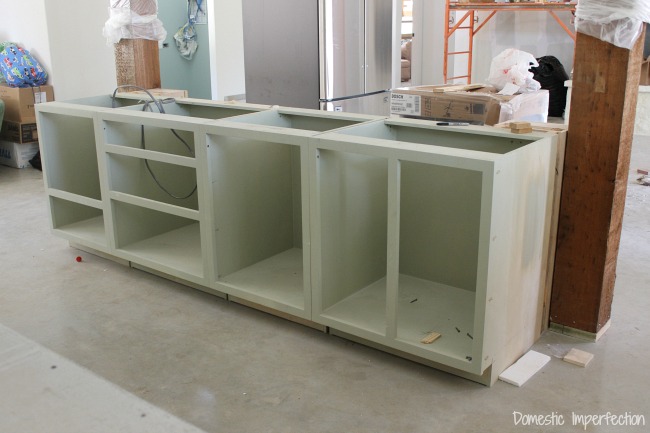
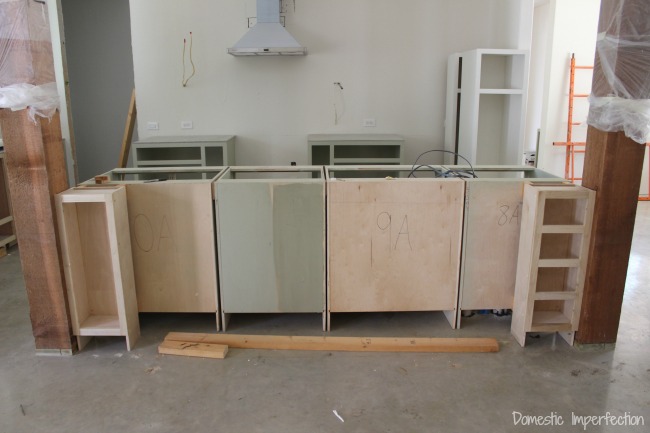
Anyway, in the last post I left you with a trailer full of cabinets…
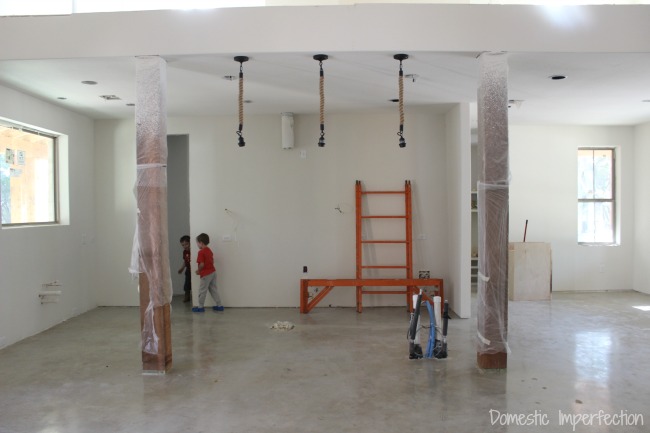
and an empty kitchen.
Then one day this happened…
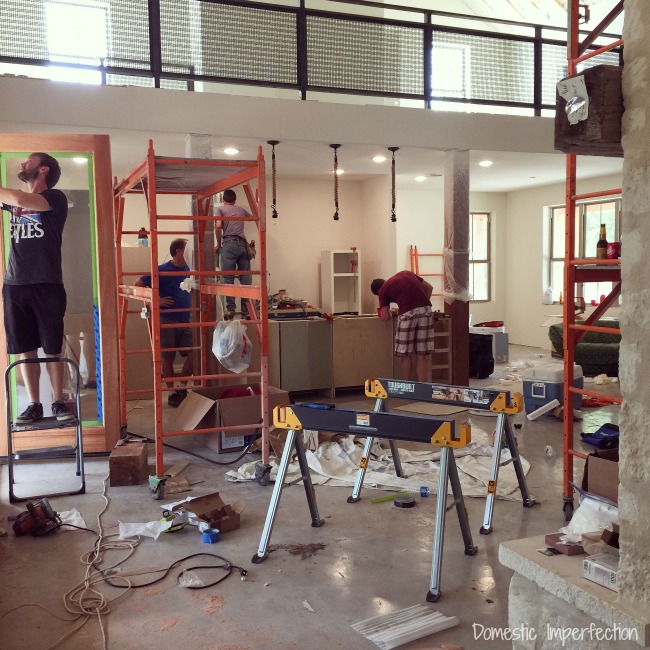
And now we have the beginning of a kitchen!
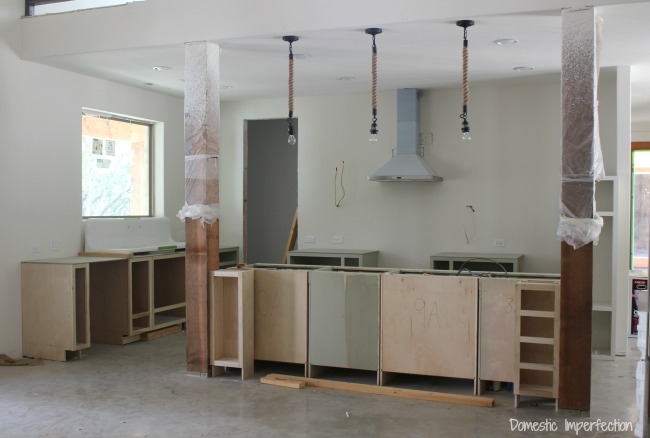
So, would you like a quick tour?
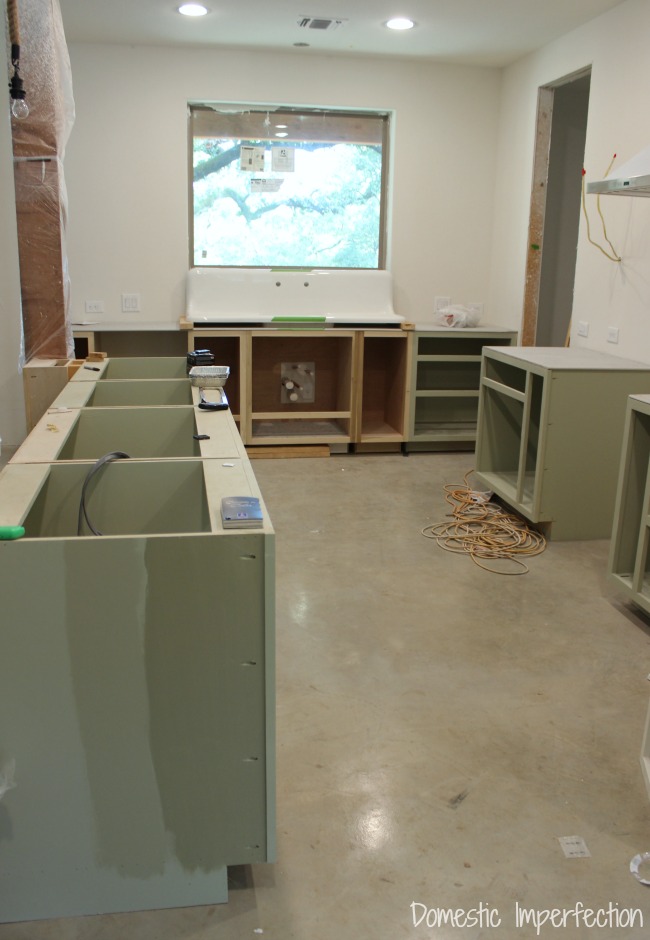
First up we have the wall with the sink.
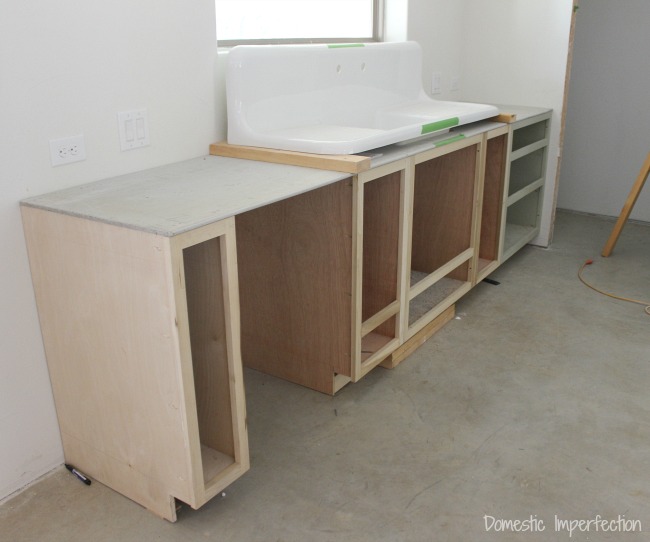
The sink is a high back, double drainboard, vintage sink reproduction. It’s from a place called NBI Drainboards and I’m pretty excited about it. Although, Adam had to rebuild the cabinet it sits on, since we severely misunderstood how the sink had to be installed (click here to read more about the sink). To the left of that will be the dishwasher, and on either side of the window will be the open metal and wood shelving.
I’m currently trying to decide if we should tile this wall (counter to ceiling) or leave it drywall. Opinions welcome.
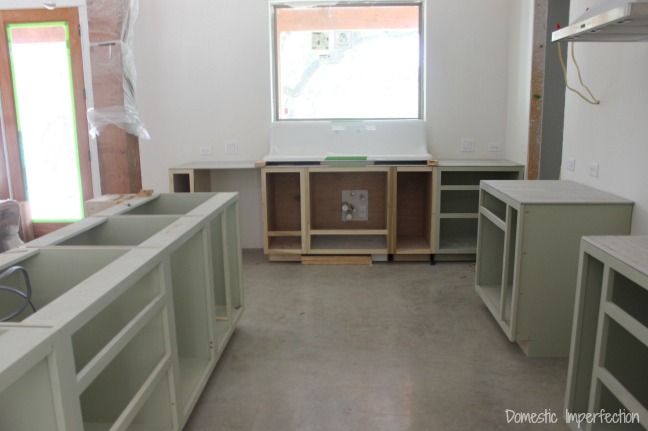
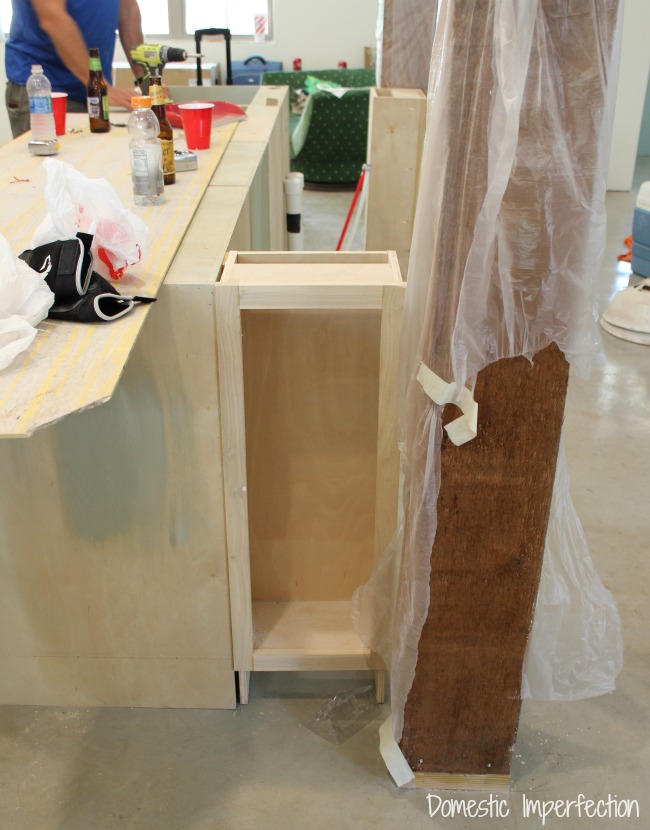
Next is the wall with the oven.
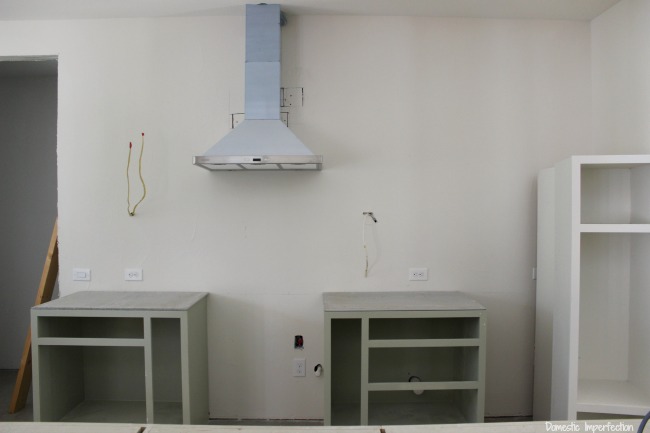
This wall has the only two upper cabinets in the kitchen, which aren’t installed yet. They are going to sit on the outside of the base cabinets and go from countertop to ceiling, and between them will be tile. To the right is where the refrigerator will go. Also, I’m loving the setup of the lower cabinets. We have a narrow cabinets for cookie sheets and whatnot and a bunch of huge deep drawers, which I’m thinking will be much more functional that the standard cabinets with doors.
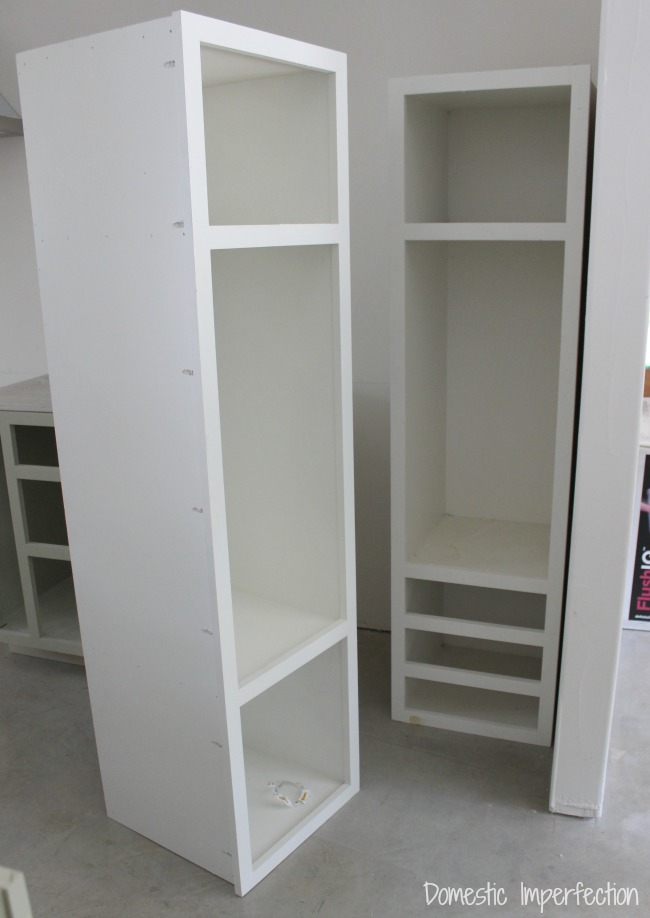
Here is a closer look at the those upper cabinets…
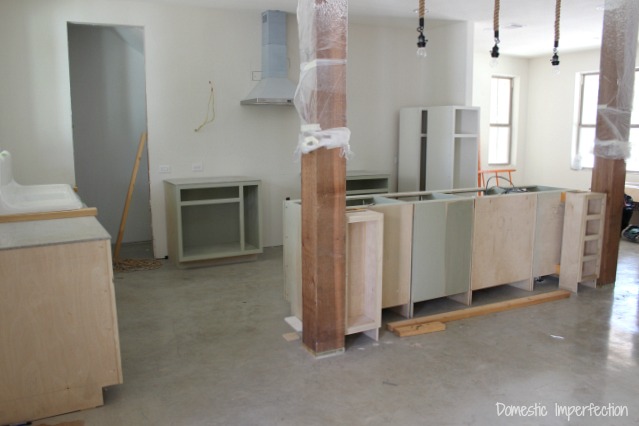
Lastly we have the island.
On the far left side we have the prep sink, and next to that some more deep drawers. I’m not sure what Adam has planned for the next two sections, but I know we are installing an under the counter microwave, so I’m guessing it goes in the middle somewhere.
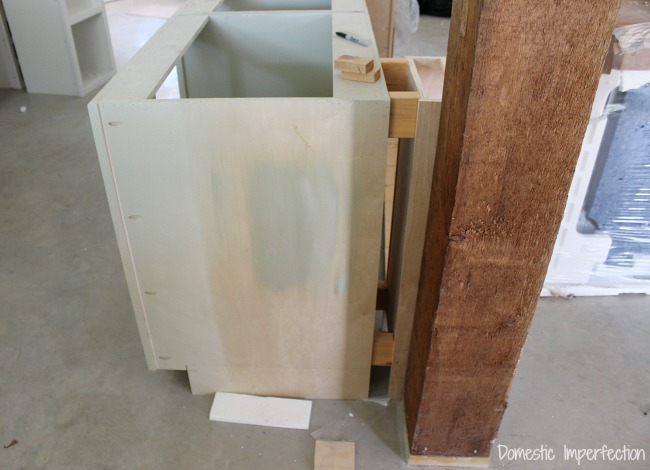
Also, the island required some last-minute changes during install. We had originally planned a deep island, and Adam built small cabinets for the sides to give us extra depth.
But the plumbing for the prep sink didn’t quite hit the cabinets where it needed it to, so after much debate we decided to move the island back about a foot and flip the cabinets to face the living room.
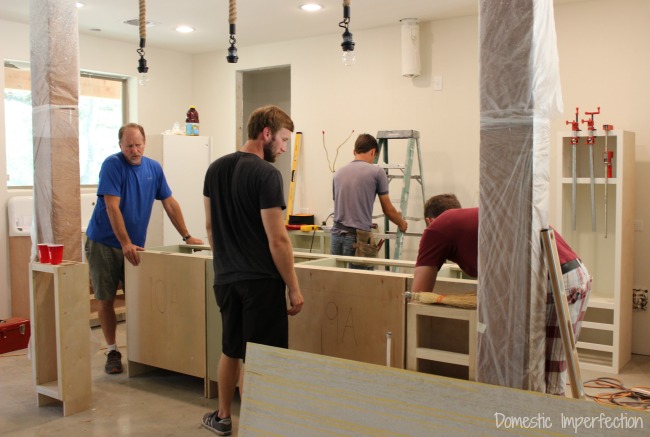
This gives us a thinner island, but a nice wide hallway in the kitchen. Hopefully isn’t not so wide that it feels cavernous, but wide enough for our (soon to be) family of six to maneuver and work around each other.
And that’s the kitchen! I am now 100% caught up in this room, the pictures you see here are what it looks like at this exact moment.
Next up are the white concrete countertops. All the supplies from Z Counterform should be here this week and we plan to pour this weekend. Neither Adam or I have ever done a DIY like this, but after reading (and watching) a ton of tutorials and talking to the people at Z Counterform, I’m feeling pretty confident that it will turn out really well.
CLICK HERE TO READ ABOUT POURING OUR CONCRETE COUNTERTOPS
It’s coming together!
It looks so awesome! I love it!
I would tile it up to the first shelf, imo.
You know what, I hadn’t really considered stopping short of the ceiling (because I didn’t want it to look choppy) but I think that might be the best of both worlds. Thank you!
Tile from counter to ceiling. Painted drywall is harder to clean. The tile will be an eyecatching statement in your large open space.
Looking good Ashley!! I am absolutely besotted with the way that the build is going. Your one lucky lady! That kitchen is going to be dreamy. I have to admit that I have been using your own build for inspiration as my husband and I have started building our own forever home. Ahem!! That eye catching fireplace for one!! ;)
I love that! Congrats on building!
We poured concrete countertops in our kitchen and I love them! Here’s a link to what ours turned out like http://deargoodness.blogspot.com/2016/02/a-kitchen.html (excuse the family blog :) ). We used the Z counterform square edge and they worked amazingly. I’m excited to see your white countertops, I saw the same blog post you did with the tutorial when I was researching ours and thought they looked amazing! Good luck, your kitchen is looking awesome!
Thank you for sharing you story, they turned out great! Let me pick your brain a little though…
I’ve been reading lots of tutorials, and with the white concrete counters if you diamond polish them at the end they turn more of a gray than white. I really want mine to be white, which means we have to get the finish right the first time and not sand much off the top. My question is, how do I ensure that I won’t need to grind them in the end? You said you think you troweled them too much, which I didn’t really think was a think was possible. Anything you would do different there?
Yeah, we had a hard time finding ‘finishing’ techniques for pour-in-place counters. But I think it is similar to pouring a slab (which we also did for our house floor)–if you overwork the concrete, it can bring fine sand up to the surface, which will make the surface powdery and weak. Our floor turned out just fine, while our counters were powdery. I had done most of the research and planning for our counters and was pretty sure we should only trowel the counters a few times to finish them–screed them, float them, let the bleed water rise and then absorb back in, and then finish trowel. But my husband was positive that if we steel troweled them a lot they would be super smooth and perfect. Well…turns out we over troweled. But it worked out in the end, so I was only mad while I spent a few days grinding/polishing them-hahaha. Also, working the concrete while there is still the bleed water on top of the surface will make them weak as well. We didn’t use a special concrete counter mix, we made our own using Cheng’s guide. Maybe with the special mixes you don’t have to worry about the finishing as much? We only used the Z form edges, we didn’t use their mix or their roll-out strengthening product-we shaped and laid our own rebar for strength.
When we poured our countertops we worked in small batches because we rented a small concrete mixer, which was hard. Part of the surface would be ready to be troweled while another part still had bleed water on top of it. Also, since we mixed multiple batches not all the batches had the exact same consistency, so that made the concrete cure at different times. So my advice would be to try to make as big a batch of concrete as possible and pour connected countertops all at once if possible. And have lots of pizza and caffeine to keep you going, it takes a while!
I absolutely love having concrete countertops, they are super durable and thick and chunky and I can put hot pans right on them. And they were inexpensive! Good luck, if you have another question holler and I’ll try to help. I’m obviously no pro, but I’ve made plenty of mistakes and learned from them!
Here are my comments about tiling the wall by the sink. First is a question…where do you see yourself using the mixer and doing most of your cooking and prep work? If you will do it at the island I would leave the sink wall drywall. The high and wide sink backsplash will take the splashing from doing dishes. If you will do it on one side of the sink or the other, then consider tiling the will. One concern with tiling that wall is that the wall is really wide to the left side of the sink and kind of goes out into the living area. Or else you will have to determine an end point for the tile and have an abrupt end to the tile. The other thing is if you leave it untiled now, you can always add it later when the house is farther along or after you have lived in it for a while.
You’re right, the island is where most of the work will happen. If we do tile the wall, the end of the loft (the ceiling) and the last cabinet line up perfectly, which gives us a good (well, not too awkward) stopping point.
So many decisions!
Really forward to seeing your finished countertops. Our kitchen is still without cabinets – we do not have a place indoors to build them so working outdoors in central Texas limits us. I researched the Z counter form products and decided that was going to be the ideal way to get the concrete countertops I want. Only mine will be black. Can’t wait to see yours!
Oh girl, I feel you. For a long time (years and years) we didn’t have indoor space to work, and working outside in the Texas summer is brutal.
Good timing on the countertops, hopefully you will be able to learn from the mistakes we are sure to make while doing ours!
Looking great! :) About the tile/dry wall: if you had a high cabinet/wall to kind of close the kitchen, to separate it from the living room I would definitely say tile it up. But you had not. So…. I don’t think you need it. If it turns out you do, you can still tile it up until the first open shelf (which was my original idea anyway :D) later.
That green, the darkest one, is so beautiful. :))
Also, the sink is so cool, it defines that part of the kitchen so nicely. With the open shelves it will look like a dream. No tile really needed. :)
Now that the cabinets are in the house, do you like the color better? Or will you still repaint the bases? I think you will like the little extra width with the narrower island when you are sharing the kitchen with family.
Honestly, I hate the color even more. I’m 100% certain I will repaint them.
That sucks that you will have to repaint them. At least you are 100% sure about it.
Ehhh, it’s okay. Adam only did one coat and they could use another before we seal them anyway. Might as well be a color I love!
Yes, you definitely want them right. I hate picking out paint colors.
Wow, the kitchen makeover seems to be at its peak! Have you decided what colour you want for the cabinets? I’ve read that icy blue is a preferred colour recently, and it looks very cool to me.
Good luck with the project!
Paula
Even if you don’t do a ton of prep work beside the sink, I think you should tile countertop to ceiling. It would be so gorgeous, and especially with the window the light would reflect beautifully and brighten up the entire kitchen. Plus if you use a subway tile with a tiny amount of texture the contrast would be stunning against the kind of shelves you want. The Inspired Room blog (she has a different house now, but she references her old kitchen quite often) and Seeking Lavender Lane blog have done shelves over tiled walls, and they’re some of my favorite kitchens of all time. You might want to check them out. A bonus is that subway tile is still cheaper, so you wouldn’t have to pay a ton to add a ton of character to your space.
One last thing, I love the dark green paint (I can totally see a few potted green plants suiting on the shelves next to your dishes to compliment the paint color), and your husband’s idea to have mismatched cabinet drawers is awesome, especially the first example picture you showed two posts back. ? The entire build is coming together incredibly. I’m dying over the German shmear brick and metal railing over your upstairs landing. Not to mention the awesome wood trim above your windows! I can’t wait to see more progress. Congrats on the pregnancy! Don’t go too hard on yourself.
I am really digging the sage-green cabinets with the concrete floor…are you planning to keep that, or are you laying hardwood or tile? I’m also curious about your creek…if it’s gone dry for the summer or looks like it will. Because the farm I lived on as a kid had a year-round creek that my grandfather made into a great DIY swimming pond!
The concrete will stay for a few years while we finish other parts of the house and save cash for wood floors. For now we just cleaned and sealed the concrete really well and it actually doesn’t look half bad. As for the creek, it is running, high actually. The neighbors on the other side of it have been there almost 30 years and said they have never seen it dry. Pretty crazy considering how hot, dry, and drought-stricken we are sometimes (most times)!
Look good. Look perfect.
On your tall and narrow cabinets, how did you support the shelves and how much weight do you estimate they will hold?