Painted Plank Walls, Finally
Who knew that painting the plank walls would turn out to be the major project of the month? Seriously, painting the walls was more labor intensive than actually putting up the planks. Okay I may just be saying that because installing the planks was completely done by my husband, but still…painting these suckers took forever. And if you’re wondering what the heck happened to the whole whitewashing thing, I’ll get to it, don’t worry. First though, let me show you some before and after pics, because that’s everyone’s favorite part!
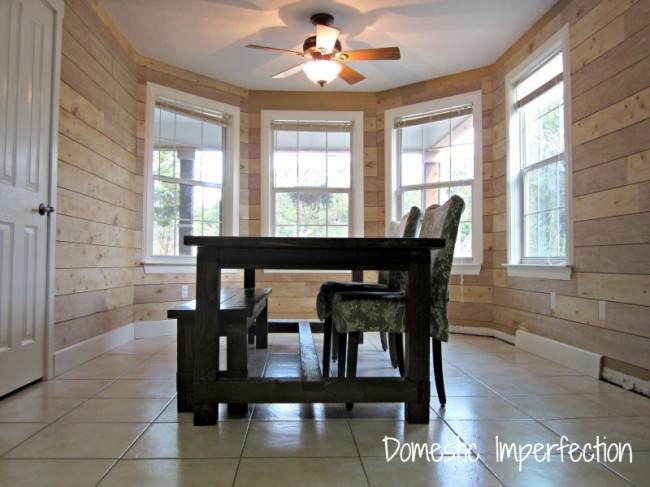
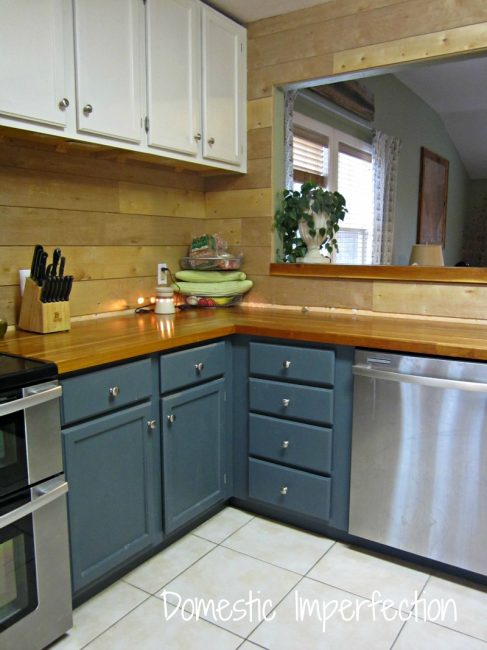
So here are my plank walls, pre-painting…
And here is my ultra bright and majorly white kitchen now…
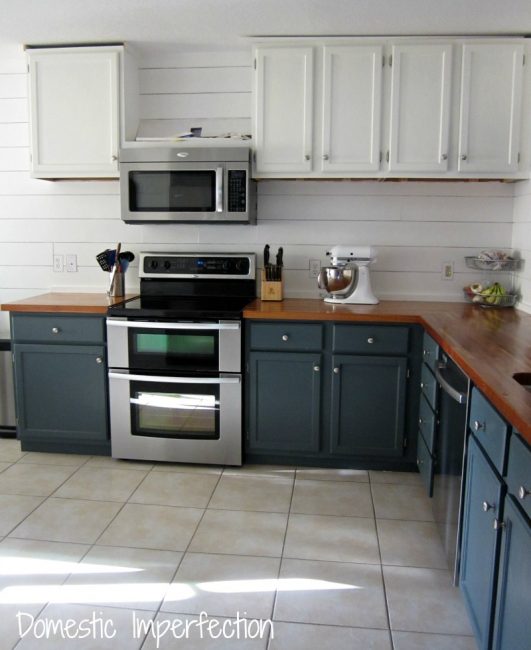
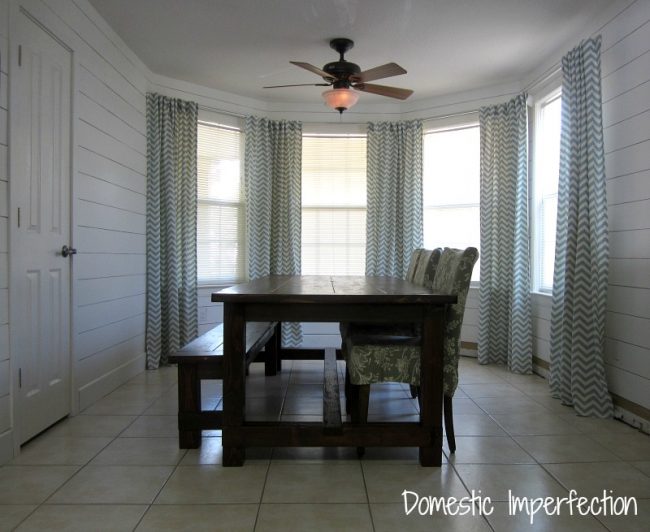

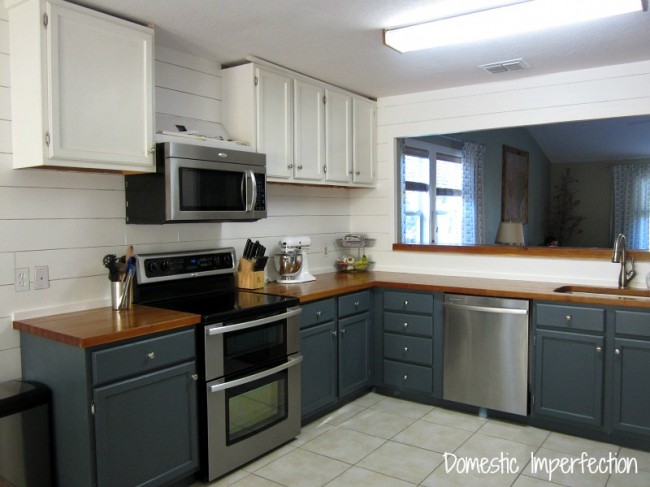
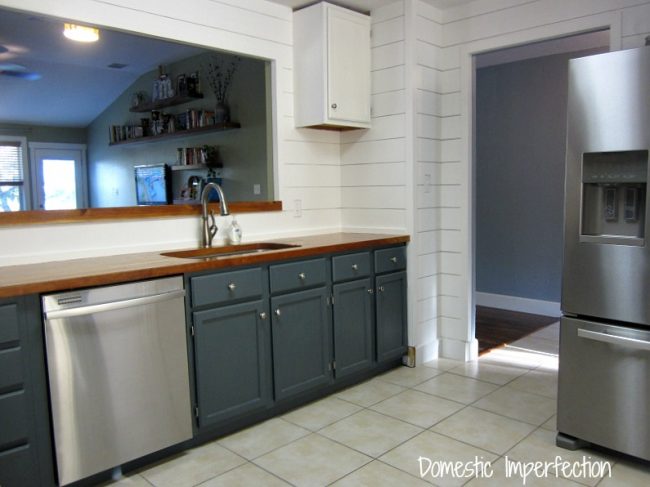
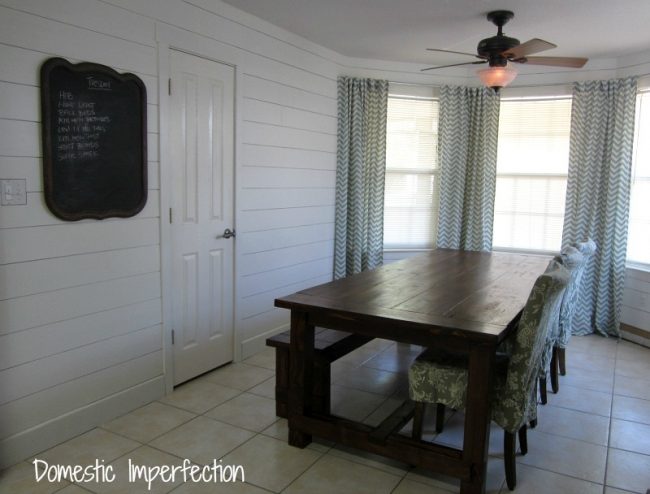
Granted it looks really bare, but that will change once we get to the decorating stage.
Those of you that are here only to see before and after pictures can stop reading and move on, but if you’re interested in why whitewashing didn’t happen, trim details, and my kitchen to do list, then read on!
So whitewash. I was pretty excited about the prospect of whitewashed walls, I thought they would be fun, different, and stand out in from all the white planked walls I’ve been seeing across the internet. I had never whitewashed before, so I turned to Google and pretty much everyone says that a 50/50 mixture of water and paint is the cat’s pajamas. The bee’s knees. The top banana, if you will. Let me tell you something about a 50/50 mixture of water and paint….it is superbly runny. It’s pretty much like painting with milk.
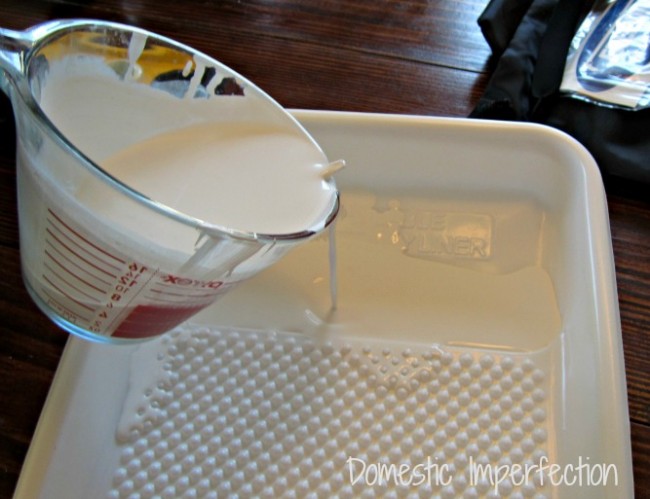
Now as you might have noticed, I’m a pretty messy painter even when the paint is thick, so this was pushing the limits of what my non messy husband could handle. I had paint dripping down the walls, spots on the floor and table….I even had it running down my arm and dripping from my elbow. There was no way I was going to make it through the whole kitchen and dining room like this, so I started to experiment with different paint consistencies.
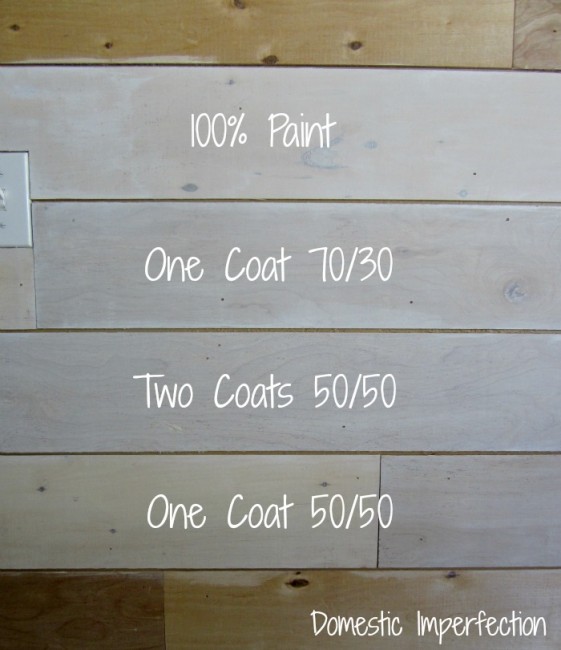
Here is what I found – a 70/30 mixture was the easiest to work with. It provided decent coverage and wasn’t quite as drippy as 50/50 (though still messy). 100% paint looks about the same and is by far the cleanest, but it dries so fast that you have to be super quick to wipe it off and can’t do big areas at once.
So I mixed up a big batch of 70/30 and got to work. I forgot to tell you how to whitewash, though I’m sure you’ve inferred it by now. You simply paint it on like normal, and then take a rag and wipe it off. Really, that’s it…and it’s hard to mess up and is very forgiving. So here I am whitewashing my messy little heart out.
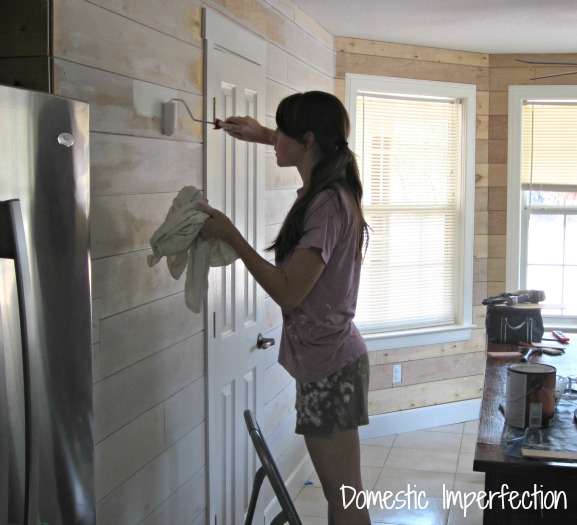
So here is one wall finished. Well, kinda..it needed another coat. Adam kept coming in and asking me “Soo0…how do you like it? Is it turning out the way you thought it would?”, to which I would step back and stare, willing myself to fall in love (with walls…I’m already in love with my husband). Finally he just said “I think it looks terrible” and I said “Thanks goodness, me too. Let’s just paint it.”
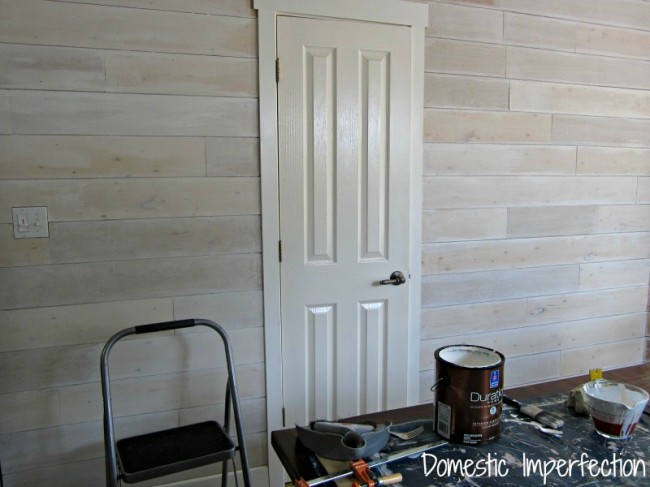
We made the right decision, I really love the fresh clean white walls.

Let me tell you why painting these walls took about a month. First, the area between the planks was tan (the wall color before). I thought that would look best and make the planks stand out, but it just looked….weird. So I had to go through and paint all the cracks with the whitewash mixture and a teeny artists brush. Then I puttied and caulked all the holes from the brad nailer, since they really stood out once the walls were painted solid white. Then the walls ended up taking five coats of paint in some places…three of Kilz (primer) and two of the paint. The wood just soaked up the paint and it kept looking blotchy. Then we needed to add trim, so we went to Home Depot and quickly realized that it was going to cost us $50 – $100 to do the trim (depending on what kind we choose). It cost us just under $100 to plank the entire kitchen and dining room, so paying that much for trim just seemed absurd. Then Adam had the awesomely cheap idea to make our own trim out of the leftover plywood from the walls.
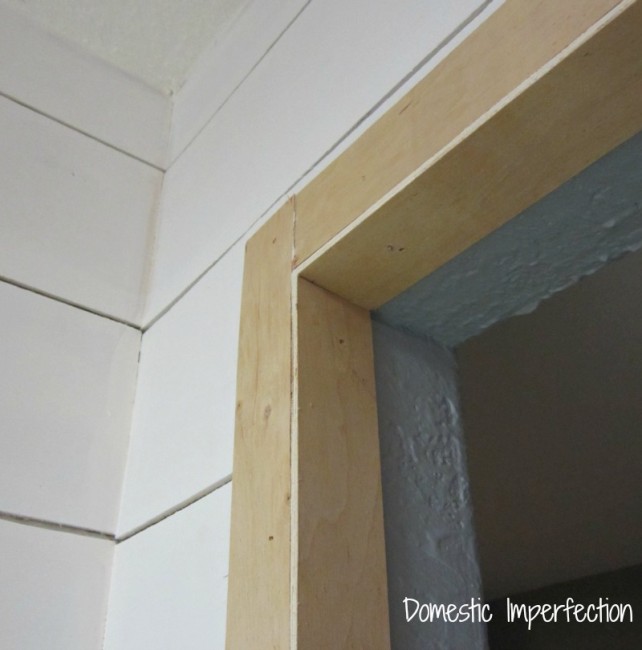
It’s not perfect, but that’s okay. We treated these walls the same way we treat our homemade table….imperfect is good. When the table get’s a new dent or scratch or warps a little we just proclaim “Farmhouse, Baby!” and move on. Calling something “farmhouse” covers a multitude of sins.
So that’s pretty much what I’ve been spending my nap time and post bedtime hours doing the last few of weeks. Did you think I’d forgotten about you?
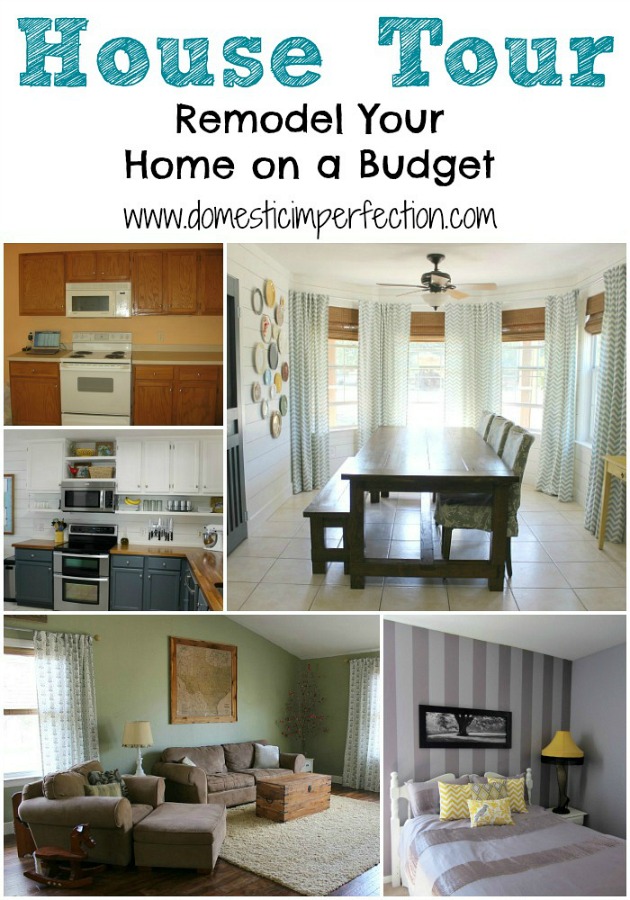
Anyway, here are some fun collages of our progress so far….
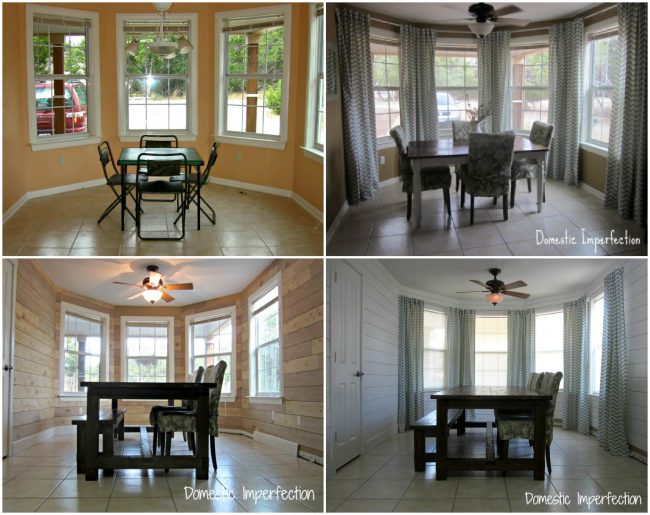
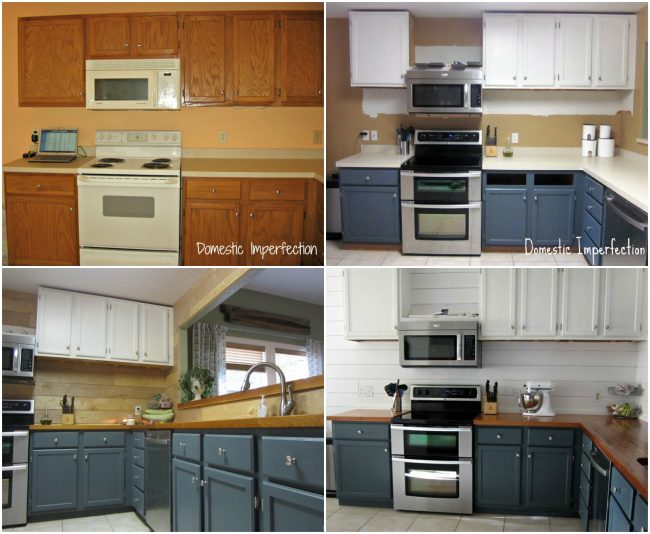
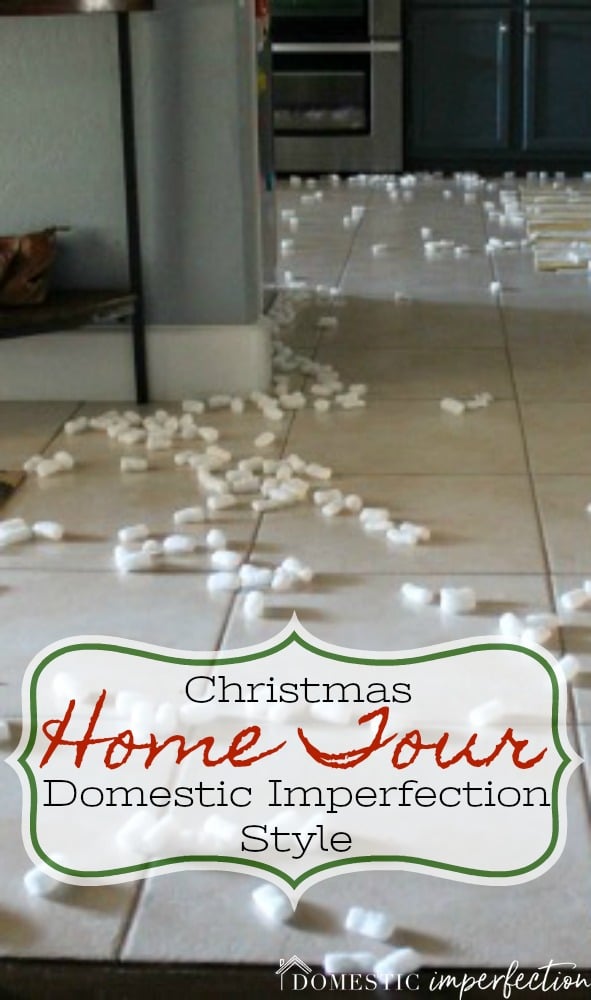
Looking pretty good if I may say so myself! Granted, when I look around, THIS is what I tend to see…
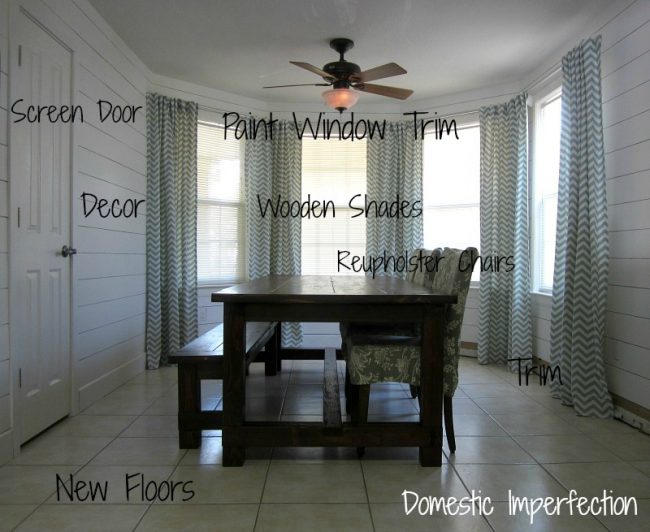
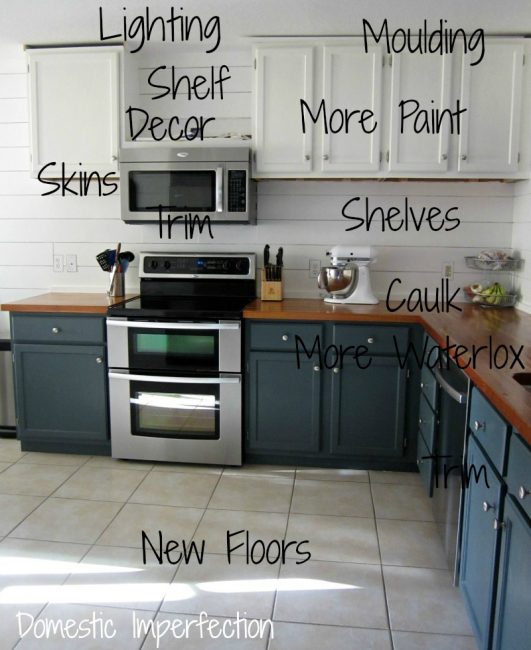
If you’re a really close follower you might have noticed that “new floors” is now on the to do list. We tried to fight it, saying that there is nothing wrong with the tile. There really isn’t…they are big, ceramic, neutral tiles. Nothing is chipped or broken. And the number one best argument for leaving them…they are already there. But the truth is…we both hate them. They are IMPOSSIBLE to keep clean and show every speck of dirt. They are too light, too uniform and too shiny. If we are going to do all this work to the kitchen we might as well not stop short of making it something we love. If we didn’t have a budget (wouldn’t that be nice) I would love to do the floors in a natural shaped flagstone. But we do have a budget, so I’m leaning towards a darker rustic travertine done in an interesting (non-grid) pattern. The challenge will be to find what I am looking for and spending less than $2 a square foot!
Update: We planked the boys room and it went much smoother. Read about what we did differently HERE.


It looks great! Very bright and cheery!
This is seriously awesome!! It was worth every ounce of that work!
It looks great! I’m glad to see your white wash ratios, I want to white wash my plank ceilings (thankfully the house we bought already had them! How trendy, right? Just 15 years before everyone else!) and I want to PAINT the planked walls white as well. I really like how yours turned out. Gives me hope :)
Oh, and I am super happy to know I’m not the only one that looks around and just sees an endless of to do’s! Thank you dor sharing!
You are making me want to paint my bottom cabinets. STOP IT! Seriously, looks amazing. One of my faves of yours.
Wow, what a lot of WORK! I love the look of the painted planks. Your kitchen has a lot more “character” now. Enjoy this part of the project before you tackle the rest of your to-do list!
Wow. Seeing all the before pics really makes an impact. Your space is beautiful.
Looks amazing! Very nice change! And those curtains…oh yes!
I would love if you stopped by my party happening now to link this up!
Stacey of Embracing Change
http://staceyembracingchange.blogspot.com
Looks fantastic! I love that you made your own trim. The collages were an awesome touch. Enjoy your new space!
My hero! I can’t believe the difference you’ve made in that room without completely ripping everything out. It’s a whole new world!
It looks great Ashley! A ton of work I know, but you gave your kitchen such character! I agree-enjoy this “done” stage before moving on to the next!
WOW! Mouth dropping gorgeous! Love the new look!!
WOWZA!!!!! I thought I liked the wood. It was so pretty and fresh… but painted is the bomb!
and I never say :the bomb”.
IT’s rocking and the full paint is gorgeous!!!!
This room is so gorgeous! Love the planked walls, what a beautiful transformation.
This month we ripped out the ceramic tiles we laid 12 years ago and replaced with hardwoods (to match the kitchen). What a huge job it was! I know you hate them, but you will hate ripping them out.
I know, ripping them out is going to feel like taking a huge step backwards. We’ve been avoiding it, but Adam said he wants to do it and when he volunteers for a project I don’t say no!
can I say amazing
How long did it take to do this? It’s amazing, you know.
Looks great! We have very similar shaped kitchens and I love all of your ideas. I’m wondering how you like your cabinets up higher? Can you reach them? I’m 5’3 and I’m afraid if I move mine up that I will be standing on the counters all the time :)
I love this! I want to do this to a wall in my living room. Great job!
Painting between the boards sounds awful! I, too, am a messy painter, doing all that white washing would be even worse. I have basically your old cabinets in our new-to-us home, maybe a shade lighter. All the kitchen make-overs are like yours and painting the cabinets. My dear hubby refuses to consider it. My wall color is horrible, like band-aides, and I can’t figure out a good wall color to look good, any suggestions to make the best of the golden/light oak cabinets? Nice job. And Congrats on being debt free, liberating, isn’t it?!
WOW!! This is fabulous. I really love the blue cabinets too. Can you please let me know what brand and color that is? [email protected]
The color is Gray’s Harbor from Sherwin Williams. Here is a post I did about it and you can see it next to other blues… https://wildfireinteriors.com/2011/08/kitchen-colors-update/
Amazing!! That wall treatment looks just gorgeous, you’ve done a lovely job!
Looks great! You know my husband does the same thing when he doesn’t like something but doesn’t want to say it first…”Does it look the way you thought it would?” LOL!
When we remodeled our daughter’s bedroom we wanted whitewashed wood plank walls for our cottage. We were doing a complete bottom up tear down and remodel so had a contractor. One day we walked in and he not only had put the planks up vertically instead of horizontally, he had painted them bright white. I won’t even go over the scene that ensued. We left the planks vertical (a feature I dislike to this day) but sanded the paint off until it looked whitewashed. I guess that’s another way to white wash because it looks great. Another trick we used in our bedroom for a coffered plank ceiling was to paint the planks before putting them up. Then they just need to be touched up and there is no unpainted wood peeking through. Your project looks fantastic! Unfortunately those to-do lists never end. We’ve been in our cottage for 2 years now and we still have them! Great post.
Way to go! The wall looks awesome! I like that you write about all the trials and errors you go through before you finish a project… it sure makes me feel better about all of MY trials and errors!! Your kitchen looks soooooooo fantastic too.
This is just gorgeous! Our kitchen needs a major overhaul and you’ve really inspired me with how you’ve transformed your space.
your kitchen looks beautiful…
Wow! I just love how the white brightens up the room!! It looks amazing. I’m glad to see floors on your to-do list, because I was thinking that new floors would make such a worthwhile addition to the awesome job you’ve done so far!
You have created “instant” character with the wood planks. Great idea, and well, some things just take time. This looks to have been worth the investment.
Liz
Took my breath away, so crisp and clean….Well done!!
It seriously looks amazing! I adore those plank walls … and the full on paint versus whitewash was a good call!
:)
Linda
I just randomly stumbled upon your site, and O-M-G loving it! I am totally digging those plank walls, especially with the paint rather than whitewash ;)
Keep up the awesome projects!!
This is gorgeous! I love the white, and your curtains are amazing. I’m definitely going to pin this kitchen for inspiration. It looks so comfortable, but contemporary. Wonderful!
Ashley, it’s lovely! The white is so crisp and clean, and makes your rooms look huge! The plank walls are very cool, I would love one wall like that in my house. Maybe! Thanks again, for such a great post and fantastic instructions.
First time here! Love the kitchen transformation! Looks soooooo bright and fresh! A lot of hard work too; I know, we are remodeling our whole hosue too! Come visit if you can.
Thanks for the info on watering down paint and how it affects the natural wood. :)
Your walls are beautiful! What a complete transformation! Thanks for sharing.
GORGEOUSNESS. So impressed. I’ve totally been waiting for this post!! :)
What an awesome transformation! I love the white walls. My projects often change in the middle too. It’s part of the challenge and adventure of diy. You did great!
Have a lovely week!
Deborah
just visiting from my 1929 charmer, the white plank walls look amazing! i think you made the right decisions about paint vs. white washing it.
Could you please tell me where you got the curtains? They are perfect!!
Thank you.
it looks great!!! I think that painting was the right choice! I didnt love the idea of whitewashing them, but hello…this is not my house! Still, I love it now!
It so looks great and painting it was a great choice. Love the character and charm it adds. Wow, that was a whole lot of coats, and must of tried your patience, but it really did pay off. Thanks for sharing your inspiration with Sunday’s Best – you helped make the party a success!
GORGEOUS!!!! What a beautiful makeover on your kitchen and dining. Love the plank walls!
I love your kitchen. The white paint is so fresh and clean. I checked out your post about installing the planks and it looks relatively easy, especially since Home Depot will do so much of the cutting. What did you end up using to conceal the outer corners?
So pretty and I love the chalkboard mirror it looks perfect there.
Wow, Ashley, This kitchen looks fantastic. Thanks for filling us in about the white washing too.
Warmly, Michelle
PS- please send that hubby of yours right over – I’d like some wooden planks too! ;D
Ashley you are way beyond talented. I think your walls look gorgeous. You made the right choice in just painting them, too much wood tones with your countertops and you might have felt like you were living in a cabin in the woods. I love how this turned out and your walls don’t look like anything else I have seen around the internet. Thank you for sharing! -K
Gorgeous- I love wood plank walls. Our house has original grooved knotty pine in every room and what a difference it made when it was all painted. Sharing at the party tonight~ thanks for linking up at Feathered Nest Friday!
Gorgeous! I love how crisp and clean they look. They add so much character!
Tons of work but totally worth it- it looks amazing! Thanks for linking up! I will be featuring you on my Pity Party tomorrow. xo
Maybe I missed it, but I’m wondering what you used to only spend $150 to plank your walls? Can you email me what you did? It looks fabulous!
Thanks Beth! You didn’t miss it, that information is in a different post. Here is the link! https://wildfireinteriors.com/2012/08/how-to-make-a-plank-wall/
I love it!! We are contemplating planking the walls in our kitchen as well. What type of wood did you use for the planks? It looks fabulous!
Thanks Jen! We just used thin, cheap plywood ripped into 6 inch strips. There a better description in the post about it…https://wildfireinteriors.com/2012/08/how-to-make-a-plank-wall/
Where did you purchase your planks?
It’s cheap plywood from Home Depot ripped into six inch strips. Here a link to the post about it… https://wildfireinteriors.com/2012/08/how-to-make-a-plank-wall/
You’re doing such a great job. I’m curious, was there a purpose for keeping the planks a “comb’s space” apart, vs. butting them like the vertical joint? — was that just aesthetic, or is to to allow for breathing/swelling or what? Thanks.
We just did it for aesthetics. I wanted the vertical joints to be as invisible as possible.
Hi Ashley, I am inspired by your project and have talked Mark into planking our accent wall. What sheen paint did you use on them. Is it the same as the trim. Looks to be gloss from the pics. Awesome job!
I used an eggshell paint. The trim is the same paint….well, the trim on the corners and whatnot is the same but the trim around the windows and baseboard will be gloss. Good luck with your planking and feel free to shoot me an e-mail if you have any questions!
Sounds like quite the experience, Ashley, but the end result? GORGEOUS! And we do the same at our house. We embrace imperfection and call it “character”. ;) Thanks so much for sharing your great tips!
Thanks Roeshel! The word “character” and cover a multitude of DIY sins, can’t it? LOL…lot’s of character around here!
Oh my gosh, I’m in love with everything you have done. It is all soooo beautiful!! I am the same way when I look around my house, all I can see is everything I need to do -so funny! I love your blog!!
oh Ashley! it looks amazing! well worth all the hard work. I really want to plank some walls somewhere in my house but I’m thinking painted backerboard planks so they are easy to hang and don’t add much depth.
Hi Ashley,
I meant to comment on this earlier and tell you what an absolutely great job you guys did! I am so impressed. It’s also very economical, which is always a plus!
Cheers, Jan Elizabeth
Love this! Question: what is the color of your lower cabinets? That might just be the perfect color I’ve been looking for for our island!
They are Harbor Grey from Sherwin Williams. Or is it Grey’s Harbor? Either way it is a great color!
Thank you so much for your thorough tutorial! I’m about to do this project, and I was going to leave my walls tan behind the planks and also cut the wood so they sit behind the outlet covers, but you’ve changed my mind! And saved me a ton of time and headaches. Thank you thank you!
Yes, painting the wall first will be so much easier! We are planking my boys room this weekend and I learned my lesson the first time. Putting the planks behind the covers would look much better, so if you can figure out an easy way to do that then pass it along. If not, our way is nice and easy. When you are done feel free to e-mail me pictures or a link to your post about it, I am going to do a roundup of reader projects and would love to include yours!
You’ve both have impeccable taste and thanks for the inspiration!!!
Cannot wait to get started on our new home!
What paint finish did you use on walls? Was it a satin, semi gloss? Im about to do this to my ceiling and cant seem to find what sheen people are using.
I would like to create the plank walls in the living room and kitchen. Do you have a post showing how you created this nice look? Regards, Patrick
This looks so great! You have inspired many projects around my own home- from the raised cabinets to the planked walls. Thank you for allowing us into your house!
Hi Ashley, this looks great!! Now that it has been a while since you put the planks up, what has your experience been around the stove area? Any stains from cooking oil or splashes? Also, how do you keep the grooves clean around this area? I really want to do this in my kitchen too and wondering if this is something I should be concerned about. Thanks!
What color are you using for your white walls and cabinets. Is it a standard in the can white eggshell paint or is it a special color that you had mixed, like SW Alabaster or Origami White?
All the white in our house is Bistro White by Valspar.
Thank you!
Looks amazing! I have to ask, I’m sorry if I missed it somewhere, if you used the same paint color on the wall as you did on the cabinets- I’m wanting to do the same thing, and our planks are grey right now. I think they would look better white, like our cabinets, but am not sure if I should make a small contrast ?
Hey Kerri! Yes, we used the same paint color on both. Same paint, same sheen…makes it easy :)
This looks so beautiful! I want white plank walls after seeing this! Thanks so much for sharing, I just love these projects so much as they look so easy to do!
Looks amazing. I’m in the middle of quite a few projects, too. Our house is definitely in flux. Our biggest one right now is wainscoting the entire house. What color and brand of paint did you decide on and did you seal it as well? Also, I love your papered floors and I’m going to do a small, barely used, 1/2 bath floor. Thanks for the inspiration!
Hi,
Biggest question where did you buy the planking for the walls? We are looking for a board look alternative to sheetrock/ drywall for our new house. I like yours with the paint finish. I build furniture, did a lot of antique reproduction over the years. The original whitewash (lime wash) was water and lime, I’d suggest starting small. You can add pigment, just be careful.
Thanks,
Jim
The planks are just cheap thin plywood from Home Depot, cut into six-inch strips. We also did this treatment in our new house, but with real shiplap from the lumberyard – https://wildfireinteriors.com/shiplap-trim-brick-flooring-samples/