
DIY Faux Stone Wall (aka the best thing ever)
I’m not even going to mess around with a proper intro paragraph in this post, let’s just get to the good stuff. Behold…
Before –
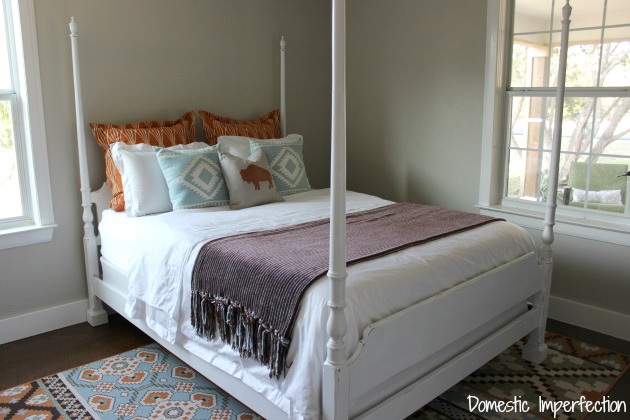
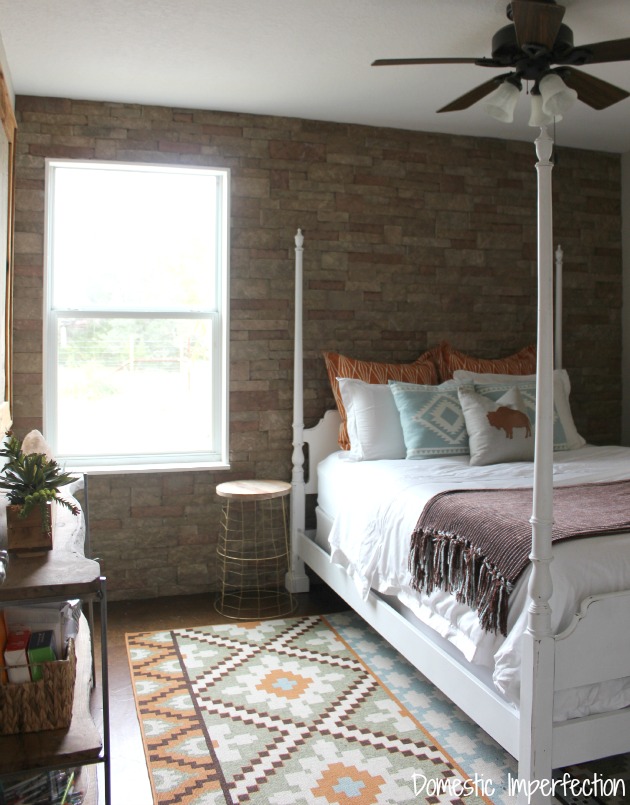
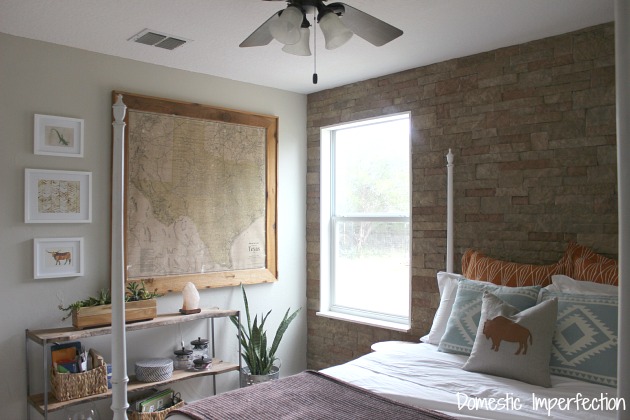
After –
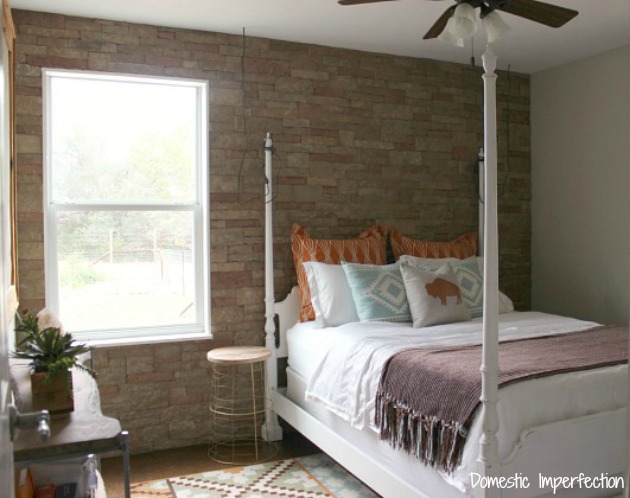

I love it SO MUCH.
Now that pictures are out of the way, let’s get to the story.
Since deciding to re-do the guest room I knew I wanted something interesting on the wall behind the bed. I didn’t want it to be colorful or bold, but rather very neutral. What I was after was TEXTURE. Big, beautiful, neutral texture. So my brain started going through all the things that I fit into that category….
Wood plank wall?
 Source – Bower Power
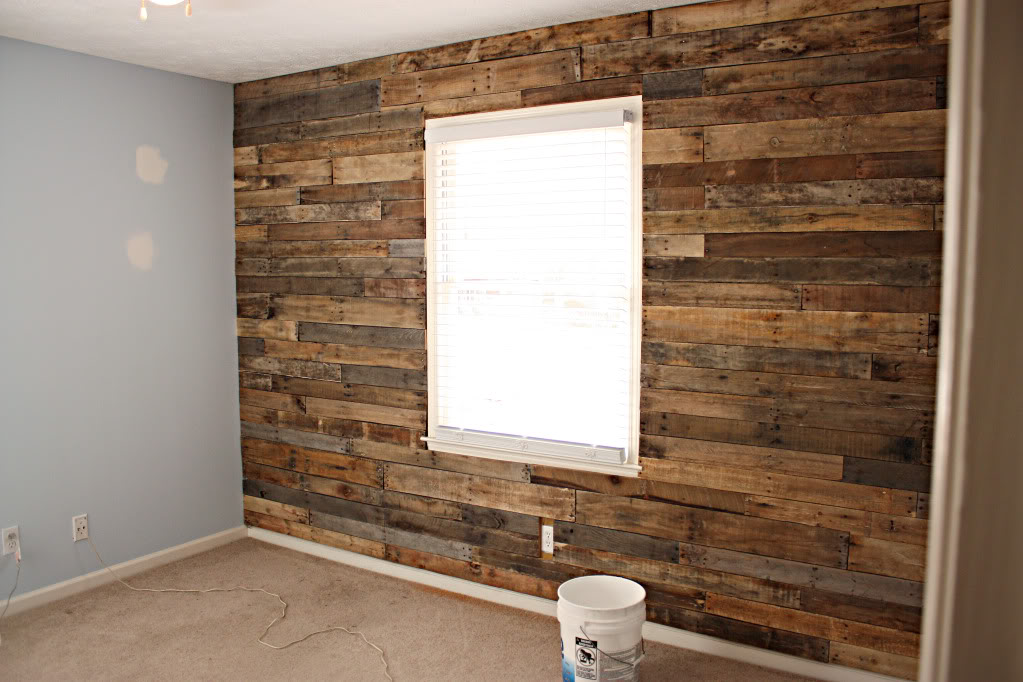
We’ve planked things before (here and here) before and it pretty easy, and would be cheap and fairly quick.
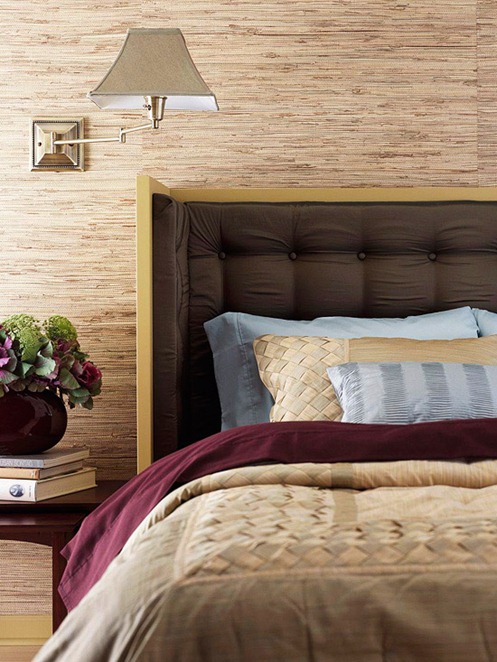
Grasscloth?
 Source – BHG
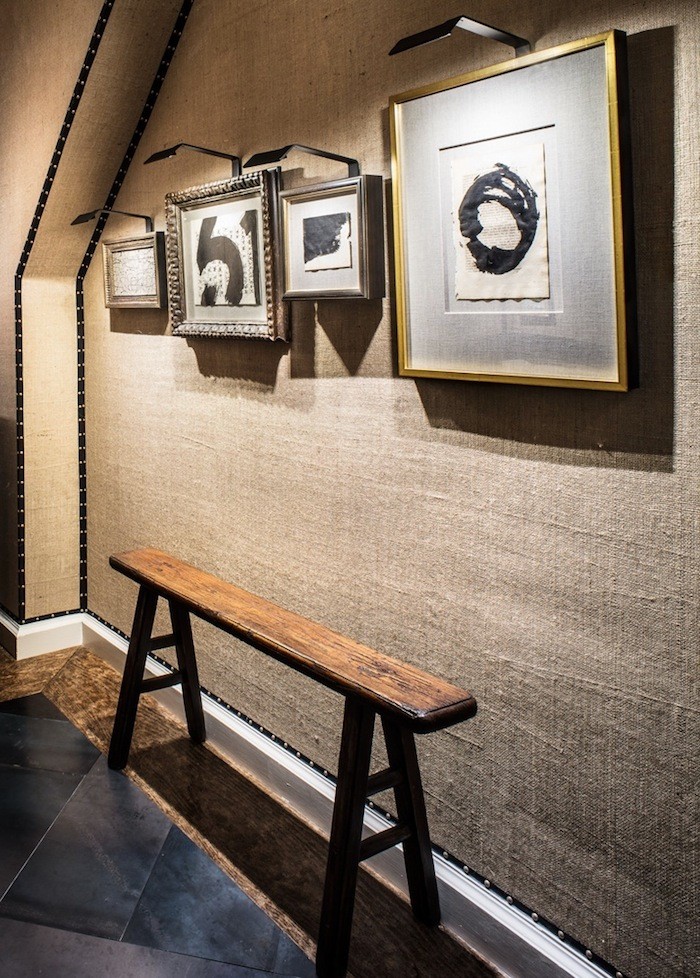
Burlap walls? (aka the poor mans grasscloth)
 Source – Remodelista
Then I remembered something I pinned a while ago….a brick wall.
 Source – The DIY Network
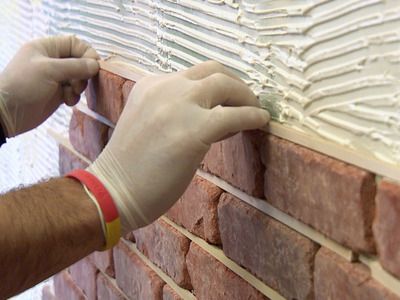
A brick wall would look awesome, and evidently you can buy thin bricks meant just for this sort of project. So I got to googling to see where I could buy some. I wasn’t having much luck, but somewhere in my internet wanderings I came across a product called AirStone. It was similar to the brick idea and basically the same shape, but it was meant to look like stone.
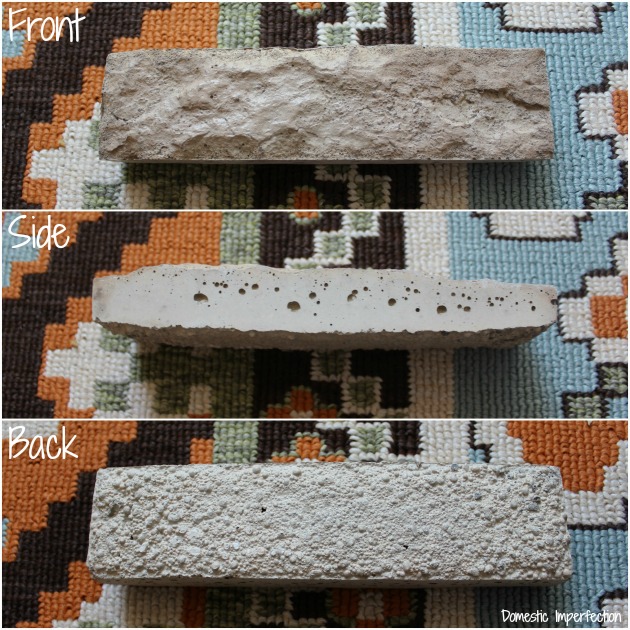
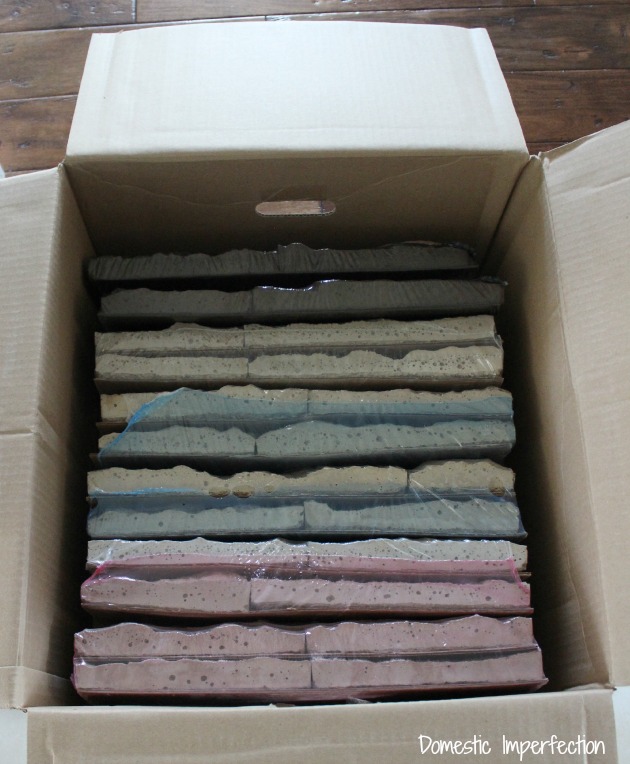
It was perfect, and before I knew it this was sitting in my driveway.

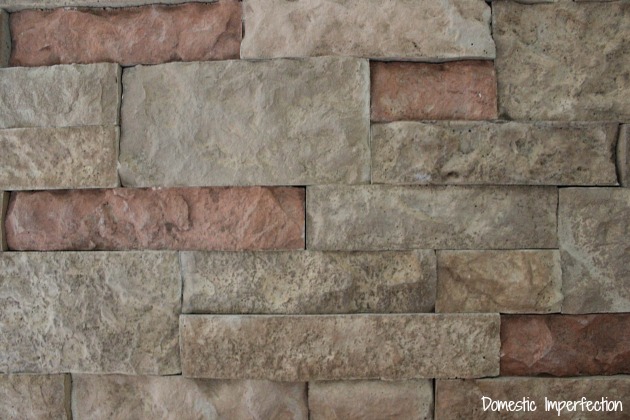
Now for some reason I had it in my head that AirStone was made of a dense foam. I don’t know where I got that from, but as soon as an 18 wheeler pulled up to my house and a sweaty, struggling delivery man tried to pull it up my driveway with a dolly I knew it couldn’t be foam. They are more like concrete…really light concrete. Here is what it looks like up close…
I was super excited to get started on this project, so I ripped open the boxes and got right to work.
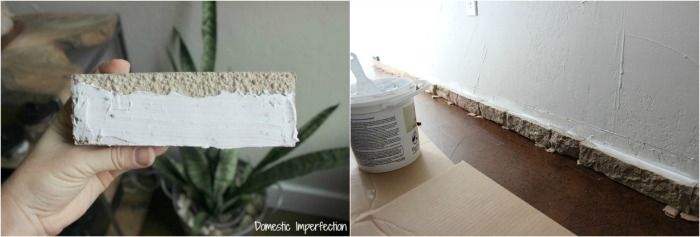
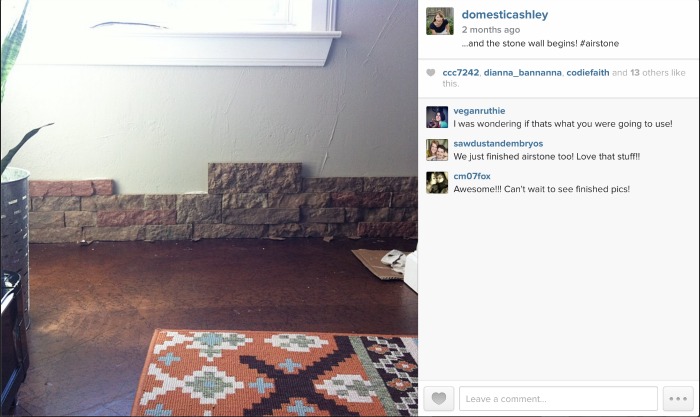
I started by ripping off the baseboard…I thought about leaving it, but ultimately decided that the wall would look more authentic without it. The first row took forever since I had to use the level and cardboard shims to make it even, but after that it was pretty straightforward. You just use a smear on a bit of the AirStone adhesive, and press it into place.
AirStone has a few different color blends (which you can see HERE), this one is the Vineyard Blend. I really like it, and since it doesn’t have the color variation of the other blends I could just slap stones without worrying that the colors were dispensed evenly.
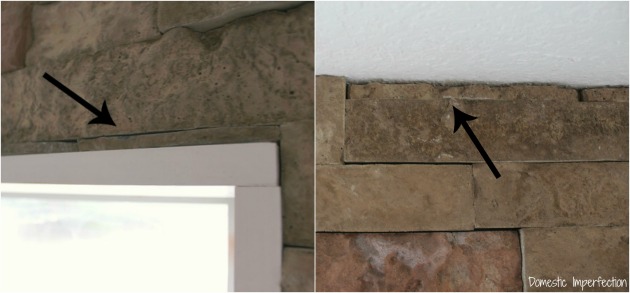
When I got to the window I wasn’t sure what to do, since all I had were the flat edge stones and they stuck out further than the window trim. Airstone makes live edge and corner pieces for stuff like this, but since we didn’t have any Adam and I decided to rip out and replace the trim with something that would be easier to work around.
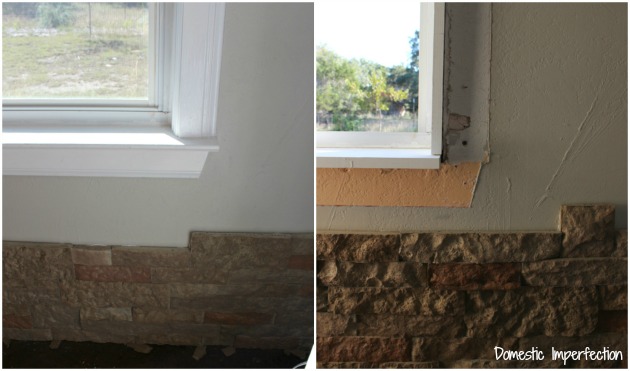
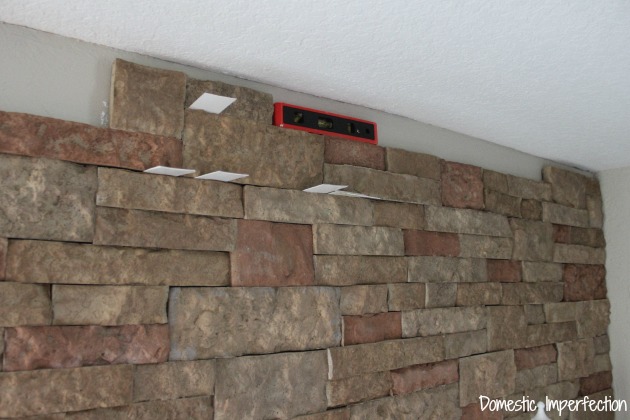
The hardest part of the project was cutting the stones lengthwise when I got to the top of the wall and around the window. To add insult to injury the ceiling is kinda slightly wavy (just like most builder-grade homes), so each and every cut was different. At this point my 7-month pregnant body was over this project.
Overall this was a very easy process and anyone can do it. That being said, it was a bit tedious. At one point I started having flashbacks to stenciling my master bathroom. If you follow me on Instagram you probably noticed my excitement level tapering off as the project progressed….
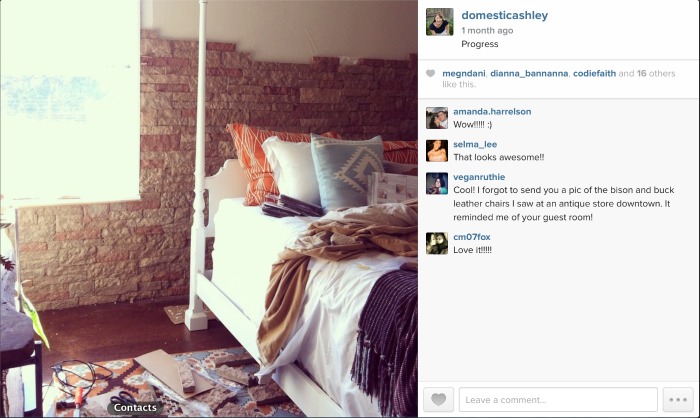
The end is totally worth the means though, the rock wall makes the room.
Helpful hints:
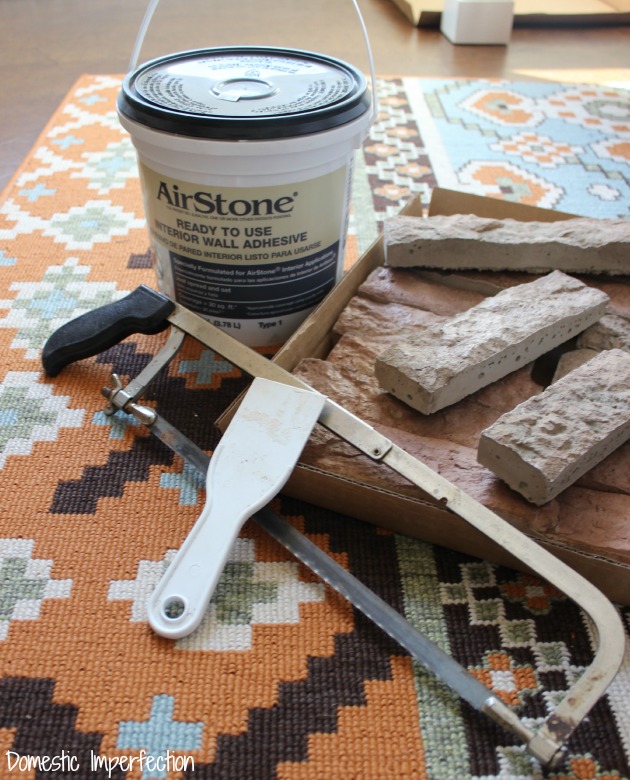
According to AirStone the only tools you’ll need are a hacksaw for cutting and a putty knife for smearing the adhesive. While that’s 100% true, I found that these additional tools were really, really helpful.
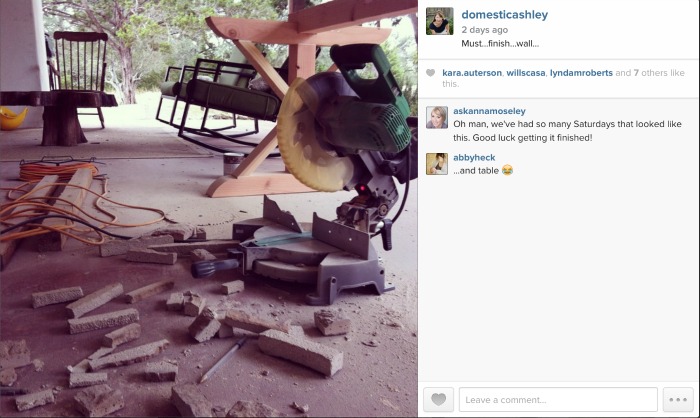
1. Chop saw
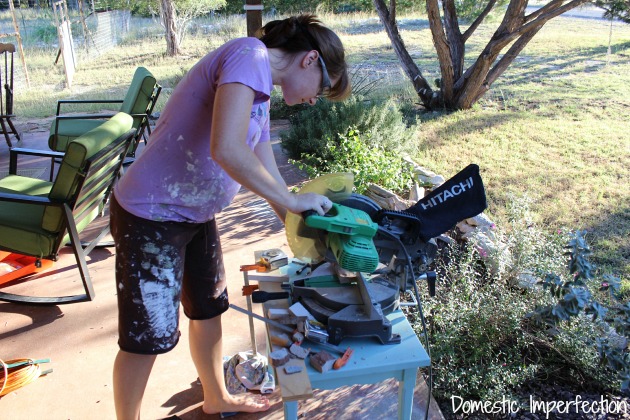
(I know, I know, barefoot and pregnant….)
You can cut the stones with a hacksaw, but it’s not fun or quick. A chop saw makes it SO much faster.
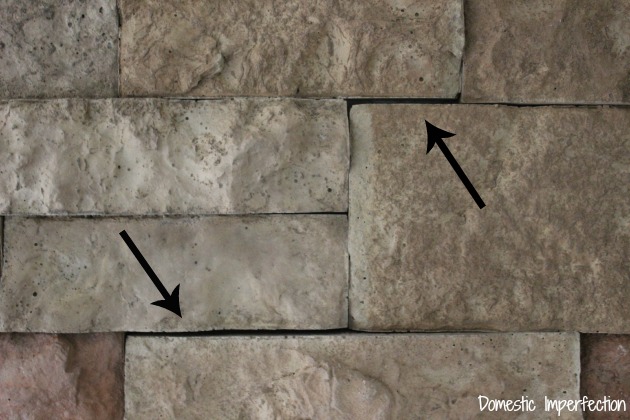
2. A chisel – sometimes I found that the stones weren’t 100% the same height. When this happens you can just keep on adding stones, but it will result in either a gap when you add the next layer, or wavy lines of stone. So when it was bad enough I would chisel off some of the extra height. Tedious, yes, but didn’t happen all that often.
3. A level – gotta keep those suckers straight. (Also, I finally found a use for all my extra business cards.)
Overall I used ten boxes and three tubs of adhesive to complete the wall, which is 11.5 ft wide and 8 feet tall. Also, AirStone is only sold at Lowes (not Home Depot).
Let’s take a look at a couple more pictures, shall we?
Southwestern Bedroom Sources + Links
Items used
- Southwestern indoor/outdoor rug
- Airstone
- Pendant light (similar)
- Curtains
- Blue and white pillow (similar)
- Sunburst mirror (similar)
Paint Colors
- Walls – Sculptors Clay Behr PPU5-8
- Trim – Pure White SW7005
Shop the Look

*I didn’t receive monetary compensation for this post, but AirStone did send me the stone free of charge. All opinions are 100% my own, always.
DIY, you are such an inspirational genius! I have a problem wall in my kitchen that I have been worrying about for years. And then, I get your post, and Presto! Problem solved! And, I love, love, love, what you did with the window! Fabulous! Thanks so much for sharing all your triumphs and tragedies with the rest of us!
So glad I was able to help!
Wow, that looks amazing! So very cool. And look at you, climbing ladders and all!
You make me want to do this to the wall behind our bed. However we rent our place, so maybe not…
Do you know how much the stone would have cost?
I hope you had a great Christmas!
Thanks Jan, hope you had a wonderful Christmas as well! Ours was great, though the kids and I have been sick for nearly the last two weeks. Not sick, but we’ve have cedar fever and it’s miserable. But still, great Christmas :)
As for the AirStone, it’s $50 a box, so this is a $500 wall. It would have been a splurge for sure.
Also, I just got my annual report from Jetpack (a plug-in that keeps track of my stats) and it says I posted 58 blog posts in 2014, and you were my top commenter with 60 comments! Thank you for being my biggest cheerleader, it really means the world to me. Here is a link to the report in case you are interested – http://jetpack.me/annual-report/33825457/2014/
Oh wow, cool! Well it’s definitely my pleasure to be your top commenter! :) The funny thing is, I don’t think I commented on your most commented post. I actually went and measured my house because I had no idea, and it took me so long, as all I could find was the yardstick(!), that I don’t think I got back to actually say anything, lol. Also, how amazing to see the places all over the world that your blog has reached. 215 countries, wow!
Happy new year to you and yours, Ashley! May 2015 bring abundant blessings to you. :)
And ps, cedar fever sounds frustrating (I just looked it up.) I hate junipers and get a rash if I brush past them a bunch. Hope you feel better soon!
Wow, that turned out great. Watch out cause you’re going to have people wanting to cone and stay! That’s a great room (Hey, can you come over to my house …?)
Very cool look! And that map in your bedroom is fantastic! I’ve been thinking of doing something similar in my master bath with some sort of stone so I will definitely check them out!
Wow that wall looks great! I would like to try this in my spare bedroom. The wall I would be covering doesn’t have windows so even I could do that!
Happy New Year!
This room looks great! I truly enjoy reading all of your posts. With that being said this is an expensive product for those of us who are true cheap diy’ers!! I looked into the air stone before because I love, love, love the look. I sadly decided I just couldn’t afford it for my space. I saw that you were provided this product for free but I wonder how much a walk like this does cost? Also… now that you have put in the labor to make that fantastic wall and add that to the typical cost of the product was it something you would have completed yourself…..if you had had to pay for the product yourself out of pocket. Again love your work! It has been very inspirational for many of the rooms in my own home :)
Thanks Jessica! You’re right, AirStone is on the expensive side. It runs $50 a box and I used 10, so it’s a $500 wall (plus $45 in adhesive.) If you are truly a cheap DIYer I think this is a great product to use on the small scale, like a backsplash, wall behind the toilet, a fireplace, a kitchen island….it would make a big impact for relatively little money. But for a whole wall…definitely a splurge. Maybe not for some people, but for us (and you) it is. If AirStone hadn’t been offered me the product in exchange for a project post, then the cost simply wouldn’t have been in our budget and we probably would have would up with a rustic wood planked wall.
This is downright flat out wonderful! I love it and you two obviously can do anything you set your mind to. This look is timeless so you will probably never tire of it and if you ever sell, it’s a bonus! I’m so envious :)
Love it! Stone or brick adds such warmth to any room. I’m planning on some quite real looking brick wallpaper for my kitchen chimney area and a backsplash. My daughter just did two walls in her old house ( got it for $3. a roll at Habitat – $36. a roll at Home Depot!) and it looks fantastic! This is a cheaper alternative for those of us who can’t afford the real thing or you can also buy faux brick paneling.
All the best in 2015! You have an exciting year ahead of you!
Looks fantastic! How do you think it’ll bee to clean? Like dust and stuff? Would you just have to vacuum it?
I’m not really sure about cleaning…it’s kinda “snaggy”, so running a vacuum over it once a year or so might actually be easiest.
What a terrific job! It looks great! The texture both visually and physically is a nice touch. (pardon the pun!)
You’re my hero! That wall looks amazing and I’m so impressed you did it 99% by yourself!
I’m in love. This room is amazing. All of it. I can’t wait to actually copy some of this when we get a house. But those tomato cage tables might happen in my guest room soon(ish).
OMG – this looks awesome! I am seriously trying to think of which wall I want to try this on. I LOVE it. You always have the coolest projects. :)
Beautifulroom, Ashley! The wall looks fab, I just love the color combo with the blue and Terra Cotta.
We have a huge wall of diagonal wood paneling in our living room that we want to replace (buh-bye 1970s!) and this would be SO perfect! That wall is just gorgeous!!
That came out amazing!
Your style is so fun and unique! Found you through link party palooza!
http://www.tidbits-cami.com/
Great article. I am closing on a house in a couple of weeks and have been remodeling the home in my mind since I first saw it. I love this idea and your article was well written and a blast to read. Thanks for sharing
Gives a another idea …
The north wall in our bedroom would be a no-brainer as it has no windows and would look great with this kind of texture.
At the same time, I wonder if I could frame out a box over the wall, say 6″ deep, and fill that with insulation?? Now I have a much warmer, much better looking wall come the dead of winter. The the stone look would camouflage what I have done with the boxing.
Interesting …
I used Air stone around my fireplace, it was easy to install and the finished product is amazing. Your room looks great, this really is an amazing product.
This wall looks great! I’m thinking of doing a wall like this in our house, but I’m curious, how did you hang the mirror on it (from your finished room pics)?
I just hung it on a nail that I put in one of the cracks. The wall isn’t perfect so there were plenty to choose from!
Adding up some cool design on your house like these really pops out and adds some more value to the house.
Where can you find the vineyard blend air stone I bought about 5 boxes to do behind my fireplace and I didn’t have enough and now I can find that color anywhere
I e-mailed my contact at Airstone and she said that the Vineyard blend has been discontinued. She said they hope to bring it back one day, but that there currently isn’t anything in the works. I’m sorry, that completely sucks.
Your wall looks fantastic! I think it’s great that you used a stone brick look, and it’s interesting that the “stone” is actually light concrete. I don’t blame you at all for getting sick of cutting it. What did you cut it with, anyway? Thanks for sharing!
What kind of blade did you use with the miter saw?
Just completed the job with their stone but we noticed that it smells really bad. Did you have the same experience after completing your project? Kind of smells like dead fish.
I have the same issue!! I’m glad to hear I’m not the only one that smells something off! I thought I was going crazy…
Did the smell ever go away?? Please tell me it did. We’ve had ours up for about 2 months and it still smells.
Love it! Thank you for sharing.
Oh my gosh, that was CRACKING me up! And I love the end result!!!
This looks amazing!! I might have to give airstone a tryn
Looks great but I’m looking for outside walls….Non structural, Right now there is old brick ,..or decorative stone..I can remove that ,but need faux stone ,, What ya got..
Looks great! But i’m trying to take on a project with this product but it just doesn’t seem cost effective. Each box is about $60 and around $16 for adhesive. So did you complete 1 wall for about $650?
An 80.00 wall?
Na.
Very nice! I know this is a while ago, and I am very interested in giving our living room a long overdue revamp! I am 14 weeks pregnant and I was wondering if the AirStone adhesive is safe for use while pregnant?
I just love the results! Amazing!!
If you already have textured walls do you need to sand them down before placing the airstone with adhesive on these walls or can you just place them on the texture wall?