
Guest Room Paper Flooring (and why I’m disappointed with it)
This summer I started redoing my guest room, and the first step was new flooring. I wanted to do paper bag floors, mostly because they’re cheap and beautiful, but also because I wanted the flooring to match in my boy’s room and the guest room (they’re right next to each other).
CLICK HERE TO READ MY ORIGINAL POST ABOUT INSTALLING PAPER BAG FLOORS
(If you aren’t familiar with paper bag flooring process then please read the original tutorial first. Links to the follow-up posts can be found at the bottom of that post.)
So, let’s start at the beginning.
I wanted this floor to match my boys floor exactly, so I used the same brown paper, same stain, and same technique. The only thing I changed was the sealer I put on top.
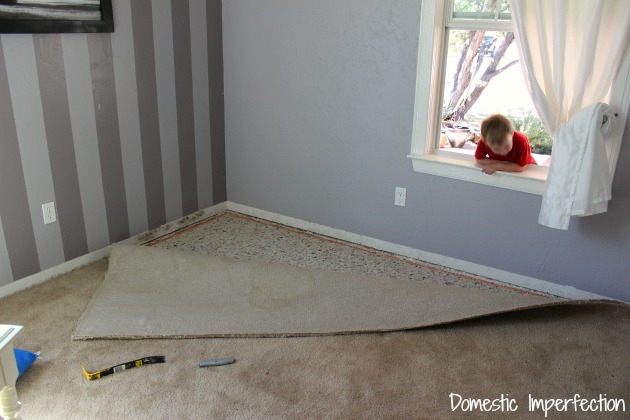
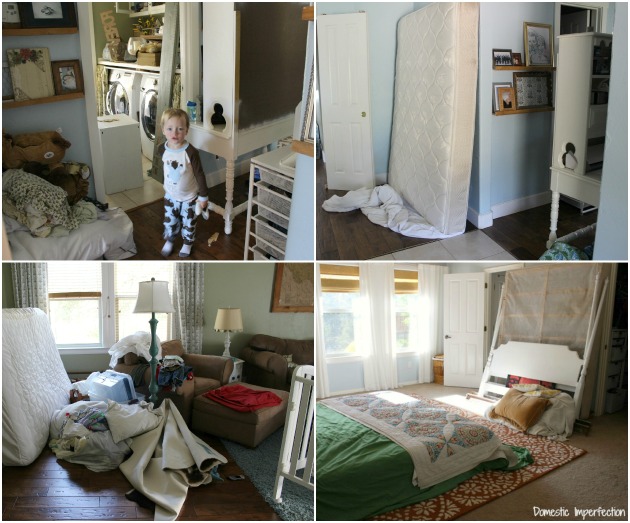
First, we ripped out the old carpet, filled the holes, and ripped and wrinkled the paper, cleaned the floor…all the prep work.
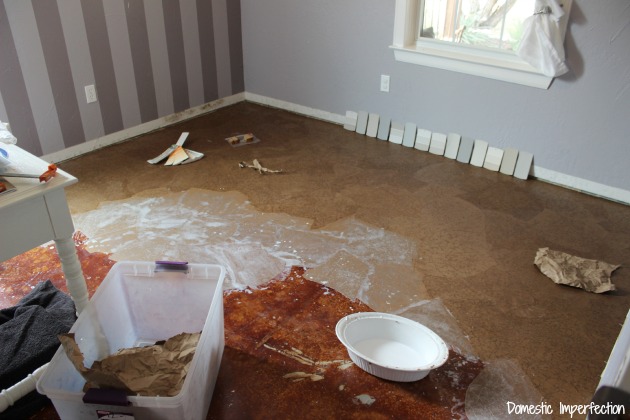
Then I started glueing. I used a 50/50 mix of Elmers glue and water and worked with my bare hands, dunking the paper in the mixture and smoothing it out on the floor.
After I finished and everything dried for a day, I stained. I used oil based Minwax stain in Provincial, mopping it on with a deck pad.
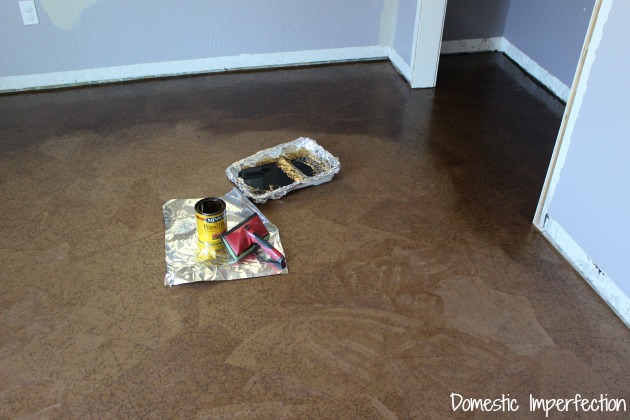
I let that dry for a day or so, then went ahead and sealed it. Here is where it gets interesting.
When I did my paper bag experiments this summer I had a clear winner when it came to sealers…Bona Traffic, hands down. It was bulletproof on my test board and I was excited to get it on my floor. I sealed the boy’s room with water based poly for floors a couple of years ago, and although it was holding up okay it definitely wasn’t doing great (you can read that update post HERE). I planned to reseal the boy’s room with the Bona Traffic as well.
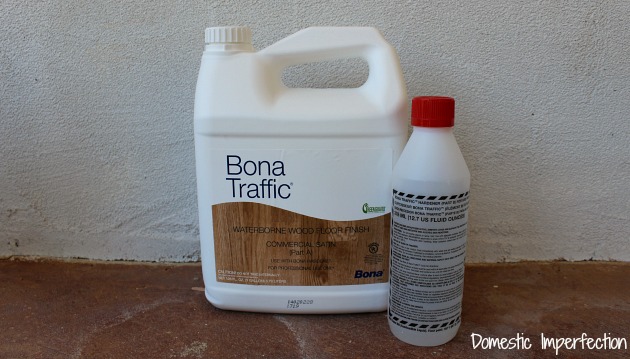
The Bona traffic is a two-part sealer, it has the sealer and a bottle of hardener you mix in. When I was ready to get started sealing I went ahead and poured the entire bottle of hardener into the sealer and got to work. After I finished the first coat I started reading the back of the container while waiting for it to dry. Right there, on the back, in tiny letters it clearly said “The finish/hardener mixture must be used within 4 hours after it is mixed. Product properties are diminished after 4 hours.” OH SNAP (not the actual phrase that came to mind at that moment, but we’ll use it here). I had read that part before while doing experiments…how did I forget? There is no way I could use that whole bottle in four hours…that didn’t leave it nearly enough drying time between coats.
Luckily it was a Saturday morning when this happened and Adam was home. I told him my predicament and explained that we had to empty out the boy’s room RIGHT NOW so I could prep and seal it before my expensive sealer was rendered useless. He sighed, shook his head, mumbled something about “only you..”, and we quickly destroyed our house.
The first coat of Traffic sealer I applied to the guest room floor actually dried really quickly (in like 30 minutes) so I added another coat while prepping the boys floor.
Do you remember how I had that corner in the boy’s room where the sealer was flaking up? I never did figure out what was causing it. Anyway, scraped it up as best I could (and tried to pull it up with tape – fail) before adding more sealer on top.
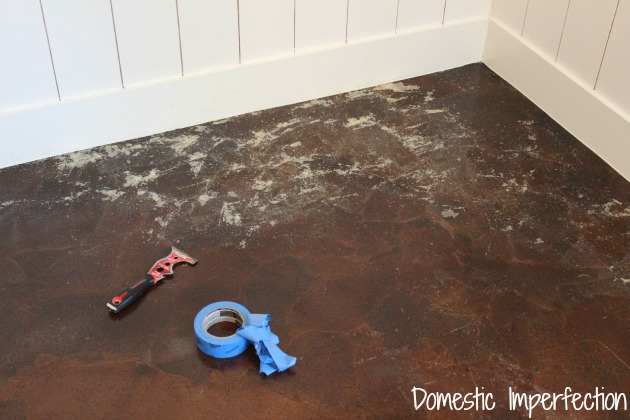
My hope was that when I added the new sealer would kinda melt into the old and you wouldn’t be able to tell that was a problem area (spoiler – that didn’t happen).
Anyway, I went back and forth sealing both rooms in 30 minute intervals. The boy’s room received two coats (over the previous twelve of the original sealer) and the guest room received four.
Here is that problem area when the new sealer dried…it doesn’t look great.
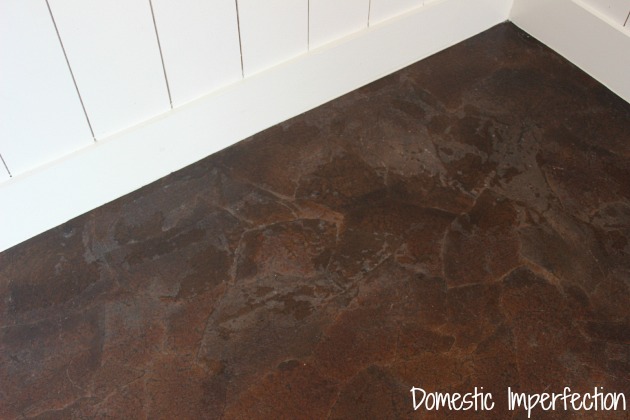
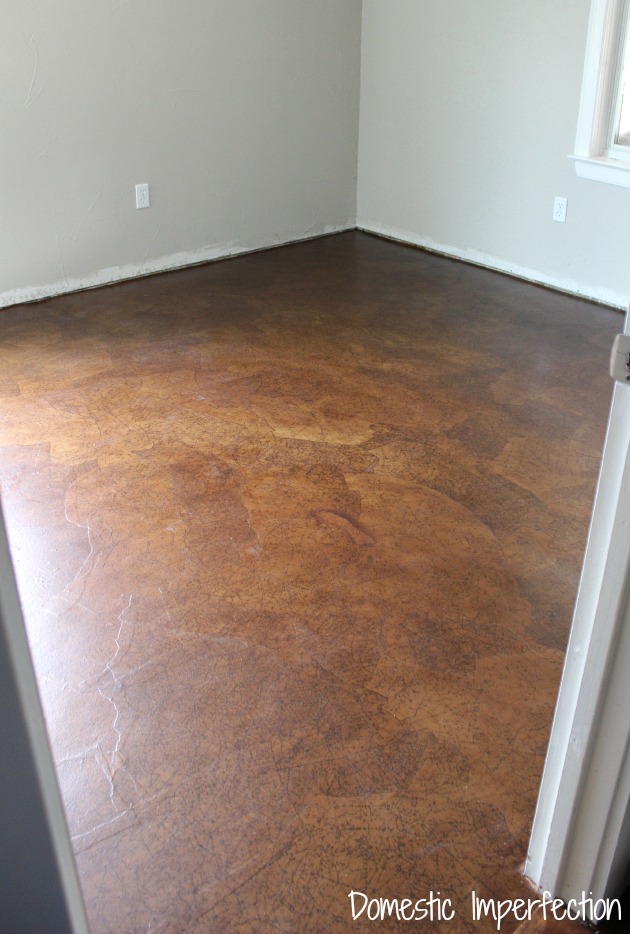
Luckily the bed goes in that corner and we’ll never see it. The rest of the room looked amazing…
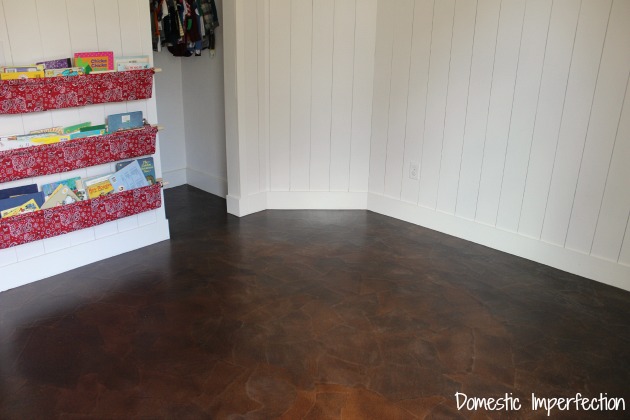
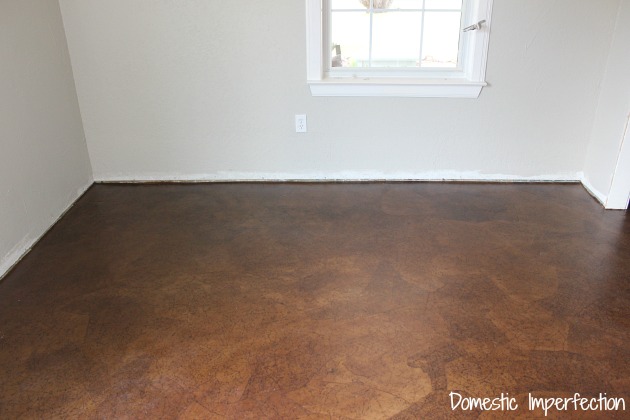
And here’s what the guest room floor looked like…

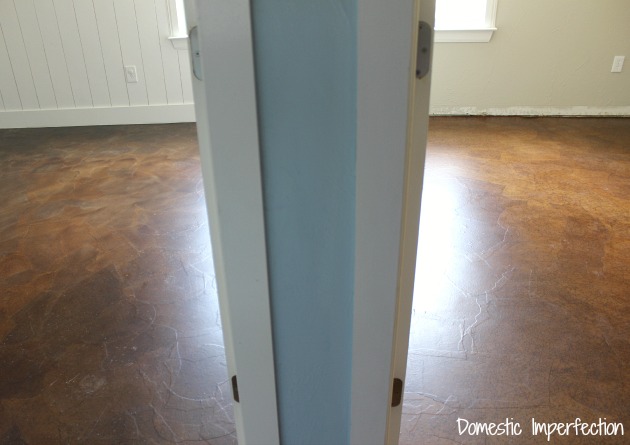
And both of them side by side…
I let the rooms cure for nearly a week before putting all the furniture back in, which I felt was more than enough time.
Since then (this was about six months ago) is when I have become pretty frustrated with the floors. The Bona Traffic is not holding up like I had hoped. It doesn’t scratch and flake up like the previous sealer, but instead it blisters. 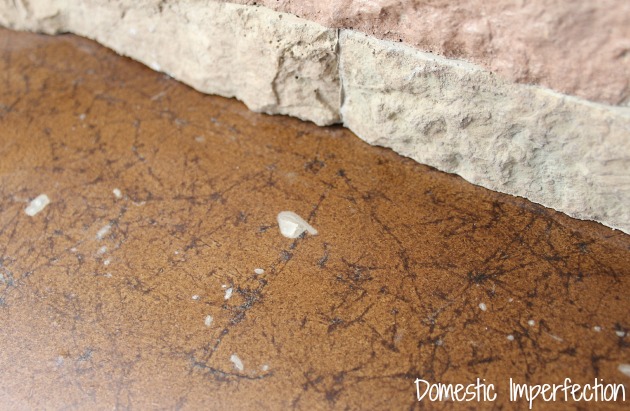
When I tested this sealer it was bulletproof, I’m not even exaggerating. I dug at it with a fork and you could barely tell. I was sure I would be able to abuse my floors with no consequences…but thats not the case at all. I think the difference is that for my experiments I waited about 24 hours between coats of sealer, and with this I obviously rushed it and added four coats in about three hours. It’s likely that it never cured properly. Or maybe putting this on a concrete floor vs. a wood floor is what makes the difference (though I doubt it). I don’t really know, all I know is that I have delicate floors and they frustrate me. I still think the Bona is a great sealer, and if your going to use it just DONT RUSH.
Both floors still look great if you stand back a bit, and if the sealer blisters up I can just cut it out and add more sealer. It’s not the end of the world, I’m just done messing with them. I wish we could have extended the wood flooring into the bedrooms when we did our living room and hallway a few years ago, but we simply couldn’t afford to at the time. I’m not going to replace the paper flooring when we sell no mater how it looks, we’ll just offer a carpeting allowance for any buyers that side-eye the paper bag flooring.
I know this paper bag floor thing can be done and be tough (I’ve had people e-mail me and say they’ve had it in their house for ten or twenty years and it looks great). I haven’t mastered it yet though….and honestly, I never will. I won’t ever paper a floor again.
Anyway, after all the paper bag experiments this summer I thought an update was needed. I wish it was a better one!
I think they look great. I would guess the moisture in the concrete would impact the sealant too.
First, let me say how much I enjoy your posts. So inspiring. Second, we used the same stuff on our hardwood and it too blistered. The manufacturer insisted it was because the surface we put it on (stained) was not completely dry. We had waited 14 days after staining, even longer than the recommended time. So we started all over. The second time around, it worked much better and seems to be ok. This stuff is finicky. Maybe a light sanding would help?? Good luck!
I agree with the sanding! I bet if you did a light sanding over the entire flooring and vacuumed really good between each layer of epoxy your results may have been different. Maybe if not I between each layer of epoxy, just before the final coat of epoxy.
We too, have sanded between coats of poly. Worked out great. I do definatly agree that this project- if you choose to attempt- is not one to rush. 4 years in and lots of traffic…still lookin good…..
Hi! Sorry your floors didn’t turn out as you would have liked! I still think they look pretty good. I hope you are doing well!
Aww, sorry to hear that. After all your tons and tons of hard work. :(
They look great Ashley, new and shiny! Where are you getting all this energy from?? You’re making me tired just reading about it and I have no excuse…other than getting older, lol! Thanks for experimenting for us.
Hmm… Blistering does sound a little like something is happening under the paper. It sounds like you have a an issue with the base. They really look very cool and I hope you don’t have any more issues with them!
Sorry to see the blistering that is happening. You put a lot of time and energy into the floors but I think they still look pretty good. Mot sure how they look IRL but on my screen they remind me of wood floors.
As one who has lived on concrete floors for a number of years, and had many fails of remodeling floors, concrete DOES make a difference. It not only absorbs the heat and cold of the ground, but it absorbs moisture as well. We learned to lay down a moisture barrier between the concrete and whatever we were putting over it. End of problems.
It does add expense, as we’re not talking ordinary wood, but a special type of wood (from hardware store). But it was worth it in the end, as the flooring finally stopped buckling and breaking and doing other not so fun things over a short period of time.
Yup, that concrete is porous, and moisture travels through it, albeit slowly. (Former architect here.) You may not have a vapor barrier (like 6 mil Visqueen) under your concrete slab. (Even if you did, if the house is fairly new, the concrete takes a long time to cure – houses off-gas all sorts of chemicals including water for a surprisingly long time.)
Good on you for a great experiment, and an interesting technique. The only way we know anything at all about building is by failing – at real scale and expense. (For a fun read, try “How Buildings Fail”.)
The floors look very nice from the pictures. You are a very energenic and talented woman!
I have never done this technique, but I did notice you used an oil based stain with a water based finish. You should use compatible products–oil stain with oil based fiinish, water based stain with water based finish. The only exception–an oil based finish can go over a water based stain. I have used the latter sucessfully.
If you read her blog on the sealers, you will see why she chose a oil based stain with a water based finish.
@ Christine – An oil based stain with a water based poly sealer is very common in wood floor installations and works perfectly. However, an oil based poly can never be applied over a water based stain.
It’s the drying time! I used it on the floors and waited, as per instructions, between curing the coats. It’s been a year and the floors look fab. Then, I used it on a wooden table. Rushed between the coats (it’s a table, not the floors, right?) Wrong. it bubbled up. I called the customer service, the old fashion way, to complain and rather quickly was explained that there is a reason why instructions say to wait ;-) Lesson learned the hard way…
I did this method on our classroom floor about a year ago. I actually followed the first paperboy tutorial to a T, but alas… paper is not meant for floors. Read my story and check out our pictures a year after install.
http://onblissstreet.blogspot.com
i only do 3 coats, i find that if you do 21 coast its actually too thick and scratches heaps easier.
we have no issues with durability or scratching, with 5 kids and animals we have it in all the main areas with no issues.
21 coats is crazy
Thanks Ashley for sharing the article. I think the idea of paper flooring is not bad and it makes the floor looks beautiful and also cost effective.
Love your floors and sorry they aren’t working out. I know how frustrating that is. As someone who grew up in a family with a floor care business, I’d definitely say the blisters are caused from moisture. I’ve seen many sealers do this over the years due to moisture and even from cleaning a floor with water. Concrete sucks up moisture from the air and the soil underneath continuously. Also as someone pointed out, never mix oil and latex as that can also cause cracking, blistering, peeling effects and problems.
Did your Minwax stain have a sealant in it? If so, it will probably react with any other sealant that you put on top of it….
So sorry your sealer gave you issues. I did paper bag floors to my play room and other than some of the nails from the subfloor poking up a little they turned out great. I did go through and re-seal again but 2 years later they still look great.
What poly did you use?
I used the Bona Traffic for this room.
Ashley I followed your suggestions and I have completed my 1176 sw ftbasement and I love it. Can I post some pictures to show everyone or send them to you to post?
I know you said you’ll never do paper flooring again but, if you could go back in time, would you do this project again? Would you use the Bona Traffic, given your problems, or one of the other sealers? Thanks!
When I do my paper floors I use the poly to “glue” the paper down and let it dry really well. Then I put 3-4 coats of poly over that. I don’t have any of the White looking problem you had. I think it has to do with the glue becoming wet and turning back white. AND using the poly as the glue gives extra hardness to the finish… I just dip my paper pieces in a container of poly instead of glue and proceed…. I hope this helps. And when I get a scratch I just add another coat of poly to that area. If the paper does happen to get torn, just glue it down again with some poly… add another piece of poly dipped paper to repair if, let dry and add a few coats of poly. These floors are so forgivable… you can mess them up and they don’t look messed up…. The imperfections add character to them.
I would do mine again… I love them. All I use is polyurethane… it is my glue, my top coats and my sealer… easy peasy
I thought my mother was nuts when she papered the floor in our living room with the brown bags from the store, but the end result was fabulous. Paper and poly was all she used and I believe that floor was still intact until the house burned down. I have been thinking about doing my kitchen & pantry.
One more comment… sorry….. I did not use a stain… I just let the polyurethane do it all. My floors looked great without the stain.
Me again… sorry. I used water based polyurethane only.
Margie, do you have your floor online somewhere to see? How long has it been? I agree your method sounds best, but would like to see the final color. Do you mix a little at a time of your Poly? Or does the water kind need mixing? Thanks, S:)
Margie, did you do any floors over concrete? Would you mind to post which brand of poly and what kind of paper you use? Thanks!
Thanks so much for the honest update. Many bloggers don’t do that and people go and ruin their houses in the sake of DIY.
Thanks for telling how it did and did not work. I am still going to try it. My upstairs hallway is not hardwood and I do not want to have to buy wood. Saw this in your blog one day and saved it. well we’ll see. Thinking of doing it over the winter.
Did you still use the same method to apply the Bona Traffic?
Yes, same as I did with the regular poly…just give it plenty of time between coats. Don’t rush it.
It’s from moisture underneath; that is what causes sealers to blister. It’s actually not an issue with the sealer. Always apply when no chance of humidity but even if you do that, if you have moisture in your slab the sealer traps it. It can also be if you apply sealer too soon after applying the bags as they have moisture in them and there is no where for that moisture to go. Blisters are always caused by trapped gas/moisture below the surface rather than within the sealer.
Do you think this could be done on walls? think this would be awesome in an office.
Yes, absolutely! It would actually be much easier (and hold up better) on walls.
That is a great idea.
My floors are incredible. They have no blistering or problems with scratching. I love them. Here are the products I used:
The beginning floor was asbestos tile. I skim coated with webcrete 95, mixing it with 0ne part weldbond to five parts water.
I dunked my contractors paper into a bucket of the weldbond mixture (one to five parts water). I scrunched up the paper in the bucket- no need to wrinkle paper first. I let the paper dry over night. I used Bona quick-dri stain and let it dry over night. This stain doe not stay tacky-very nice. Then for next three days after that one coat of bona mega each day. I used the mega “booster” with the last coat on the heavy traffic areas. I used this method throughout my entire house. It has been a year and my floors are still beautiful.
can you do this over a old vintl tile for in my den after removing the carpet
You can, but you will want to lightly sand it first so that the the glue adheres properly. Also, when you’re finished you will be able to clearly see the lines in the tile through the paper flooring.
Don’t sand if it’s asbestos tile, not safe. Best to do a skim coat as I described above. The lines of the tile won’t show through then.
Yes I have a problem my staircase is narrow and it goes from bottom up to the upstairs it’s not very wide I am and I was wondering if it would be good to use the wall are the paper bag method on the floor because right now it’s just bare-bones , so I was wondering if the paper bag method would work on the top part of the stair case and I’m looking for not a affordable way to redo my stairs there’s not many there’s like 10 or 12 please help if you can
did the paper bag style on many walls and had over 200 people stop and watch, as we did walls in our gift shop, and ask if we would do their homes. We used brown lunch bags and once wrinkled left over night before using wallpaper paste to apply. In one home I just dry brushed it lightly with gold and people insisted it was real suede
I did the paper flooring technique in my bedroom based off your original post using those products. I felt like I couldn’t get a consistent finish on the poly no matter how many coats I used. Some parts always looked more matte and others more glossy. I also had one corner the pulled up when it all cured. Obviously I didn’t have quite enough glue. But I put a rug in the center and then my bed so no one sees the inperfections but me ;) I LOVED this economical flooring solution and I really appreciate all the hard work and research you have put into this!! Thank you so much!!
Under our carpet is subflooring.. Can I lay it directly onto that? Awesome idea by the way!!
Subflooring, like plywood? Yes, you can absolutely paper over wood, it should actually work better than over concrete. Just make sure to fill and sand all the joints in the plywood before papering, or else the seams will show after you are finished.
I am not sure why this bothers me so much that you call this paper bag flooring, but it does. Especially since I saw photos on another site and it was clear you used a roll of brown craft paper and not actual paper bags…at least on one room.
Just wanted you to know that I just got done reading your post on the paper bag floors. I had never seen anything like it and I was intrigued because I’ve worked in the flooring industry for fifteen years and my father for over forty. I just had a discussion with him about the issues you had. He said that something could’ve reacted to it but, more than likely, it’s a moisture issue. If any moisture gets underneath, it would definitely go through the paper material and up to the sealer. This is why you have a problem with the one corner in your boys’ room and the bubbling of the finish in the guest room. Liquids can easily slip between where the base of the wall and the sealer meet. Another issue is most floors aren’t perfectly level and if something is spilled and gets underneath of the paper material, liquid tends to run “downhill” so, basically, if the floors aren’t perfectly level, the liquid will travel, and settle, in the lowest area of the floor (usually a corner) and as it sits…it absorbs into the paper…then between the paper and finish…basically separating the finish and causing it to bubble, crack, chip away, etc. Also, you had questioned whether there is a difference between concrete and wood subfloors, guessing there wasn’t a difference. Actually, there is a huge difference between concrete and wood (sub)floors….HUGE. Concrete tends to hold quite a bit of moisture, at least until it fully cures (it takes 25 years for concrete to cure). When dealing with concrete and wood floors, there are many differences, especially to prepping the floors, in order for any type of flooring(including “traditional” flooring that is typically used) to be installed successfully. I’ve learned that flooring isn’t quite as simple as it seems. I also wanted to mention that moisture isn’t just spilling something on the floor, it also has to do with how much is in your home’s structure, under your home, and also in the air (and the part of the country that you live-humid climates don’t just reak havoc on your hair..lol). I hope this info helps. I never comment on posts but the idea of paper bag floors intrigued me. I know that the issues you’ve faced have to be very frustrating. I also am a mom of very active boys and I love that you are trying to find something that can withstand all of their activity. Sometimes I think it’d be easier to make something bulletproof than boy proof. Good luck.
I’ve never done this work before and your experience is a lesson to learn for me, thanks for your share
This is a great tutorial. I will try to make this my my house. Thank for share !
What would I need to do to do this on my back porch?
I have had paper bag floors for 18 yrs & they have only lately began to show some wear. I had only a vague idea in my mind so I charged right into the job. After tearing & wrinkling the paper & I used a paint brush & applied ( deluted to paint consistency) wood glue on the printed side with a paint brush & spread out the paper ’til the hall ( 8’x32′) was completely covered. Next I rolled glue on the floor as you would paint & let dry over night. For the next week I brushed satin polyurethane each morning & another before I went to bed. With each coat of poly the finish became smoother. To start this was just a temporary fix but everyone that sees it tells me to not change it! All I have to do to clean it is damp mop & it looks great!
Found your site on Home talk. I was looking for some ideas to do my two bedrooms as well. I did Laminate flooring and porcelain tile in the living area… but finances did not allow me to go into the bedrooms with it. I truly can not stand the carpeting in the bedrooms and I am looking for a solution to my concrete floors. I considered painting them… but first I have a few questions.
When I removed the old carpeting in the living area and the tackles strips the concrete had holes where I popped the tackles off the floor… what do I use to fill in the holes which will no doubt be present. The concrete under the carpeting has never been painted and it looks to be in great shape.
The other question I have is: I read your blog about the paper bag failure in the boys rooms, and decided that probably wouldn’t work for me either, my dog runs in the house and I would imagine his nails on the paper bags would eventually rip and look crappy. Having said that, what product would you recommend I use on the cement floor, specifically what kind of paint??
I like the idea of stenciling some kind of pattern, but someone mentioned somewhere that an acid wash would be required… I am on a LOW BUDGET, in fact I design on a dime! Finding items to re purpose gives me a thrill… wish there was a way to add a photo or two as I would love your feedback. Love the things you have done with your home. In fact those barn doors would look wonderful in my living room covering the sliding doors. (another pet peeve vertical blinds… yuck)
Any suggestions would be a welcomed surprise!
Oh before I forget… I love your website… how does one go about getting or designing a website. I would like to make one for my own… Probably too many questions I will google how to make a webpage. Thank you.
Do you know the best way to remove this? I covered a countertop in my guest bathroom and want to redo it, but I’m not sure how to go about it.
Hi – I am excited about trying this in our master bedroom. But how do you clean it?
I used a damp (not wet) rag or mop to clean it.
Ive paper floored a few rooms, some of them are two years old now….
i only use water base (without hardener) poly to seal.
I only do 3 coats, ive found if you do too many it actually is less durable (i dunno why, it just does!) and i wait at least 4 hours between coats.
Ive used it on the main toilet and we have 7 ppl living here…..no issues….just never bleach poly.
the only trouble i had once was over heating. if you get HOT sun through the window for a long time directly on the floor, it will lift…..maybe thats what your problem area is from??? same goes with hot water…it will lift straight off the paper.
I learned this from my huby who left a hot towel on the bathroom floor…
I have faux tiled, faux wood panel, and comic booked my floors, and i intend to paper floor everywhere except where hot water is frequent xxx
“I won’t ever paper a floor again.” I think that was something I said, too, but like the pain of childbirth, we forget (and hey, I’m a DUDE…) I did my one-and-only room so far about five years ago. It still looks GREAT – except where I had to patch the wood subfloor, using Bondo, and discovered the hard way that white-glue won’t stick to Bondo under much challenge (eg where my desk-chair rolls).
I got back here looking to see if anyone’s updated/up-rated the basic white-glue binder to an epoxy, so as to go a lot more bullet-proof. I haven’t seen much, if anything, to indicate. And it would be truly horrible to be wet up to the forearms with epoxy while trying to squeegee out crumpled brown paper, which might not like to “soak” with the epoxy to begin with. The more I think about this, the more my back and knees hurt, so maybe my questions are moot.
I suspect your poor adhesion (blistering) of the Bona is from residual oil from the stain. I’m never very comfortable applying water-based sealer over oil stain, even when the work has been sitting for days and wiped down – because it’s still a little oily, right? But I didn’t stain my paper floor, so I don’t know whether there would truly be a problem with a water-based stain.
Did you apply several coats of the original poly (water-based) sealer? If so, was it sitting partially or wholly for long enough to take it outside of the “recoat” window, that time period beyond which you’ve got to sand to guarantee adhesion of the next coat? Looked like that to me.
Finally, sanding is a relative pleasure with a high-end dual-action sander, eg my old Porter-Cable 7346. If you get one of these with a flow-through velcro pad, and then buy the expensive-but-worth-it Abranet screen abrasives (also velcro), you can connect the sander to your vacuum and GO TO TOWN without getting dust everywhere. Only the larger chunks remain, and they tend not to get airborne. It will change your attitude about sanding, especially if you have to live within the space you’re sanding.
Do you have yo take up the old wood floor or can I put this on top of it ? Do you have to take up the old tile in the floor or put it over it
I’m very confused, now. When I saw your tutorial page and went to the other tutorial, and, saw the one year later post, it sounded like everyone was very happy with this method and it would be a great idea. This post makes it sound like a horrible idea that you have hated all along.
Granted, I didn’t read the whole thing, as the internet is acting like the internet often does, but … at this point, would you recommend it as a technique or not? It looks beautiful in most of the photos.
Thanks so much for your honest and detailed accounts of your experiences with paper bag flooring!! Although you feel it’s not perfect in ways… I LOVE them! I think they looks great in both of your rooms. And your posts have helped me a ton as I move into my first home and am trying to figure out design details and updates. — Thank you!
Did you seal the flooring underneath? This looks like a classic example (but just guessing, could be many, many things) of moisture coming up under the finish, and lifting it off. Also, this is a curing film finish, so it just builds more layers, it doesn’t “melt” the previous finish, similar to paint. Lacquer is a good example of a finish that they solvents in the new finish will soften the old finish and cause the layers to melt together.
If you are going to try this technique, I will put some kind of sealer coat under the paper to inhibit moisture. Apologies if you did that, I didn’t read the entire thing all the way back to the beginning.
Do you have to remove baseboards when doing this technique? I am wanting to do a lot of my house with this technique and having to remove all the baseboards might make me change my mind !
Thanks for any advice!
Think it looks great .. I did the paper floor twenty something years ago they were walked on lived on by 2 adults 7rescuse dogs and 5 rescue cats. They were a life saver for along time until this year. Bam I fell in love with free pallets. Oh my you talk about a great floor out of this world
It might be off gaming caused by doing multiple costs in a short time. Typically it needs to fully cure for 24 hrs before applying a second coat of any 2 part epoxys
Your problem with your sealer coming up is that you are mixing latex & oil & water bases…. (Elmer’s glue= latex. Oil based stain. Then a water-based sealer.)
You can’t mix these… they don’t adhere to each other… Latex and water work fine together… oil doesn’t mix with either of these!
Thank you sooooo much for posting all of this! I’m still on the fence about papering our floors, but at least now, I have a much better idea of what I’m getting into. I feel like if it fails, it will have been a lot of work, a bit of money, but it can always be covered up with carpet, vinyl or wood, so not all will be lost. You did so much work here, and you’ve saved me so much time and potential trouble. Honestly, I wanna give you a virtual hug!
Has anyone ever done kitchen countertops. Then covered with epoxy?
I appreciate your insights in the post, but I have to say I’m a bit disappointed with the idea of paper flooring for a guest room. It seems impractical for areas with high foot traffic and potential spills. I would worry about durability and cleaning challenges. Have you considered alternative options that might be more resilient yet still stylish?