
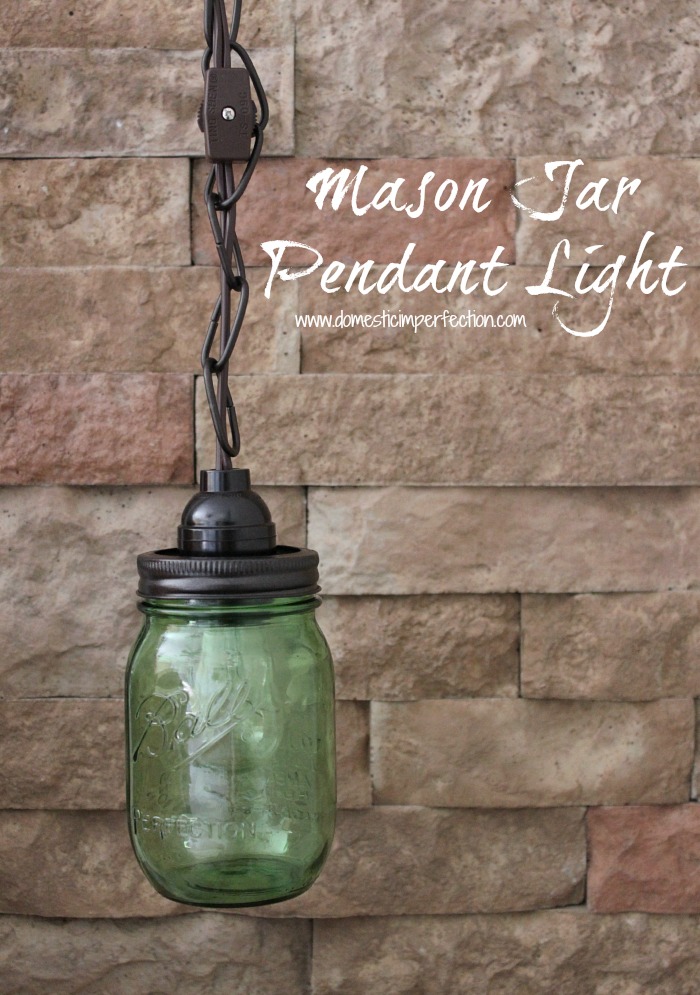
Mason Jar Pendant Light
You know those projects that should be really easy…the ones that should take you less than an hour but end up being a complete time suck and turn out NOTHING like you planned?
Yeah, me neither. Never happens.
Except like every fourth project or so.
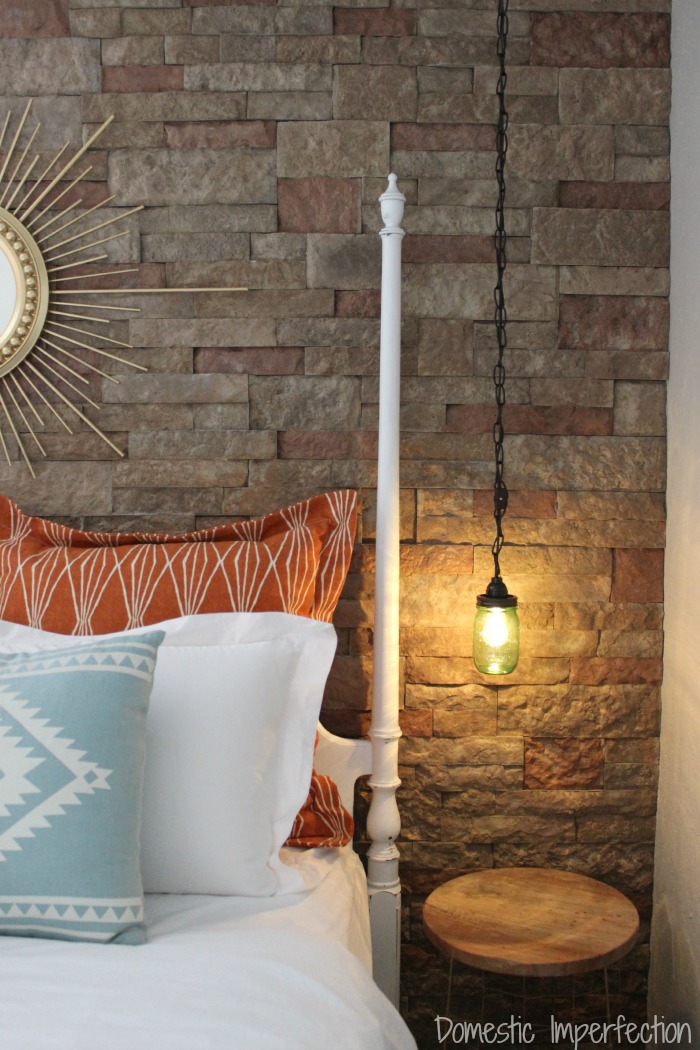
I’ve been planning to hang pendants in the guest room instead of doing traditional bedside lamps. The room is pretty small and anywhere I can save space, I will. Plus I’m certain my tomato cage side tables wouldn’t support anything like that for long.
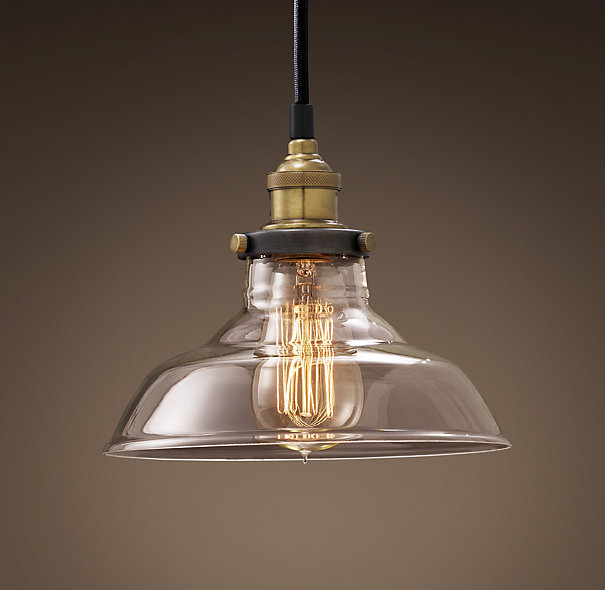
My first choice was these pendants from Restoration Hardware, but they are $119 each.
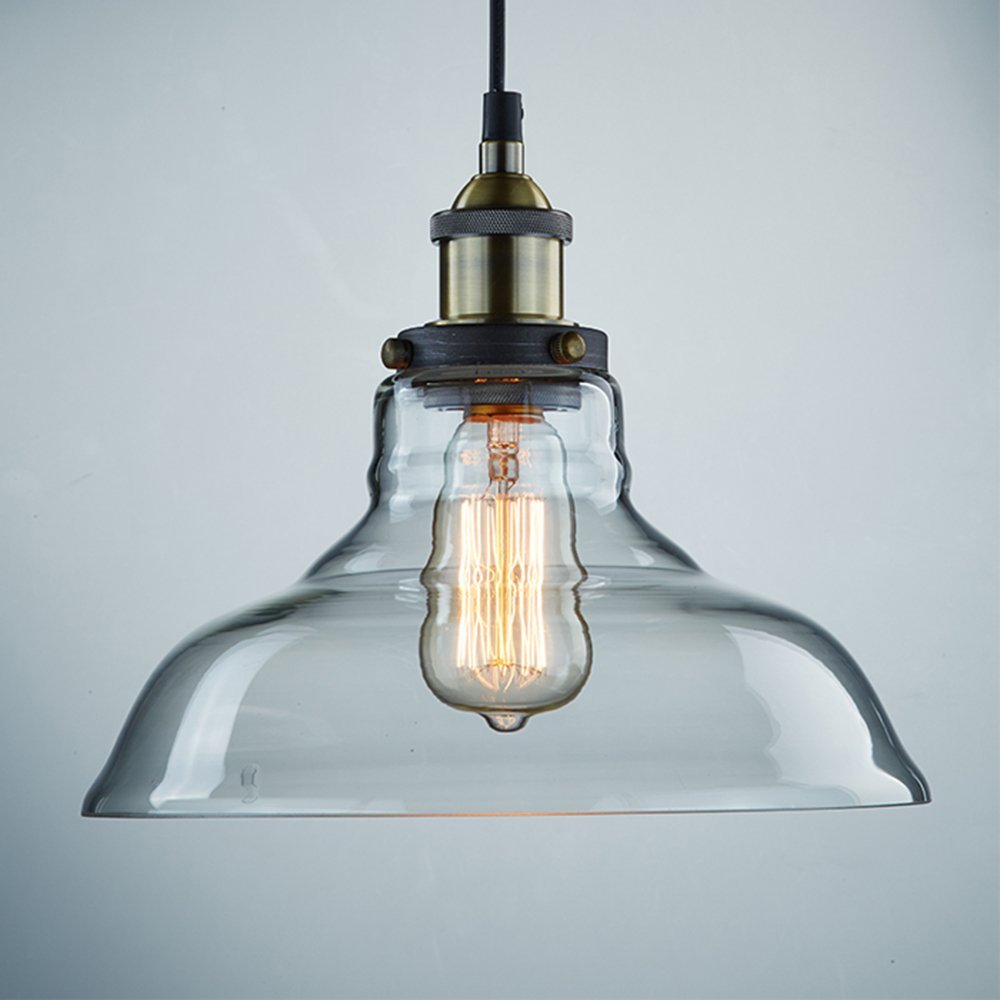
I found nearly identical ones on Amazon for only $45 a pop, and in hindsight that is a fantastic deal and I should have just bought those.
I thought that I could make my own for crazy cheap with a pendant kit and a glass bowl or something. Turns out I can’t…but I can turn my failure into a mason jar light and share the process with y’all.
So let’s just do that instead.
From what I can tell, there are basically three ways to go about making a mason jar light.
Option one (the easiest option)
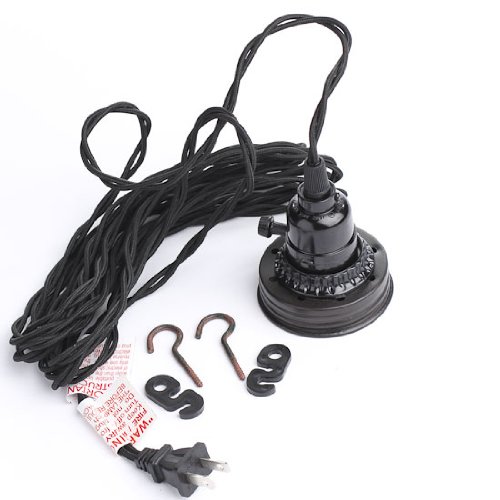
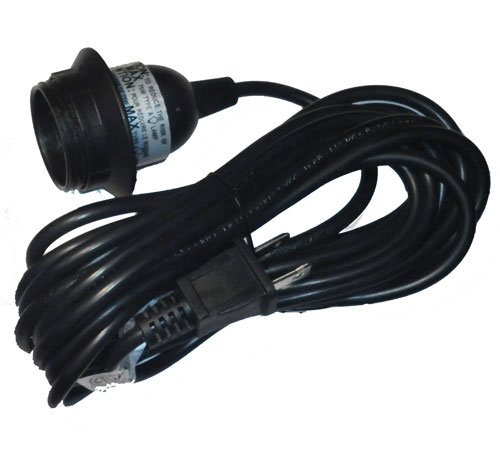
Amazon.com sells pendant lights specially made for mason jars.
You literally just plug them in (no electrical knowledge needed), hang them from your ceiling, and screw on your jar. It doesn’t get any easier than that. They are $31 each right now, but they change price all the time and were like $25 when I was wishing I had bought them.
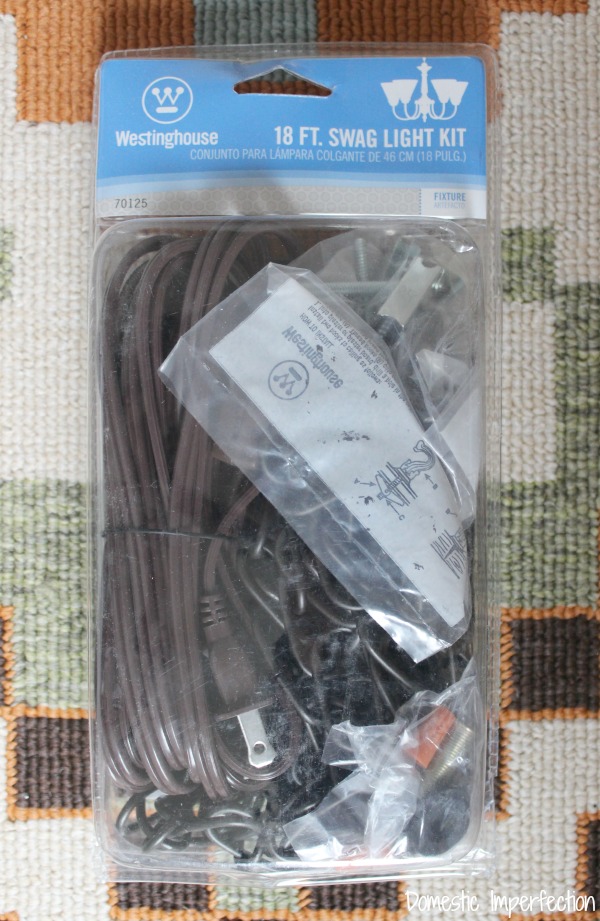
Option two (the cheapest option)
Ikea sells a pendant light that would work for this project for $5 (the Hemma). If you don’t have an Ikea near you (I don’t), then you can order it through Amazon for about $10. This one has a plug and would be easy to install as well, but you would have to do a little work to your mason jar to get it onto the socket (more on that in a minute).
Option three (the dumb way where you waste a lot of time and money)
This was my option of choice, obviously. I started off buying this pendant kit for $18 from Home Depot.
It had a plug, a chain, and an on/off switch on the cord….but no socket. Just a cord with nothing on the end. And I of course didn’t notice this until after my husband had cut the plugs off and it was too late to return them. I had planned on just plugging them in and making the whole thing easy, but Adam immediately vetoed that idea. He couldn’t see why I would want cords running up the rock wall I just spend forever installing. So he cut off the plugs, drilled some holes in the ceiling, and somehow wired them into the fan. Don’t ask me how…he’s pretty much a magician.
ANYWAY, to make a long story short, I tried a few different pendant ideas (all failures) and ended up going with mason jars, since I could easily figure out how to attach them.
And now for the instructions…
Most pendants will already have a socket on the end, and if it looks like this you are good to go…
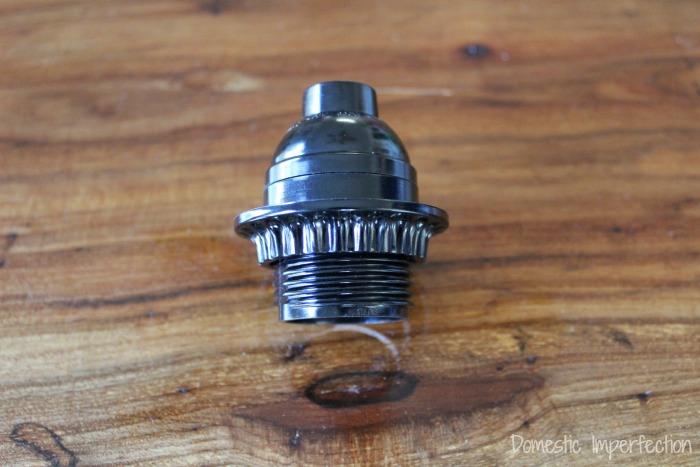
If not you can buy them separately. You have to buy a phlegmatic keyless socket, the kind that’s threaded with a ring on it.
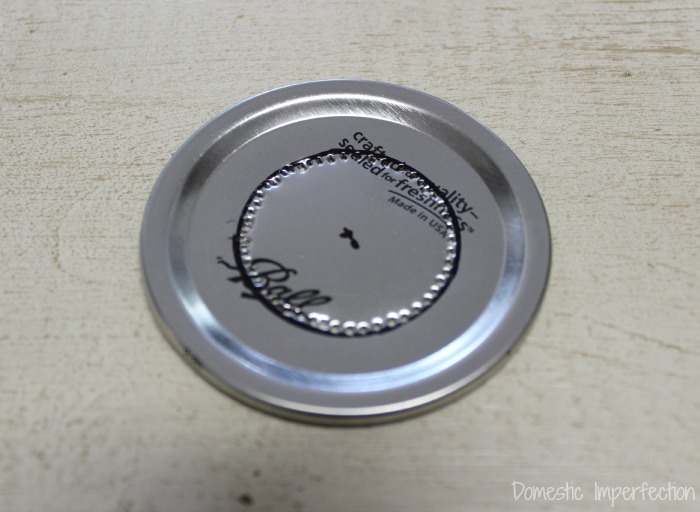
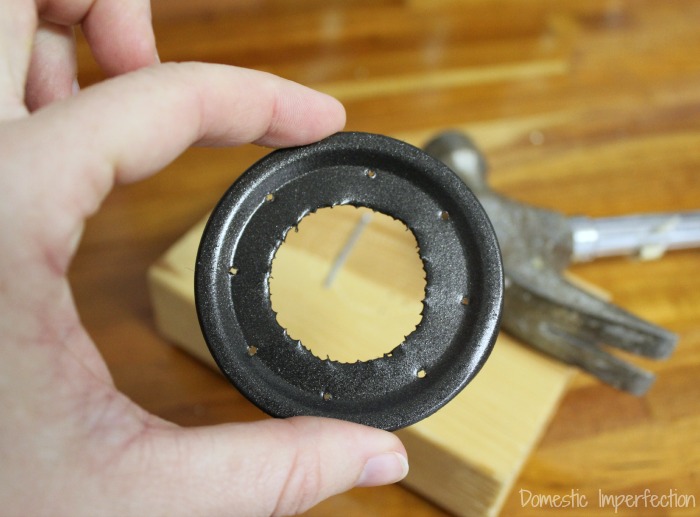
First, you will need to prepare your mason jar lid. Place your socket in the middle of the lid and trace around it. Then using a hammer and a small nail add holes and cut out the center.
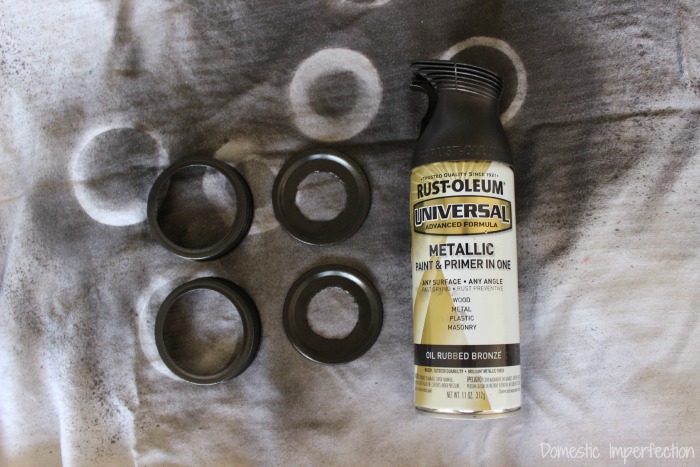
Next, I spray-painted mine to match the pendant cord and chain, but this is optional.
Don’t forget to use the hammer and nail to punch some vent holes in the top.
Now it’s time to assemble everything.
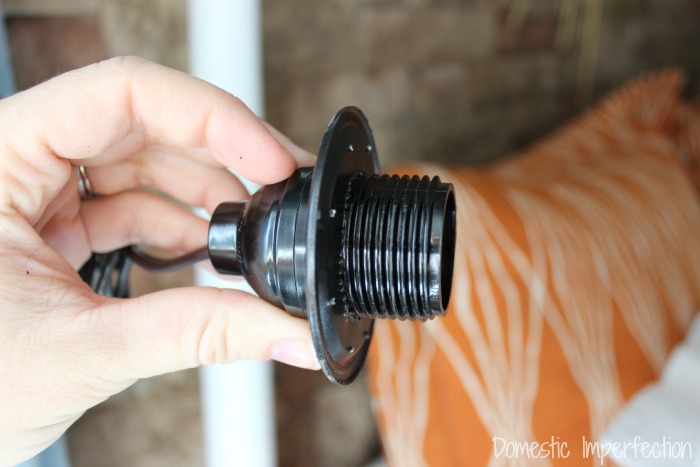
If it’s not already, wire the socket onto the cord (I don’t have a picture, but it’s just two screws). Then slide the band (the ring part of the lid) over the cord and push the socket through the lid, like so …
Then screw the ring on under the lid. This holds everything in place.
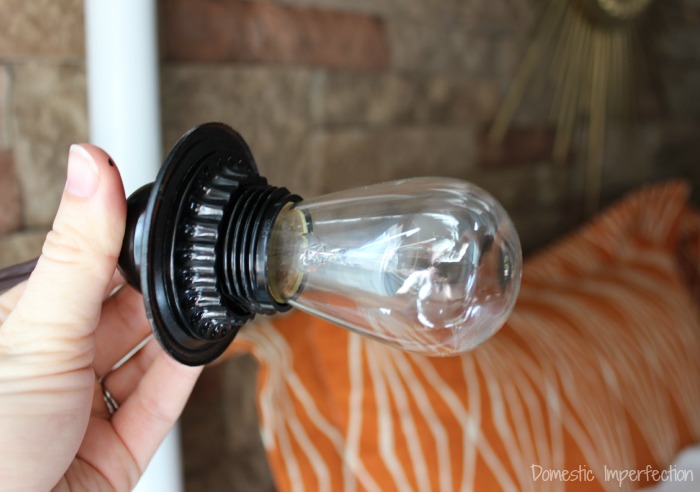
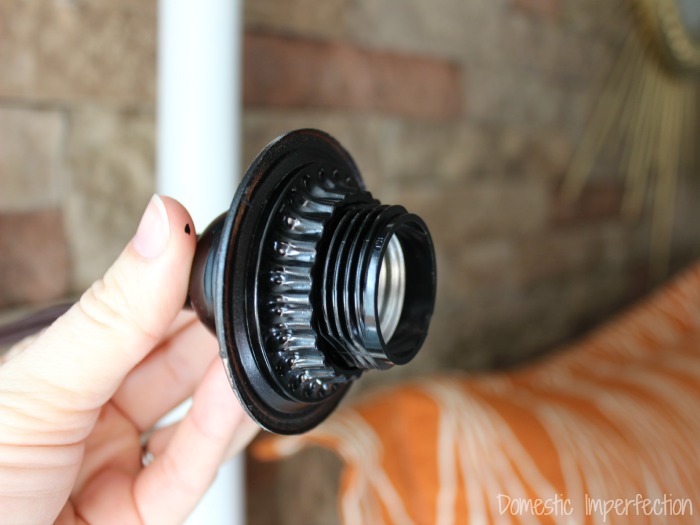
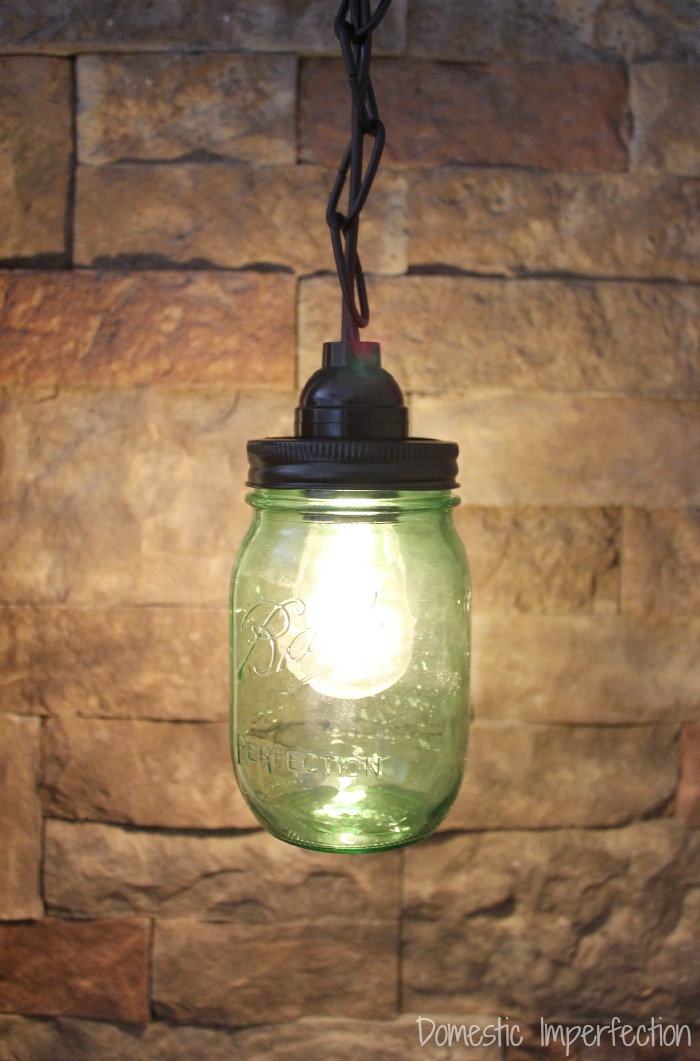
Next, add your bulb. I used a really small dim one (11 watts) so that it wouldn’t get too hot.
Then screw the jar into the band and you’re done!
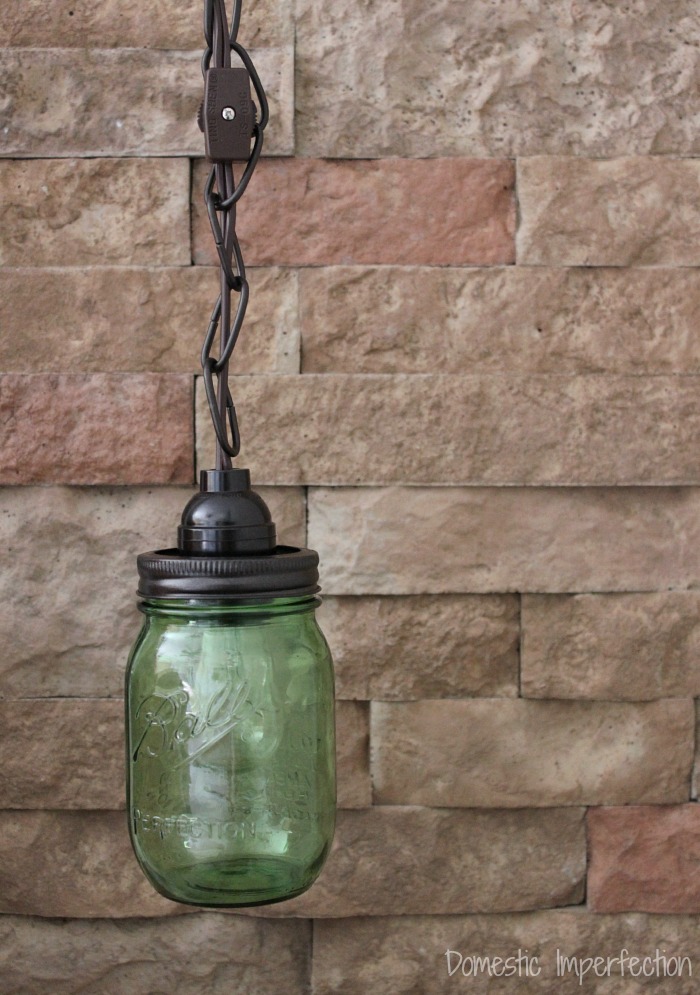
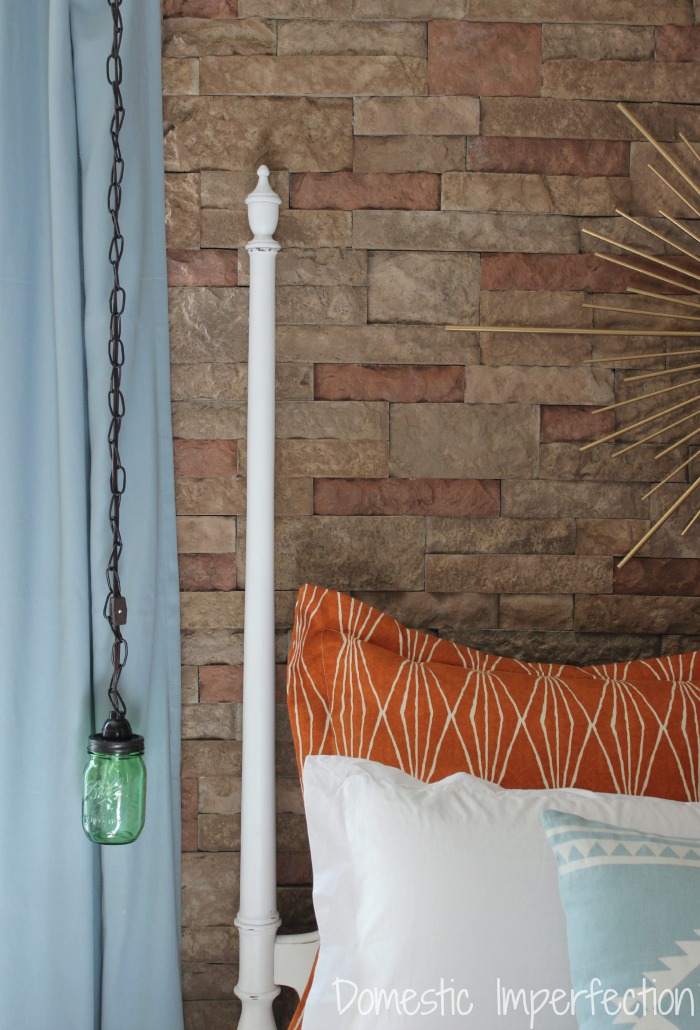
I found the green jars at Walmart and I love them, they tie into the green in the rug and on the wall. Finding them was actually what convinced me to go ahead and do the mason jar lights.
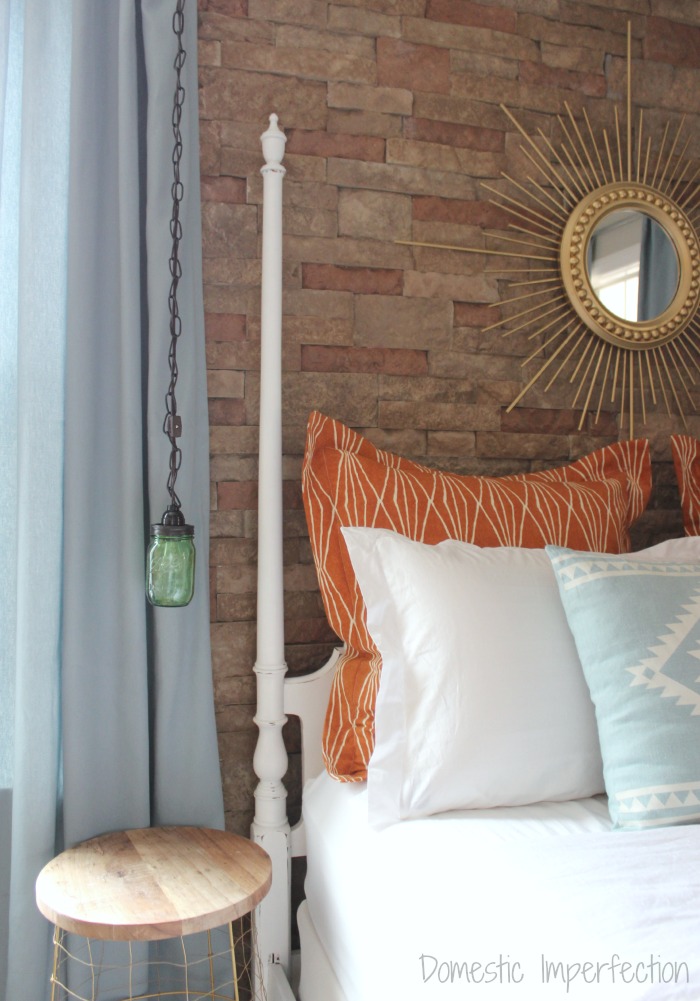
So even though these turned out nothing like I planned, they actually look great in the room. Everything is coming together really well … I can’t wait to show y’all the whole thing in the reveal!
Hey look…you can just buy these for cheap and skip the whole pain in the ass project! You should do that for sure.
Click here to buy a green one
Click here to buy a clear one
Click here to buy a green one in a wire cage
Southwestern Bedroom Sources + Links
Items used
- Southwestern indoor/outdoor rug
- Airstone
- Pendant light (similar)
- Curtains
- Blue and white pillow (similar)
- Sunburst mirror (similar)
Paint Colors
- Walls – Sculptors Clay Behr PPU5-8
- Trim – Pure White SW7005
Shop the Look

You should check that light for temperature.
That looks totally amazing! I do things the “hard” way all the time trying to save money. :)
I did a wire basket light fixture “the hard way” last summer – wasted time and money before I went back to the store and bought a kit!!
Love the mason jar idea.
Great idea! Thanks for the post – these would look great on my back porch.
Ashley, those are adorable! Even if you did go the long way to get there :) Love how they look against the wall.
Looks great! I do love those green jars. I got the ikea cord from Amazon to go in a paper latern, but I haven’t gotten around to finishing it! Thanks for the inspiration!
Those turned out great! I did something similar but instead of using mason jars I bought a big ole rattan shade from World Market and made my own hanging light. I love it and it adds so much to my livingroom.
p.s. Those green mason jars are awesome! I love the blue ones too so much so that I stock piled boxes of them when they went on clearance for $5.00:)
They look great. Can we see how it looks attached to the wall?
Ashley, Love the green glass jar hanging pendant lights! I’m making some for our guest bedroom, but I would like to add some sort of shade…. they looked so bare without….. any suggestions?
I love this… Featuring you tomorrow. I hope you stop by and link it up to our party!
The green jars are very pretty! Doing things the hard way is my first choice every time ;)
Love this idea! I had no idea it was this easy! I will be doing this on our new hallway light:) Thanks so much for sharing!
Did you ever consider using an Edison bulb?
They come in LED also.