
Our DIY Farmhouse Laundry Room – The Reveal!
It’s a big day around here, because it’s room reveal day! Our farmhouse laundry room is completely finished…man it feels good to type that. Room reveals are my absolute favorite, not only because they mean I get to check another space off my to-do list, but also because I get to move onto a new space and appease my project ADD.
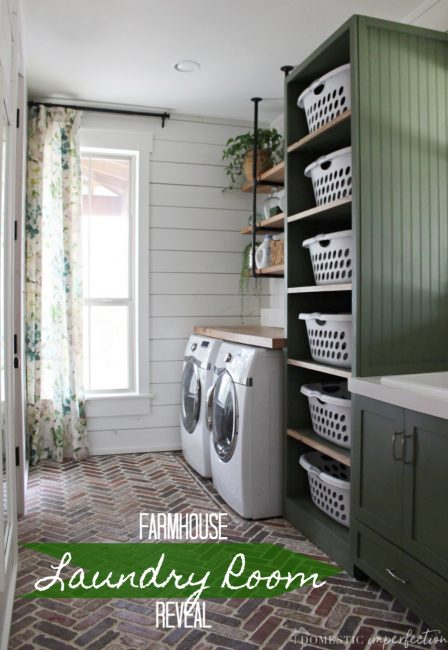
So here is the finished laundry room…check out this before and after!
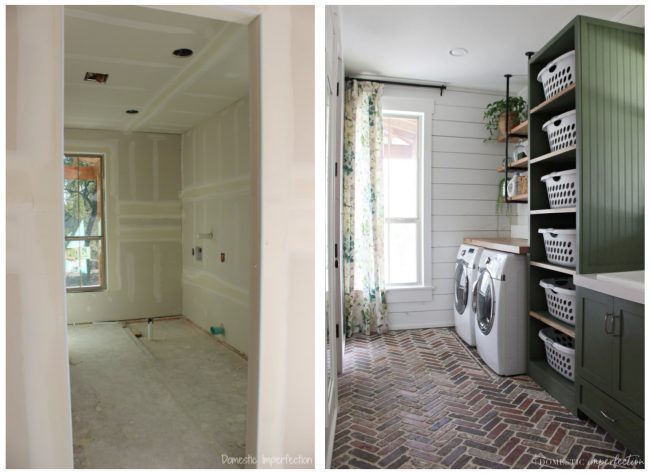
Looking at the photo makes me smile so hard…what a difference!
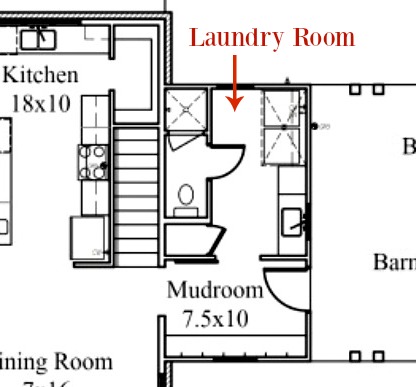
To get a better idea of the layout, here is a birdseye view of the space –
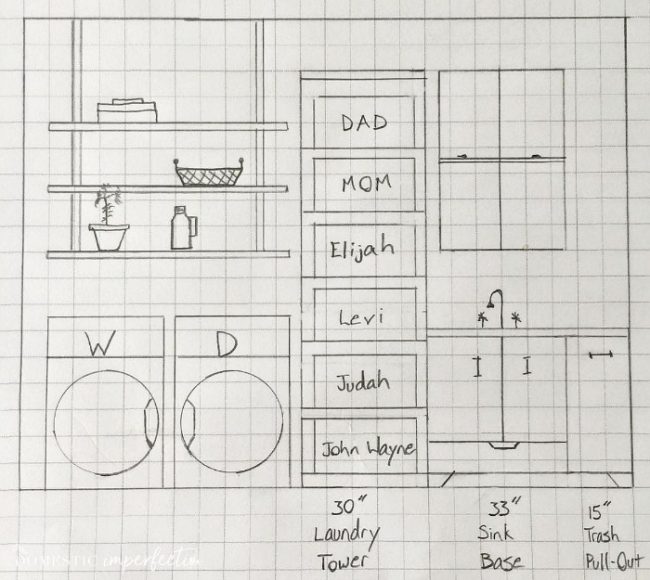
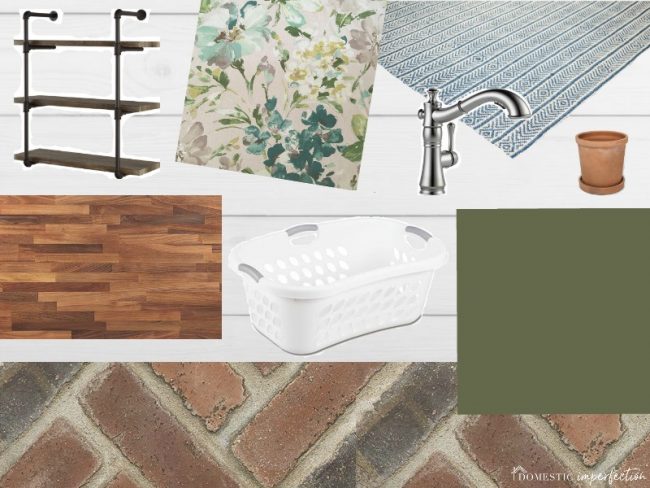
And here is the sketch Adam and I drew up when we were planning the space (also, our fourth son’s name isn’t John Wayne, it’s Abram…Adam just put John Wayne in as a placeholder since we had just found out I was pregnant with #4) and also my mood board.
Here is the official before photo. I snapped when the builder was finished with our house, just a short time before we moved in. If you are new around here, my husband and I designed our house ourselves and then hired a builder to build the shell of the home. He took it to the drywall stage, and after that Adam and I took over. That was three years ago… the jury is still out on if we are idiots or not, haha.
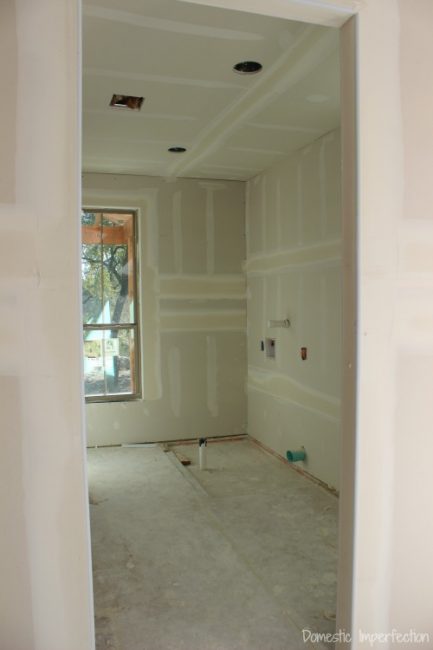
And now, just a few short years later, it’s finally complete!

Ahhh…..so pretty right?! I’m thrilled with the way it turned out. Not only is it easy on the eyes, it’s so functional. If I had to design this space again I don’t think I would change a single thing.
As a refresher, here are the posts I have already written about the laundry room –
- Laundry room design plans
- Adding shiplap over drywall
- Simple farmhouse window trim
- How to paint shiplap
- Herringbone brick paver floor
- Our brick flooring – One year later
- How to make a countertop out of wood flooring
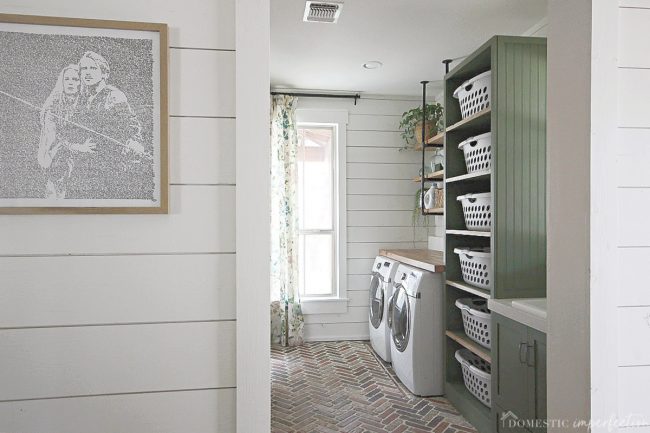
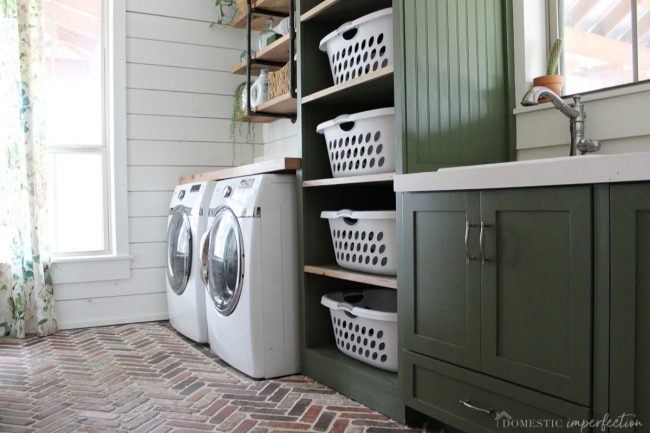
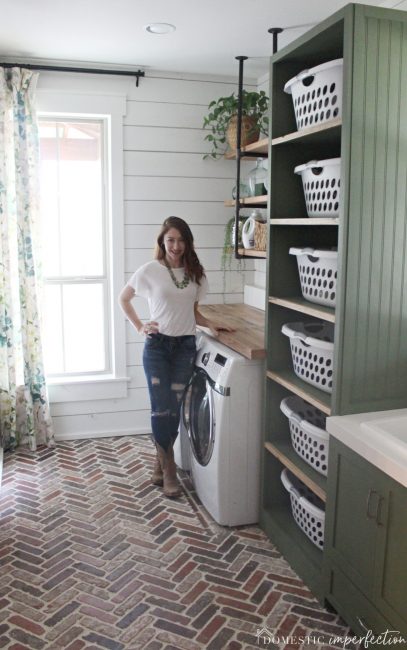
Alright, so let’s take a closer look at the elements in this space, starting with the washer and dryer area.
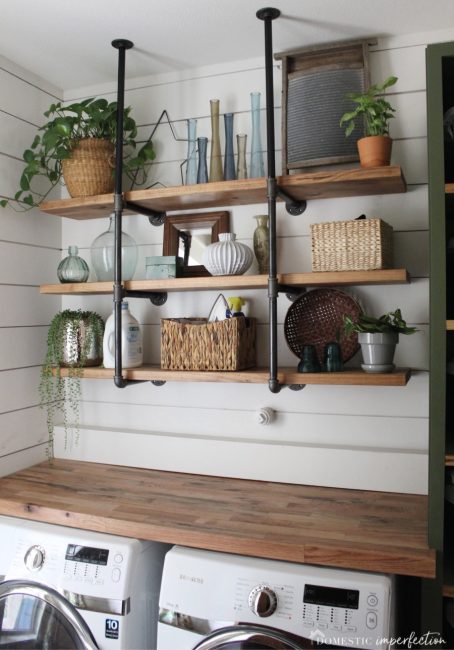
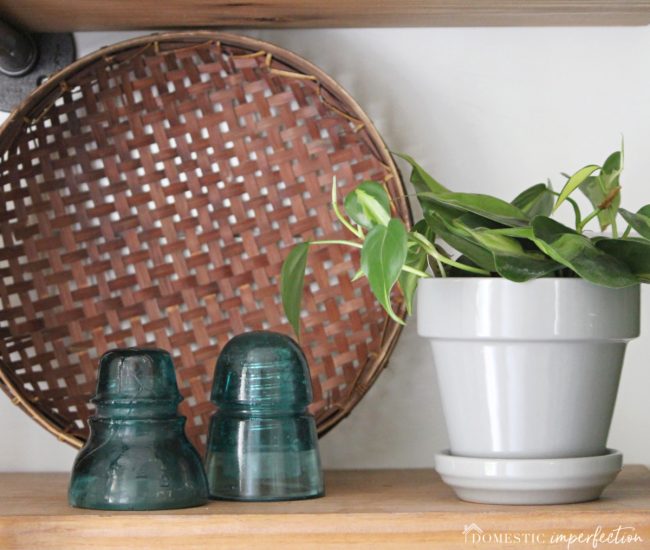
The first thing you probably notice is the shelves. I love the shelves, though admittedly they serve almost no purpose. There are three useful things on here…the laundry soap, the basket full of laundry accessories (iron, stain remover, etc) and the basket on the second shelf that is full of socks that don’t have a mate (so basically, all my kid’s socks). The rest is all just useless pretty stuff that adds interest and spreads around the colors in the curtains.
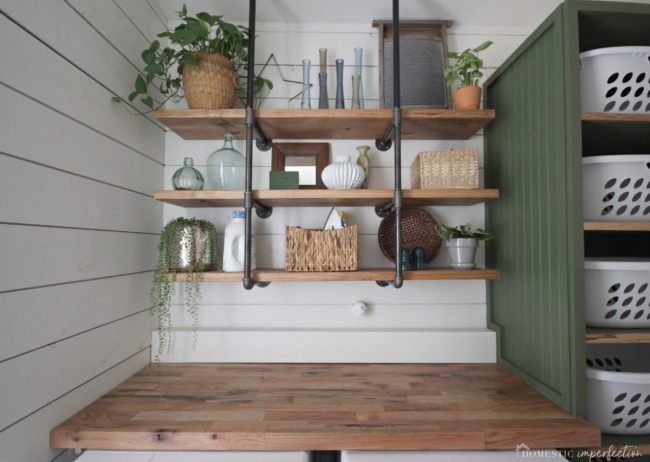
The countertop exists mostly to make the area look more pulled together, but publicly I’m going to claim its for ironing and folding. I try not to do much of either, I usually just take the clothes out of the dryer and toss them into the correct laundry basket.
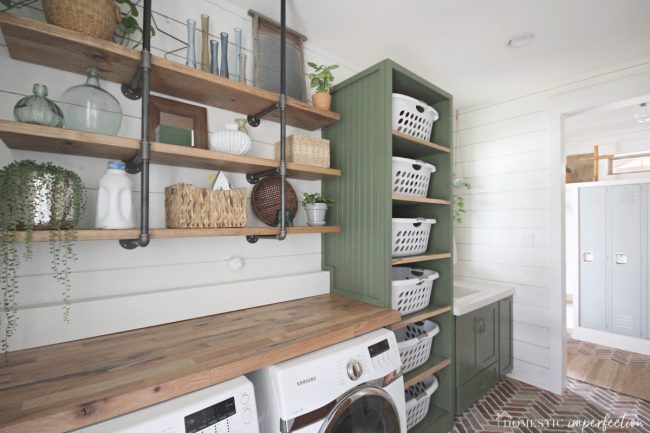
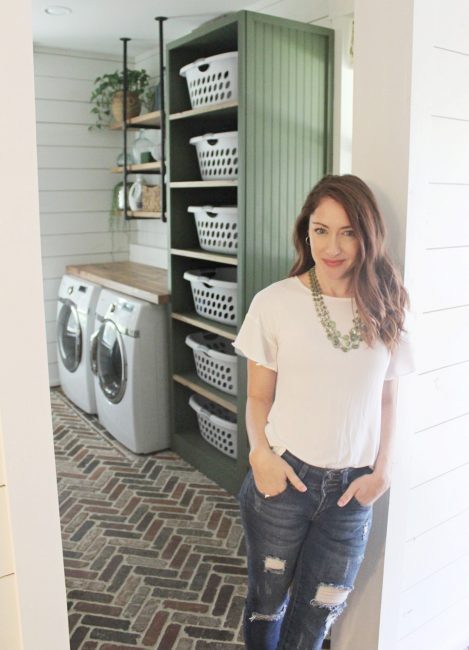
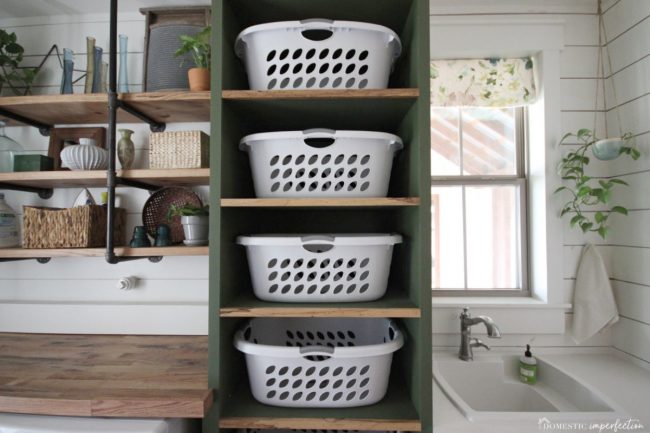
That brings me to the laundry tower, which I’m in love with. It’s SO useful and helpful. In our last house the laundry would end up in big unfolded piles all around the house (I know I’m not alone in this…doing laundry, no big deal. Folding and putting laundry away? I’m going to need at least a week). Since becoming the proud owners of a laundry tower I can honestly say that unfolded laundry mountains never happen. Seriously never, in italics and bold for emphasis and everything. It’s glorious.
Now I just take the clothes out of the dryer one at a time, chucking then into the correct basket. I never fold them. Each day my two older boys are responsible for putting away all the laundry in their basket, and the two little boys and I put away their laundry together. Before too long they should all be laundry self-sufficient and I will just be responsible for me and Adams stuff. That will be a good day.
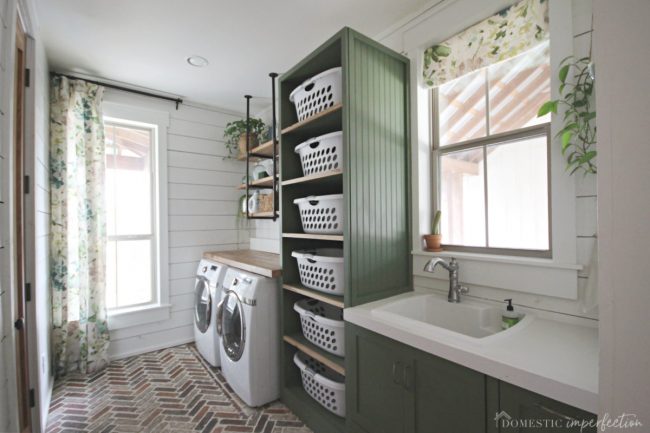
Working our way to the right we have the laundry sink/guest bathroom sink. It is kind of a unique setup, the guest bathroom has a toilet and a shower in it (the shower still doesn’t work….it’s on the list) and the sink is out here in the laundry room. I really wanted a laundry room sink, and putting two sinks so close to each other seemed silly. So instead we just did one shared sink and put a shower in the guest bathroom. Currently, the shower in that bathroom has never been used and seems unnecessary…but we have four boys sharing one bathroom, and one day when they are all stinky teenagers I think we will be really glad we threw in a second shower.
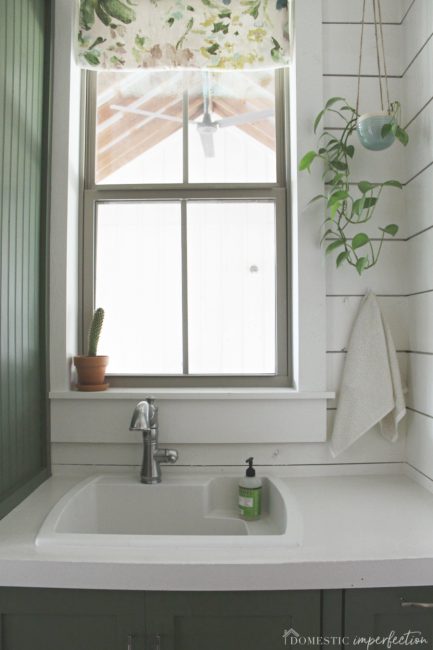
My husband built all the cabinets in this space (and the whole house), and the green is the same green that is on our kitchen cabinets. The countertop is DIY white concrete that we poured at the same time as our kitchen countertops. The kitchen ones turned out decent, but this one got a little forgotten in our haste to smooth the out before they dried, and it turned out terrible. We seriously thought about tearing it out and replacing it, but I decided to try and just paint it first. I used a concrete patch to level it out, then painted it with Rust-Oleum countertop coating. It turned out okay… it’s not my dream countertop or anything, but it’s white, inoffensive, and is good enough.
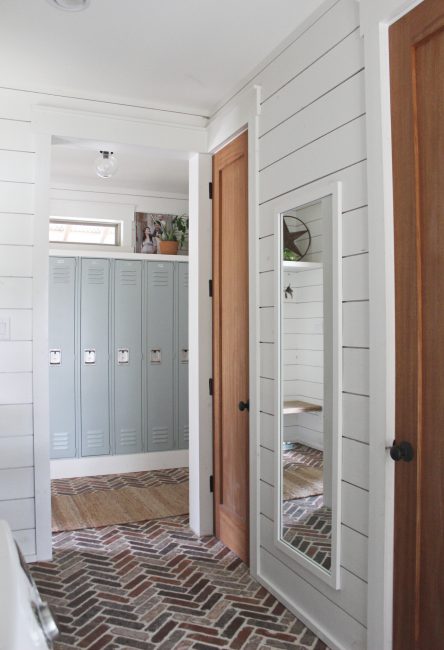
There isn’t much to see on the other wall, just a storage closet, door the guest bathroom, and a full-length mirror for those last-minute checks before you dash out of the house. Through that doorway you can also see the mudroom, which we finished last year. You can read more about the mudroom HERE.
I really think the shiplap and brick floor make the space. I’m a big fan of making the house itself interesting (walls, floors, ceilings, etc) and letting the things in it take a backseat. I feel most homes start off as a big blank drywall box, and decorating something like that is expensive and stressful, because all the emphasis is on the “stuff”. If the house itself is interesting, beautiful, and maybe a little bit quirky, then the rest of it isn’t so important and easily falls into place.
ANYWAY….now let’s get to the nitty-gritty details. Below is a list for where you can find all the items and tutorials for the laundry room (some of these links are affiliate links, just FYI) and then the price breakdown. I’m not organized enough to keep receipts and all that nonsense for years on end, so the price breakdown is round numbers and my best guess.
Laundry Room Source List
- Wall color – Alabaster from Sherwin Williams
- Cabinet color – Oakmoss from Sherwin Williams
- Curtains – DIY, the fabric is P Kaufmann Paint Palette in Mist
- Curtain rod – Pottery Barn
- Washer and Dryer – Samsung
- Silver planter – Article (discontinued) Similar 1 2 3
- Faux String of Pearls – Nearly Natural
- Pipe Shelving – DIY, tutorial here
- Wood countertop – DIY, tutorial here
- Shelf decor – antique store finds or decor I’ve had forever
- Laundry baskets – Amazon
- Brick pavers – Home Depot
- Cabinet hardware – D. Lawless
- Sink – Build.com
- Hanging planter – Etsy, store closed. Similar 1 2 3 4 5
- Hand towel – Target
- Countertop – Bad DIY concrete job, painted over with Rust-Oleum Countertop Coating in Linen
- Faucet – Amazon
- Mirror – DIY
Price Breakdown
- Floor – $1,100
- Countertop – $15
- Shiplap and trim – $300
- Paint and supplies – $70
- Sink – $160
- Faucet – $260
- Shelving – $120
- Window treatments – $ 175
- Laundry baskets -$40
- Mirror – $30
- Accessories – $80
- Cabinetry – $350
Total price – $2,700
$2,700 for that before and after picture actually seems really great to me. I’m trying to pick better quality finishes in this house than our last house, but we also still have a budget and can’t go crazy. I feel like this space is a great mix of splurges (the brick floor) and money-saving solutions, cheap countertops, DIY cabinets, etc). Three years wasn’t exactly my goal timeline, but it is what it is, and the journey is half the fun.
I love how honest you are about your renovations. This one took so long, like normal people but it turned out so amazing!! Congrats!
It looks beautiful! Turned out so well! Would make laundry almost enjoyable especially with all that light (my laundry room, while plenty big, is in an unfinished basement room). Do you hang dry any of your clothes? I hang all my husband’s shirt and have a drying rack for jeans and more delicate items. Also handy for all the wet stuff after playing in the snow, though you probably don’t have that problem in Texas! Thanks for sharing! I have so enjoyed watching your house transformation, especially at a normal people pace!
Thank you! I have a drying rack but almost never use it. I have a saying “If it can’t go in the dishwasher and the dryer, I don’t want to own it”. Ha! It won’t always be like that, but for now that’s where I am in life.
It’s pretty and functional!
I’m curious, what is the cost savings of building to a shell vs a finished house? I realize you still have to add the cost of the inside materials, but is it 25%, 30%? We recently remodeled out kitchen and I think we saved at least 50% by doing it all ourselves.
This is a total guess since we aren’t finished yet, but I think about 40-50%. We built the shell of the home for roughly 230K, and the quotes we got to finish the whole thing were about twice that. Our finish out will be better and much more personal and unique…but it’s going to take us forever to finish. It’s definitely a trade-off, but I feel much more comfortable with our tiny mortgage and an in-progress house than being tied to a huge monthly payment.
I absolutely LOVE it!!!! I agree that if you have the right details in the floors, walls, etc…then you don’t need to have so much “stuff” to make the space feel unique and homey. I am keeping so many ideas from this space for our future one :D
Oh wow, I love it!! It’s so beautiful. Light, airy, and functional. I LOVE the finishes and agree that they really make the room. Good choices!!
Looks like a million bucks! So glad for you! I can’t stand the way our laundry room turned out, but there’s no way to fix is without completely changing the plumbing or something major. At least I can enjoy looking at yours. :)
Hi Ashley,
I’m going to buy Oakmoss tomorrow. Quick question..Do you still like the deep, dark green.
If you had to say, would you describe it as more of a hunter green or sage green or olive green or army green? I guess I’m trying to figure out where it shifts in color. Would it feel too dark to you to do an entire den in this color?
I love the work you’re putting into the floors and walls so you barely have to do any decorating when the room is done! But what made me have to leave a comment was spotting that Buttercup & Westley print just outside the laundry room doorway <3
Keep up the great work – I always enjoy reading your posts <3
Wow such an amazing DIY project. I must really appreciate all your efforts for this. Can you please answer my queries regarding this?
1. If we group of 3 start now, how much time will it take for us to complete?
2. What is the total approximate cost on all this?
Please guide in details.
Your project is amazing! I am working on a bathtub skirt and looking for the board wainscoting that you used on your laundry tower. I think it is called v board.
Would you share the vendor with me?
Thank you so much I have been looking everywhere.
If this photo had been Houzz, I wouldn’t have any problem believing it was professionally designed. Would you mind sharing what material the cabinetry is made out of? Thanks!
My husband and I want to build a similar laundry basket tower. Do you have the design plans that you could share? More specifically, I am curious how you did the shiplap design on the side of the tower.
I don’t, and that house has been sold so I can’t give you measurements or anything. I CAN tell you that it was built as a simple plywood box..sides, shelves, everything. Then faceframing was added, and the we glued the beadboard (it comes in large sheets, like plywood) to the sides, caulked and painted.