
Herringbone Brick Paver Floor
Y’all. The brick paver floor is finished and it turned out AMAZING.
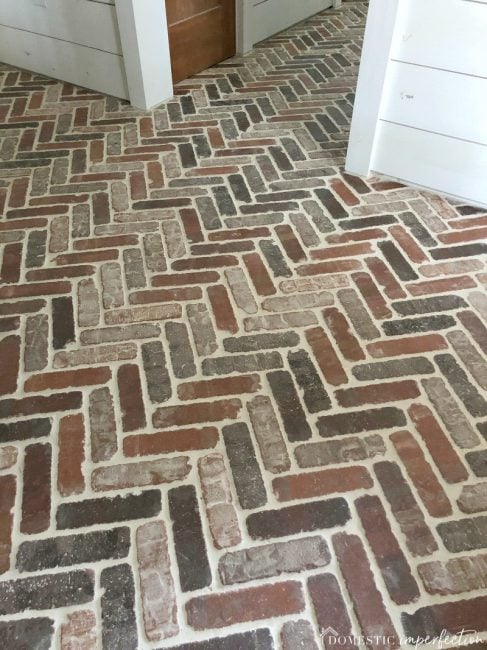
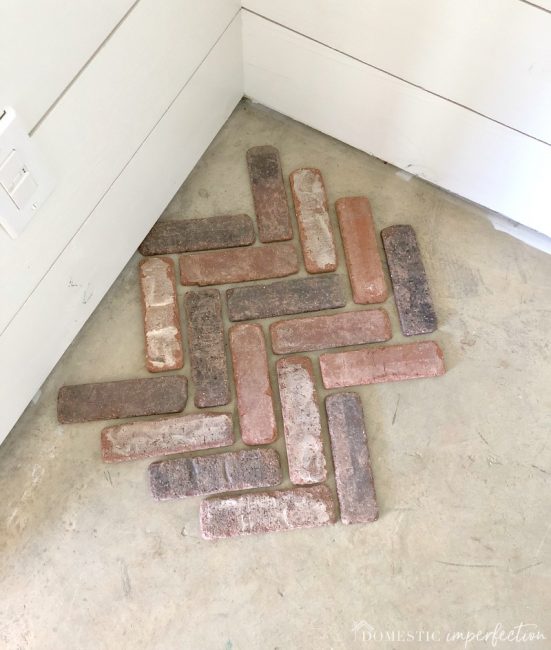
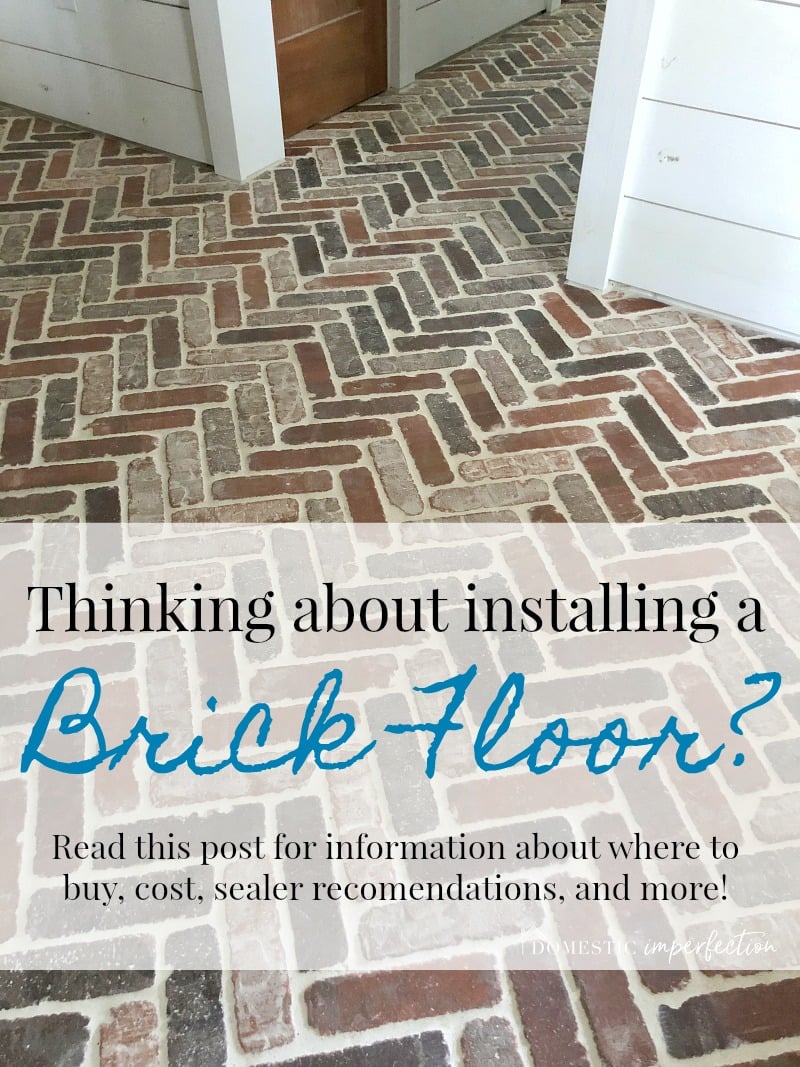
It is exactly what I wanted, which is impressive considering my list demands was pretty specific. I’ve seen plenty of brick floors that aren’t my favorite, so I was only interested in installing a brick paver floor if three things were involved….lots of earthy color variation, light colored grout, and a herringbone pattern. Oh, and not shiny. So four things. Knowing exactly what you want is a good thing, right?
My desire for a brick floor started a few years, back when I was spending all my free time on Houzz.com while designing our new home. I found a few pictures of brick paver flooring on there that I really, really liked.
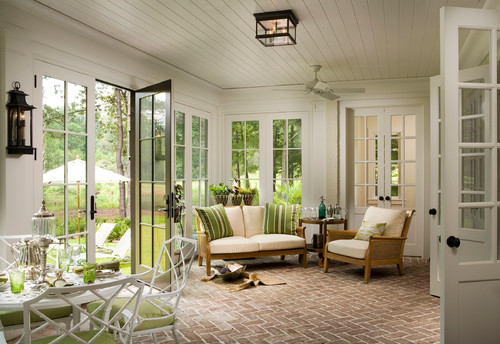
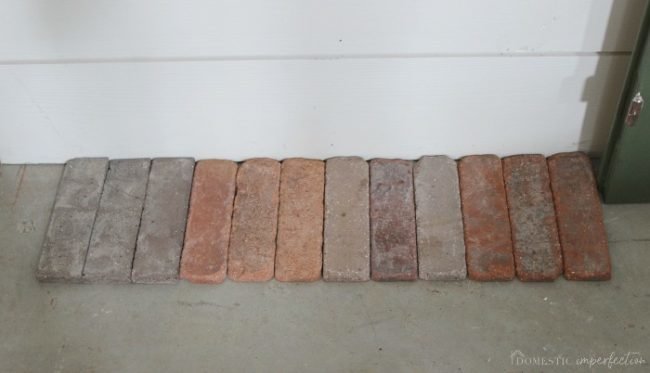
I ended up choosing the reddest one, Castle Gate. I really didn’t love the sample, but according to the pictures online it actually had a ton of color variation. So I ordered 27 boxes and hoped for the best.
Luckily it arrived with all the color variation I had hoped for. Whew!
Then all that was left was to get started!
So Adam and I chose not to DIY this project. We seriously considered it and I know we could have done it, but in this case time was more valuable than money. Laying a brick paver floor would have taken us FOREVER, and the bid for labor only came back at $900. It was kind of a no-brainer, especially considering that we couldn’t use our washer and dryer for however long this project took. We’re a big family and I do laundry every single day, I need those babies functional and not sitting useless on the porch.
Alright, so the first step was an acid wash, which I have one terrible picture of…
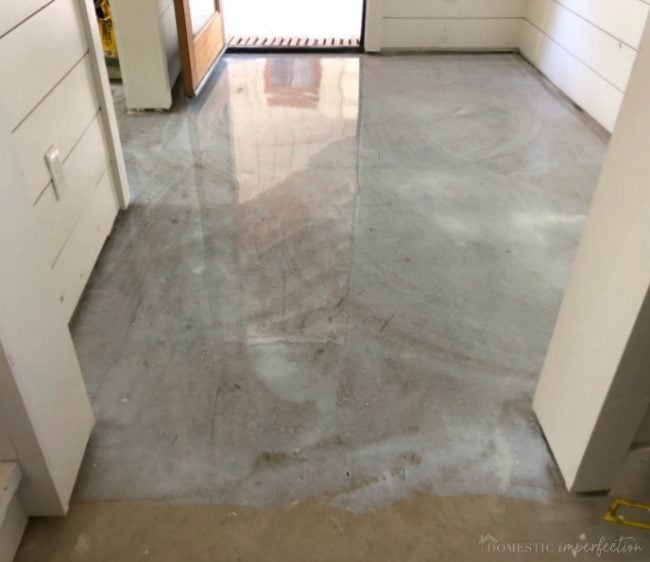
This is not a step most people should need to do. We had previously sealed the concrete floors though, and the sealer had to be removed so that everything would adhere properly. It sounds a little scary but isn’t actually a big deal, Adam and I did an acid wash in our garage when we epoxied the floor.
After the acid has finished its job, they added a thin layer of *something* to the floor. I honestly have no idea what it was and didn’t ask…I assume it was either for better adhesion or making sure the floor was 100% level.
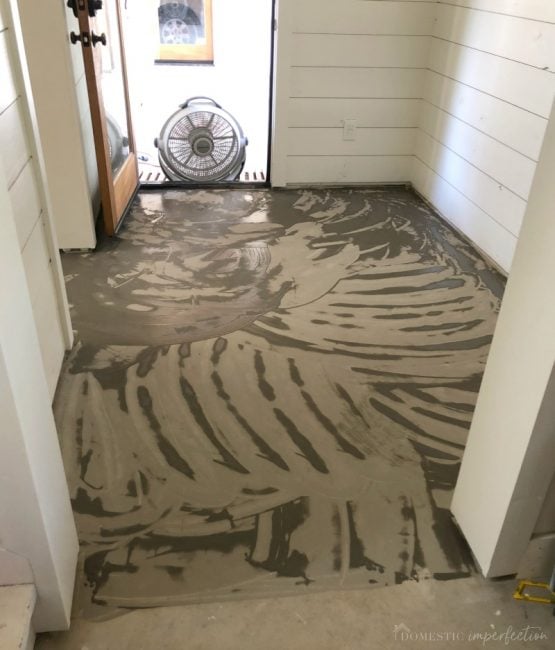
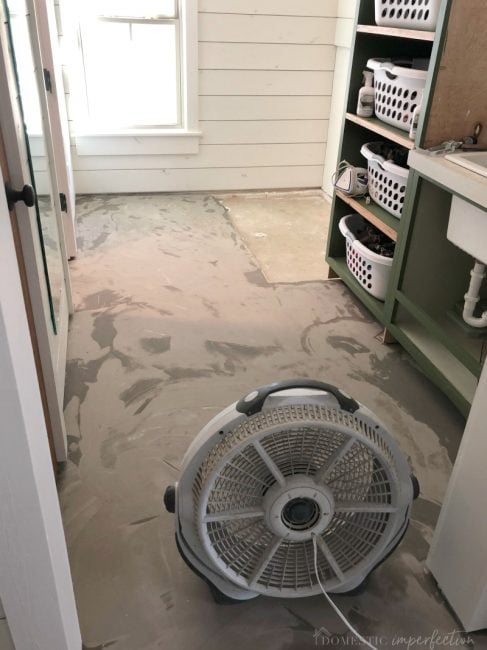
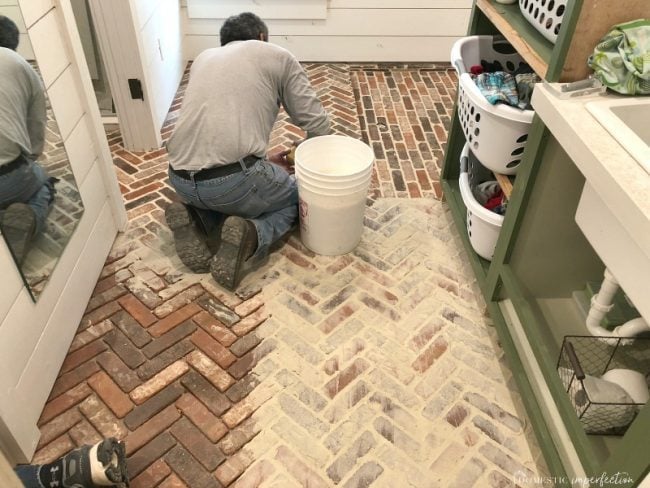
And then they started laying the bricks.
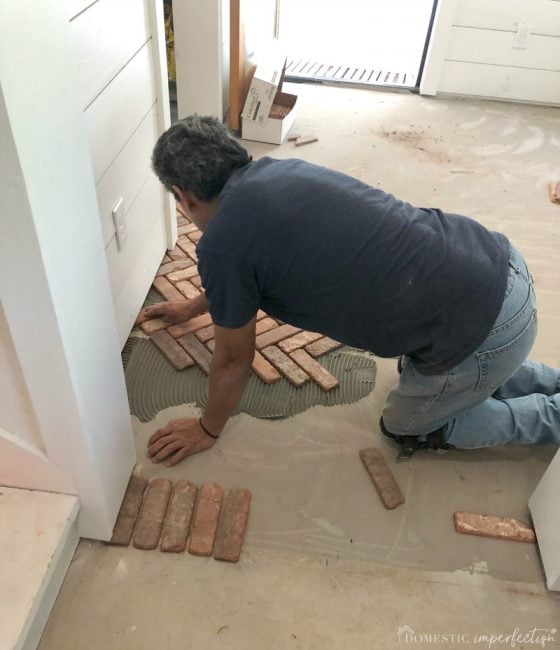
It took two guys two days, and I think I smiled the entire time. Not only because I could tell I was going to love it, but because I wasn’t the one having to do the work. As much I as I love DIY and hate paying for things, sometimes it SO NICE to just write a check and not have to slave over a project.
Anyway, here it is after all the thin brick pavers were in place.
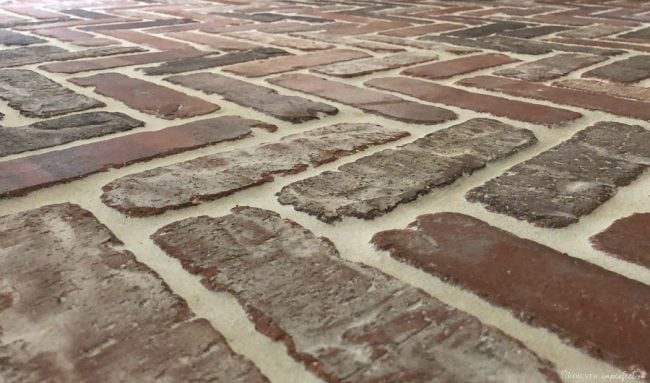
Next came the grout. I wanted something in the white family, something that would give the bricks some definition without being too bright or new looking. I ended up choosing color called antique white, and it was a perfect choice.
After the grout was dry it was time for the very last step, sealer.
Here is the thing about sealer…it usually makes things shiny. Even if you get a matte sealer, it often still looks like there is a plastic film over the top. I wanted my brick tiles to look completely naked, but still be resistant to all the stains that my family will inflict upon it. On my facebook page a few months ago a reader recommended Laticrete products, and after doing a little more research I bought their most hardcore and expensive sealer, Stonetech Bulletproof.
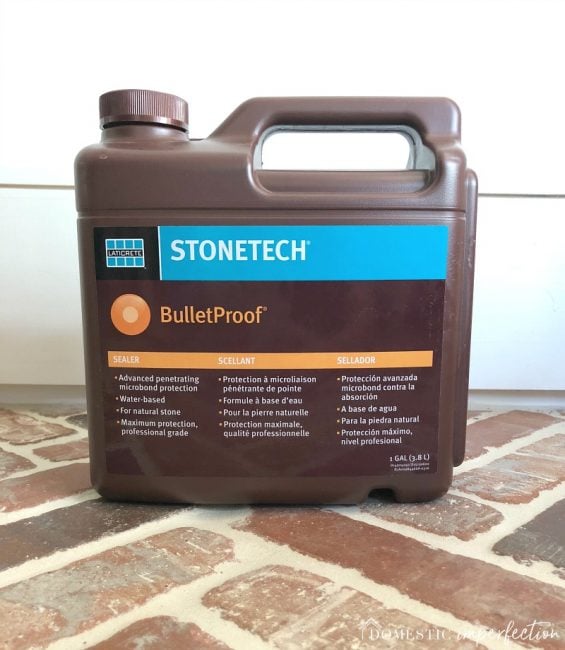
I’m happy to say that this stuff is amazing. It goes on like water and the bricks legitimately look naked…no shine, no film, no color change whatsoever. It works though, when Adam and I were reinstalling the bathroom toilet we tilted it too much and tons of that super blue toilet water (the kind you get from adding cleaning stuff to the tank) leaked all over the new floor. I freaked a little, convinced my white grout was going to be forever blue, but it just sat on top and waited for me to find a rag to soak it up. I think I’m going to reseal the other bathrooms with this stuff…four boys means I basically need rubber floor mats around the toilets in our house.
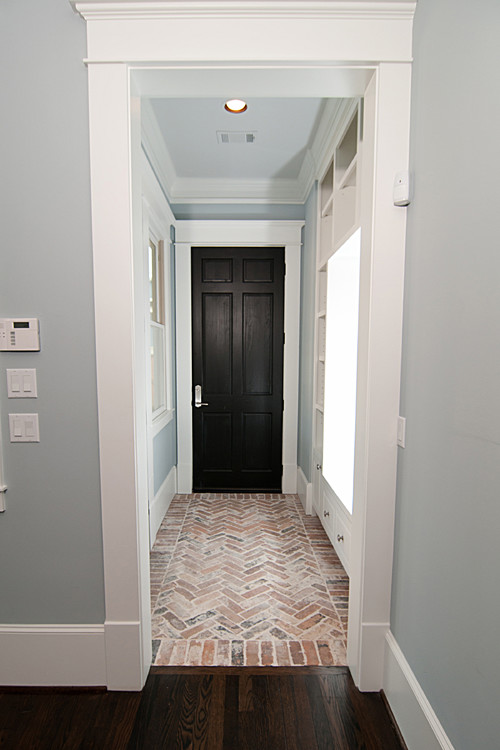
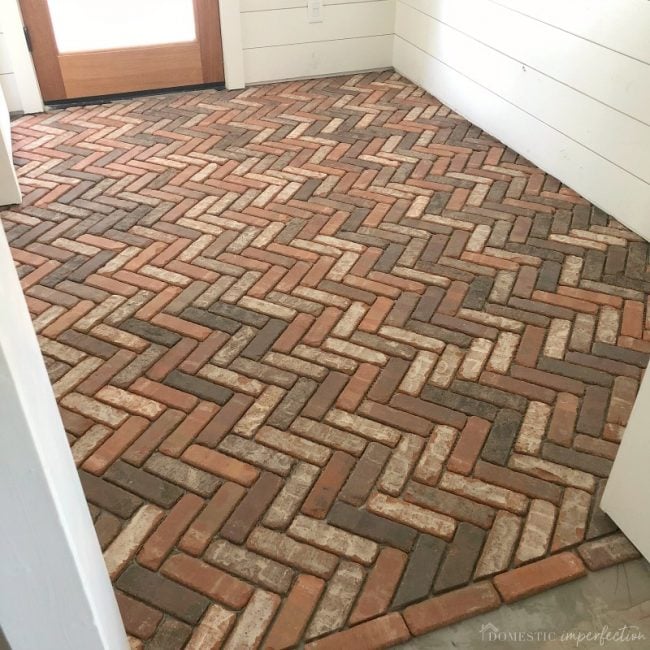
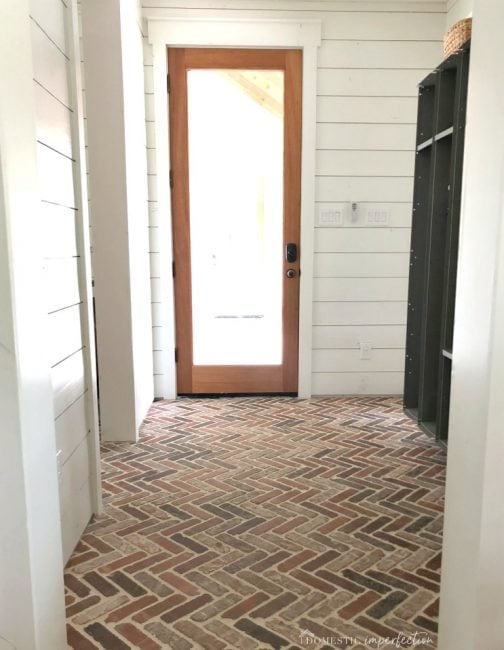
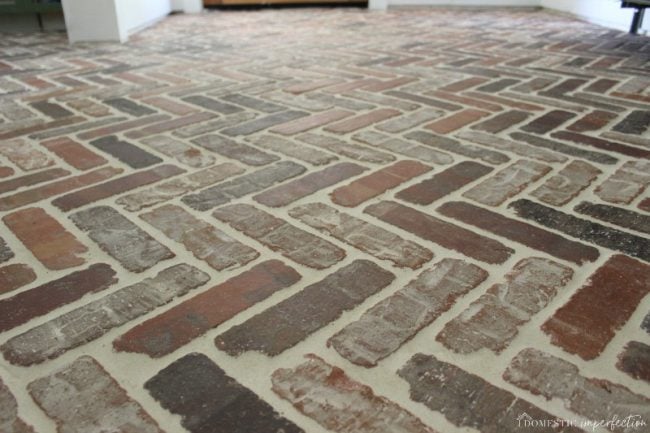
Anyway, enough explanation… let’s see some more pictures. Here she is!
(I photographed it a few times to try and get an accurate representation of the color, it changes a ton based on lighting and time of day.)


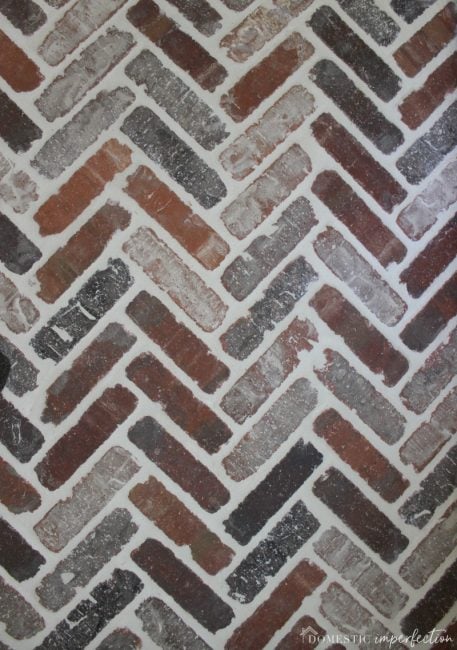
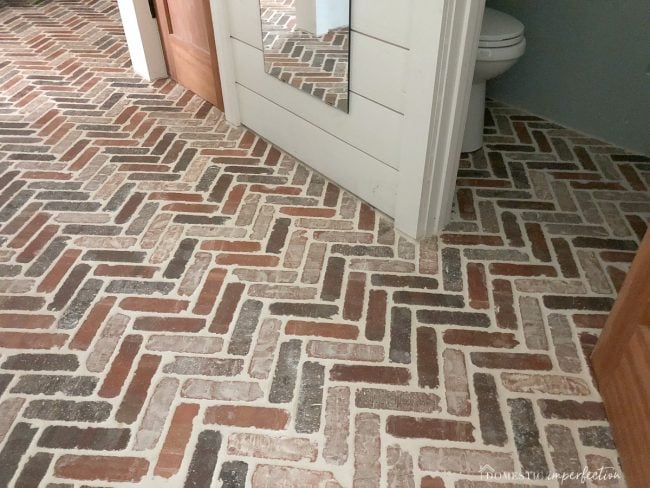
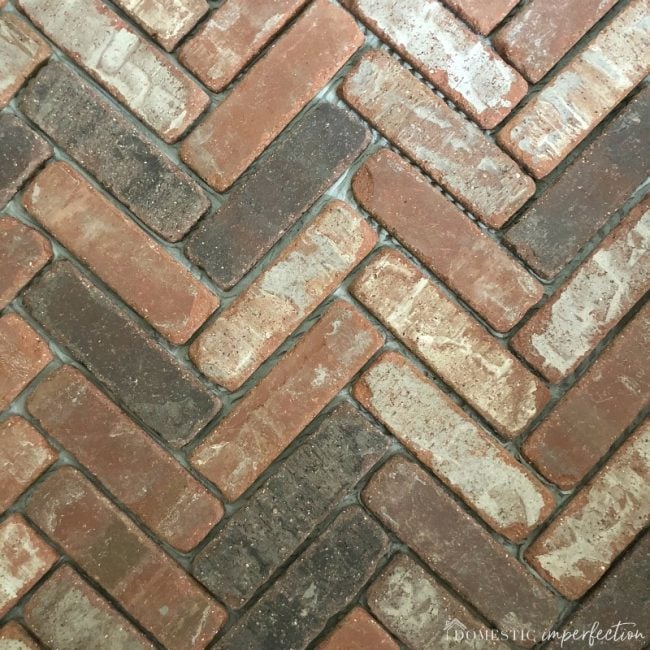
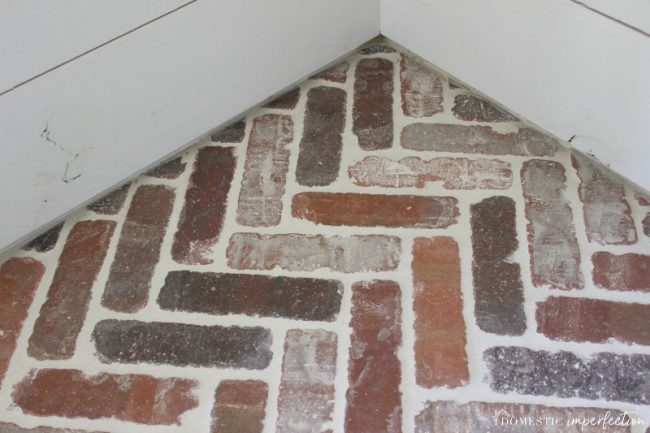
The men I hired did an amazing job, I wish all contractors were as detailed oriented and responsive as they were. The herringbone brick pattern makes this installation much more difficult than doing straight brick, and all the angled cuts they had to make looked like an annoying time suck. I mean, just look at the detail on this corner… (also, this photo is probably the most accurate color representation)
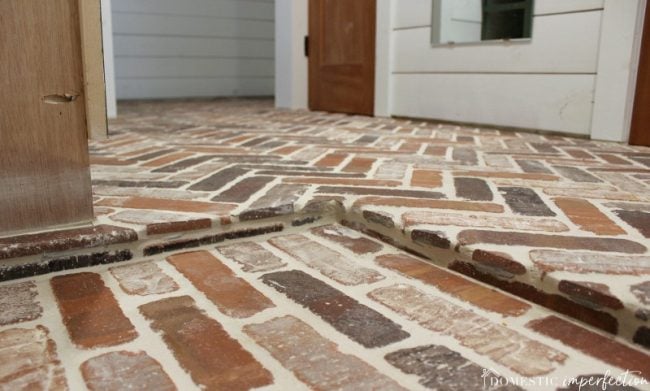
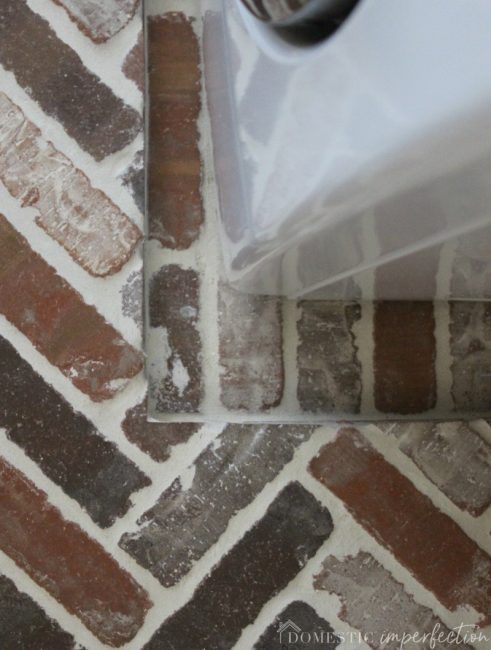
We still need to add trim around the base and told them that, but they still went under the shiplap and to the wall with perfection. Look at the detail around the washer and dryer inset…
Anyway, if you can’t tell I’m pretty thrilled with the final result. The laundry room and mudroom are finally coming together!
Alright, so let’s talk cost. As you can imagine, brick pavers are not the cheapest flooring option. Here’s the breakdown-
Cost of a Brick Paver Floor (200 sq ft)
- 26 boxes of thin brick pavers from Home Depot – $1,377
- 6 bags of Polyblend sanded grout in Antique White – $98
- Laticrete StoneTech Bulletproof sealer (1 gallon, I put it on thick and had a ton leftover) – $110
- Labor (included cost of acid wash and thinset) – $900
Total – $2,485 or $12.50 per sq ft.
I actually hadn’t done the cost per square foot math before now, and it hurts a little to see that number. Thank goodness I love it, right?
I posted floor progress on Instagram a few times and people had two main question, so here they are…
How does walking on it feel?
Expensive, haha. But seriously, not bad at all…no one in my family has any issues walking on them barefoot. The floor is bumpy but not uneven (if that makes sense), it’s not like I’m going to trip over a rogue brick or anything. They are brick though and not exactly forgiving, so standing barefoot on them for hours at a time wouldn’t be ideal, but this isn’t that kinda of room.
How do you clean them?
I’ve only had them a few weeks so I’m still figuring that part out. Finishing your brick floor with a good sealer (and reapplying as necessary) it probably the most important part of keeping them clean. Other than that sweeping or vacuuming needs to be done regularly, dirt does tend to get caught in the low part between the bricks. I haven’t mopped them yet, but I’m not scared of it either. The good news is that it’s a busy floor, so they pretty much will never look dirty, even if they are (or is that bad news??).
Anyway, I can’t think of any other pertinent information, but if you have a question please leave it in the comments below and I will be happy to answer!
UPDATE – CLICK HERE TO SEE HOW WE LIKE THE BRICK FLOOR AFTER A YEAR OF USE!
You may also like –
Paper Bag Flooring (yes, for real)
How to stencil a concrete floor
How to make a penny countertop (and what NOT to do)
My husband had an architecture professor who called the pavers “lick ‘n stick” bricks. ???? But regardless of what you call them they look amazing!!
Nice job! I have the same brick in my laundry room/pantry. I like it but it traps lots of dirt, so I’ve been thinking of sealing it with the shiny stuff. I’ve been noticing your wood doors. Can you tell me where you purchased them from?
Thanks and love your house!
You bet, all of the doors (interior and exterior) are from a company called ETO doors (https://www.etodoors.com). We actually bought most of them from the clearance section, it was $99 each for 8ft mahogany doors. We did everything online and never saw them in person before they arrived at our house! We mostly love them…though it’s been two years and we still haven’t finished sealing them all :/
Looks great! It’s not something I would have thought of doing.
I’m curious what you will think of it in a few years!
Also curious if you do use the sealer in the other bathrooms, let us know the results! That boy bathroom situation needs all the help it can get around the globe.
The boy bathroom situation is ridiculous…how hard can it be to get pee in a potty?! I actually told mine a few weeks ago that if they need to pee during the day to do it outside, no need to walk to the bathroom and make more work for me when they can walk out the back door. I still have two up and coming toilet using boys as well… eesh.
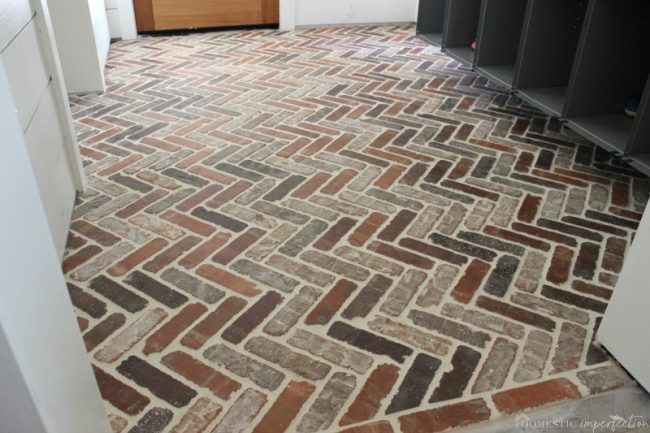
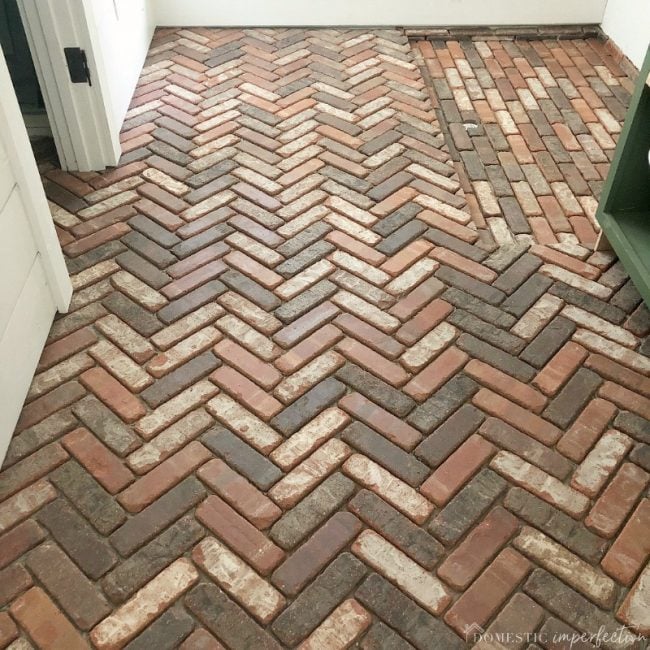
What made you decide to do the area for washer and dryer different?
I was curious about that as well. I love the pavers though!
I thought it might look nice/interesting to define a section that was already different (sunken) from the rest of the room. Well, that and sympathy. I think the herringbone pattern took way more time and effort than my tile guy anticipated, so when he asked if I wanted the sunken area to be straight or herringbone I told him straight :)
Hello,
This is beautiful! So are these real brick? Also I love the sunken area for washer and dryer. How did you come to do that?
Kathleen
WOW! That is seriously gorgeous! Instead of price per square foot, think of it as price-per-smile for each time you walk into the laundry room – with as much laundry as you do, that is s pretty cheap price :-)
With all the laundry I do I think the floor should be paying me, haha. I really don’t mind spending money and quality things that I love, sometimes it’s just hard when there are so many places your money can go. No regrets on this one though!
OMGoodness! I love this and now I’m trying to figure out where I can do it in my own house!
I love the floors! And I love that the sealer leaves them looking naked. It looks amazing. I can’t find a place for them in my house, but I think they will be on the list for the next house. :) Also, I see the edge of lockers in one of the pics… I’m dying to know how the lockers turned out! I have a place in mind for something similar. Can’t wait to see a post about them.
The lockers aren’t quite finished yet, but they are definitly in the works! I ended up having to buy them new and they were battleship gray, so they are in the process of being painted. I will definitly have a post about them when they are finished!
We have been wanting to do the exact thing in our laundry room for a few years. They look amazing and totally agree it’s money well spent on a tedious job like this!
$12.50 per square foot is not bad at all! I work at a flooring store, we do wood/tile/carpet and tile prices for our builder program start at $12.00/square foot and that’s with $3 allotted for material. I think that’s a very reasonable price! Also, it looks amazing! Love the color you selected and the grout color is perfect!
looks awesome great idea , thanks for sharing
I really want to do this on my porch and mudroom but sadly don’t have that kind of budget. I selfishly wish you would have DIY so I could attempt it. I have done some research but would have preferred one your step by step tutorials, especially for the grout process! It looks great and you should be proud.
Sorry I can’t help you with the DIY experience, but I read this post (a few times) when we were deciding whether to DIY the floor or not, and I’m sure you will find it helpful!
Oh, I am in loveeeeeeeeeeeeeeeeeeeee with these floors! They look amazing!
Hello! I know that you didn’t install these yourself, but do you know if your contractor used the Old Mill brand adhesive? We are very close to DIYing this exact floor in our pantry, and I’m not sure if we really need to use that thinset, or could go with a more economical one?
I’m almost certain that he did NOT use the Old Mill adhesive.
I think that you got a steal for labor on the pattern. Especially since they’re small tiles. So now you smile bigger.
I love the brick flooring. And the herringbone pattern. This is something that I can see in our future house! It will be interesting to hear how you like them in the future and if you would do anything different.
PS – great idea to have the washer and dryer set “IN” the floor to catcha any leaking water.
Oh my goodness… this is PERFECT! I love it so so so much! I want a floor like this in my house so bad!!!
It turned out beautiful
this is amazing.
We are a company in the UK who manufacture these types of tiles. would you mind if we shared this post on our website.
http://www.reclaimedbrick-tile.com
OK, these floors are perfection! I have been wanting this in our mudroom/pantry/powder room in the house we are building. We live in MN where the mudroom really is a mudroom with slush and mud. Would you still recommend? I have three boys so I worry about the pee in the bathroom…Any insight you have would be greatly appreciated!
The sealer we used works really well, and if you put it on thick enough it I think it would be fine. I wet mop mine with no problem, and liquids (yup, pee…I’m right there with you!) beads up. I would probably just reapply it after each winter. It goes on really easily and is invisible (not even the slightest bit shiny, which is why I love it so much).
I just wanted to say that this helped SO much and I’m so glad you shared the prices of everything with us! We’re in the process of designing our new build and I have to have a paver mudroom/laundry!!
Yours look flawless btw!!!
Hi! We just installed thin brick on our mudroom floor and laundry room, and our tile layer brushed the grout all across the bricks and did wipe with a sponge afterwards. However, the brick color barely came through and they look way too creamy/white all over. He came back again this week to wash it again (after about a month or so since laying it) and he also used a wire brush for a little bit, but it still doesn’t look at all what it’s supposed to. How did your contractor get a lot of the film from the grout off the bricks? Is there a process or product you recommend? And thanks so much for the sealer recommendation! I have 3 boys so definitely going to buy that! But not before I try to get the color fixed :/. Your is beautiful!
Thanks for such a detailed post on this! We are considering doing brick pavers flooring in our kitchen, but I’m worried about my feet hurting while cooking…any thoughts?
Looks great! Do you know what size grout lines were used? Pre grout they look small after grout they appear to be larger. Assuming due to the rounded edges of the brick?
I am also thinking of doing this in a mudroom and bathroom in an old farmhouse. Now that you have had it for a year, what are your pros and cons?
I love the look of this and excited to do it but wondering how easy it is to keep clean from sweeping to mopping.
Wow!!! They are absolutely gorgeous, and add SO much character, colour, texture and style. Am I correct in thinking that this mudroom is right at your front door? It really gives a sense of age and permanence to your home. Love!
I love your brick flooring and the information you have included. Thank you!
love ur work can I pls tell where do u reside I’m in ny now, want the address of ur contractor to do mine too.
Did you seal your bricks before you laid them?
Question about the sealer: the manufacturer states to apply a little, let it sit for 10-15 min and then – wipe it off? Did y’all really wipe it off? I don’t see how this matters on a brick surface?
Thanks!
Tanya
These floors are just what I’m wanting in my laundry room! Did you have to reenforce the tiles under the washer and dryer? Or was it pretty sturdy on its own? I would just hate for them to crack under weight!
I just got a quote for $20k to have this done in my mud room and kitchen. But your post was encouraging. I’ll keep shopping around.
How have these held up? Any cracking???
They have held up great, no cracking. Here is a post I wrote about how the floor is doing a year after installing it -https://wildfireinteriors.com/brick-floor-review-one-year-later/
Wondering how your floors are still holding up? I am wanting a brick look but not sure if pavers would be thick enough to hold the weight of a bed/people without chipping or cracking? Any thoughts. Thanks for tips on sealer!
Did you put this in your bathroom too?
Your floor is fantastic! Congratulations!
I once had a farmhouse style house with brick floors (oversized, handmade). It’s always been my very favorite kitchen of my life!
Can you tell me what size bricks these are?
Thank you so much for posting about the brick flooring. They are absolutely beautiful! I was curious if you still like them & how you ended up cleaning them? I use a steam mop on everything, so was very curious about what you thought about that before I make the leap.
Thanks again for your post, it was so helpful.
Tyra
This looks really good. So good we did our mudroom Reno with these bricks. We did it all ourselves because the quote to have it done was $3k just for labor! It turned out great so far. On to using the bulletproof sealer next.
Thanks for the detailed post to spur us on!
HI! Thanks so much for this post! I am also curious about the grout process. It looks like the grout was spread all over the tile, but then ultimately, almost all of it was removed. Is there any clarity you can provide on how this was done? I like the idea of an “overgrout” to fill in the nooks and crannies and smooth out the brick a bit but I dont want to change the look of the finish.
You are exactly right, they covered everything in grout and then removed it with a wet sponge. They removed it well and there wasn’t any cloudiness, but I have seen brick where it wasn’t removed as well and there is a haze. Then I applied the sealer. I hunted long and hard for the one I used because I didn’t want it to change the look (make it dark or glossy) and it was perfect. So just make sure they scrub off the grout well and you will be good to go.
What color brick did you use? Castle gate looks like it’s the type of brick as it isn’t one of the color selections?? Thanks!! Can’t wait to do this in my laundry room!
Castle Gate is the one I used; I bought it from Home Depot. Here is a link… it’s on sale right now too!
I keep coming back to your post and pictures on this beautiful floor. We are going to do this soon and I really appreciate all of your good pictures and comments! I also wanted to ask you what paint color/brand you used on your walls?
Thank you! If you are asking about the shiplap walls in the mudroom, it is Alabaster by Sherwin Williams. The walls in the rest of the house are Shoji White by Sherwin Willaims with Alabaster trim.
We just did this in our laundry room and it turned out so good! so glad I came across this blog because this was exactly what I was envisioning! Question, you said you were going to use the sealer in your bathrooms next? Did you end up doing that? What type of tile do you have? I’m wanting to use this for our bathroom floors and for our master shower but was unsure if it can be used with any tile or how that works? Thanks!
(sorry if this posts twice I was unsure if the first one I submitted went through because I got an error after)