
Industrial Pipe Kitchen Shelving
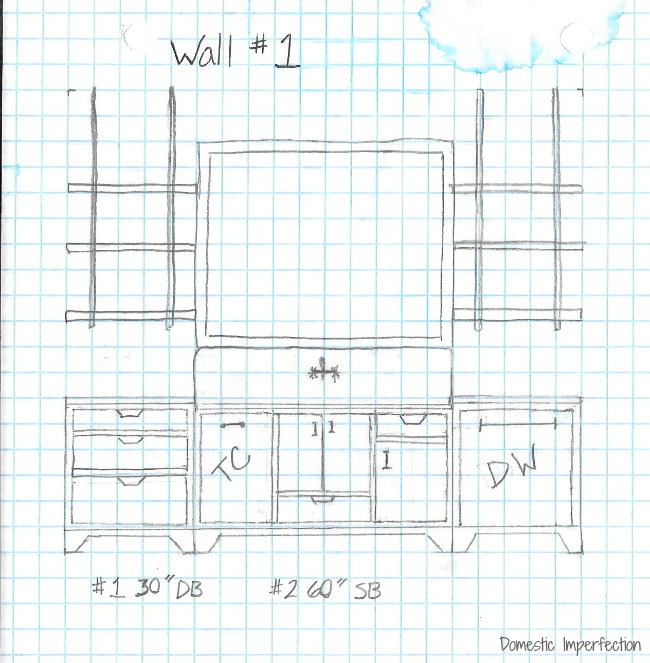
From the time we started designing our house I knew I wanted some open shelving in the kitchen. Not all open shelving (because it would look cluttered), but just enough for our everyday dishes. We put open shelving in our last kitchen and really loved it, I liked having the dishes out in the open, and since we used them everyday dust was never an issue. So Adam and I designed the sink wall in the new house to have a big window with a view and shelving on either side.
I’ve always loved industrial pipe shelving, so that was the plan all along. I know it’s not a new idea and you’ve probably seen it done a million times (particularly on Fixer Upper), but whatever…love is love.
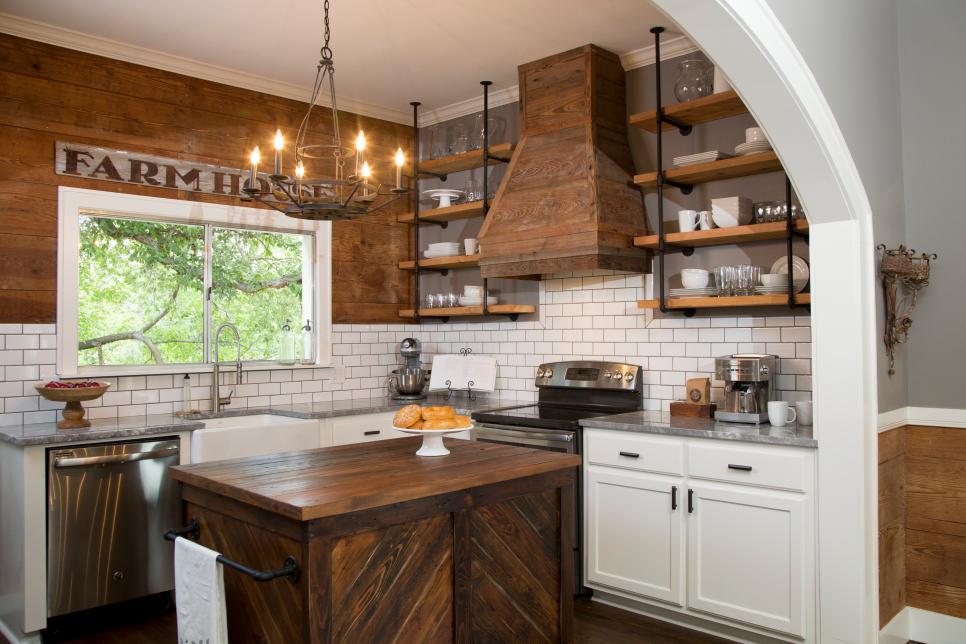
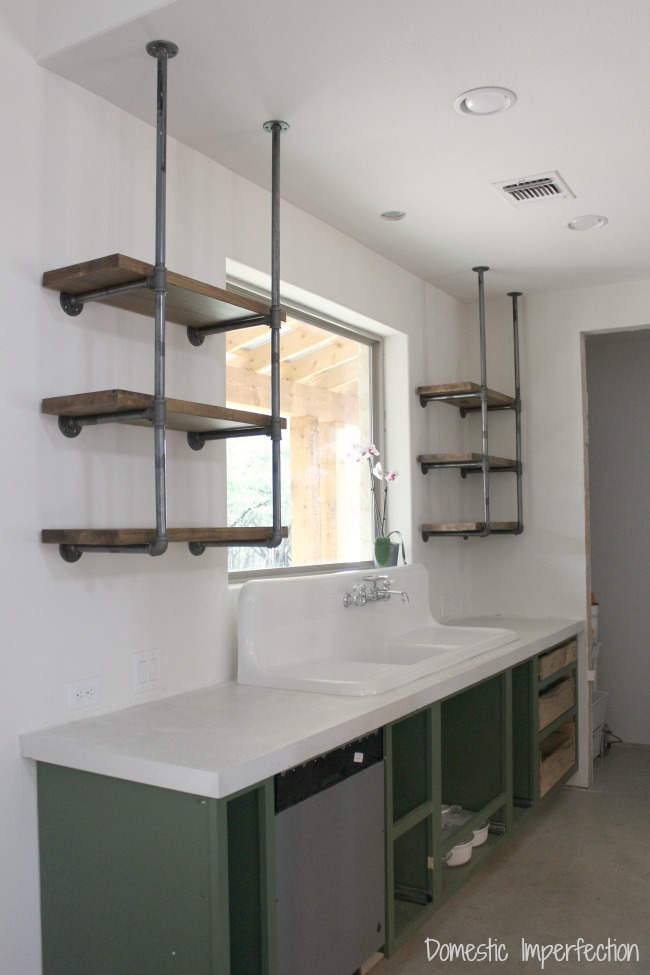
So that is a pretty finished kitchen with good lighting and a better photographer… and here is mine before the shelving.
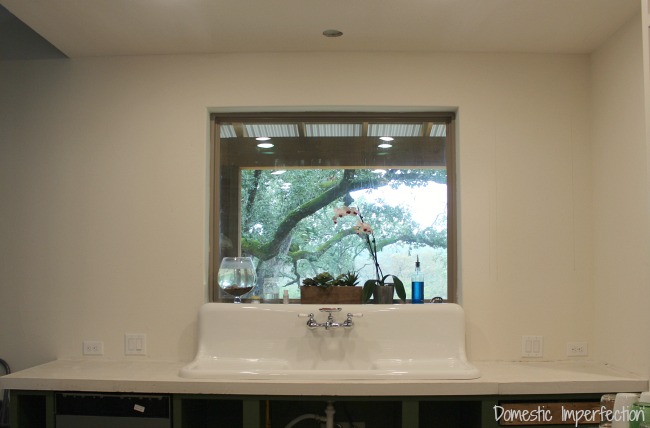
Not exciting or pretty…though we did kinda nail the view part. It’s not easy to find a grove of moss-covered oak trees in our dry part of Texas.
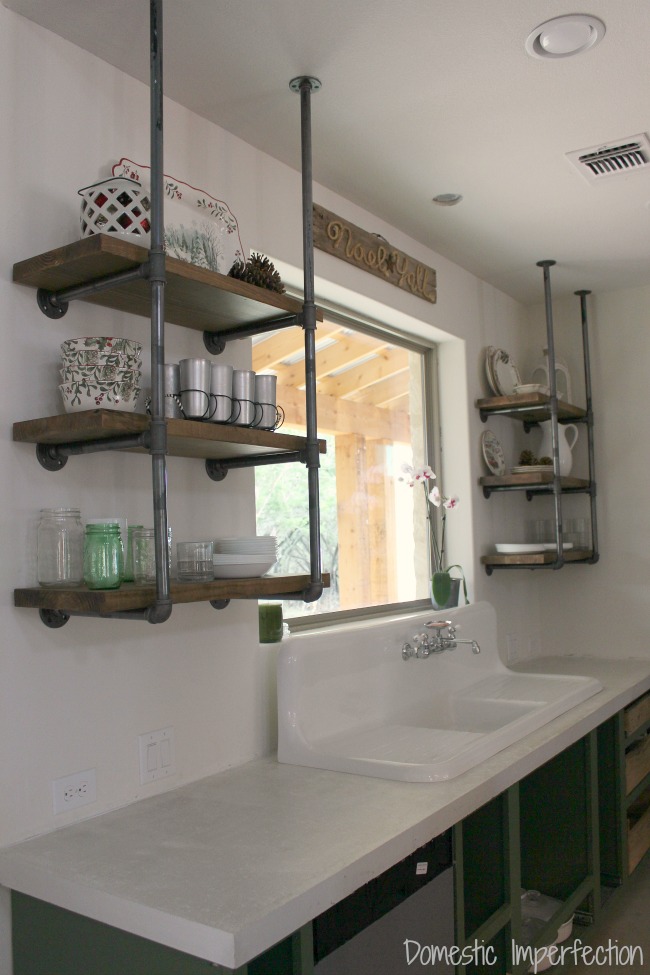
Here is the same wall after we added the shelving…
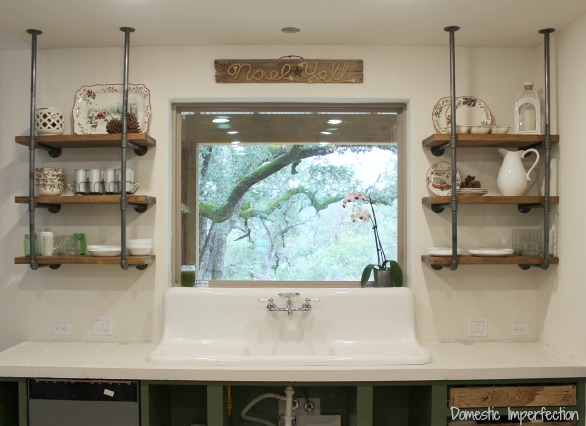
So much better! (Although the lighting and photography could use a little work).
So here is a quick tutorial on how to make the shelving –
First you will need supplies, which all come from the hardware store.
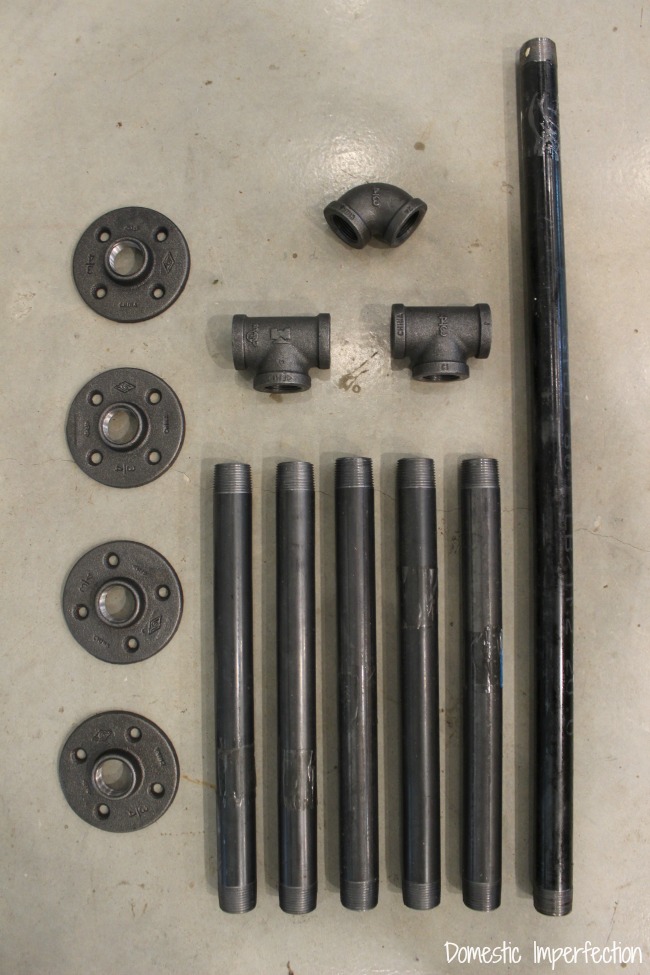
You will need –
(we used 3/4 inch pipe)
- four flanges (4.30 each)
- two T fittings (2.71 each)
- one 90 degree elbow (2.07 each)
- five 12 inch nipples (4.71 each)
- one 24 inch nipple (6.58 each)
Keep in mind that this is for ONE side of ONE shelf, so you will need to double the recipe for one full shelf (and quadruple it for two shelves, like we have). The total price for both of our shelves, including lumber, was about $240.
You can have the pipe cut to any size your heart desires, and that was our original plan. However, 12 and 24 inches are standard sizes that they have in stock, so I decided to go with those just in case I screwed it up and had to return them. You can return standard ones, but not ones that are custom cut (and they’re relatively expensive, considering).
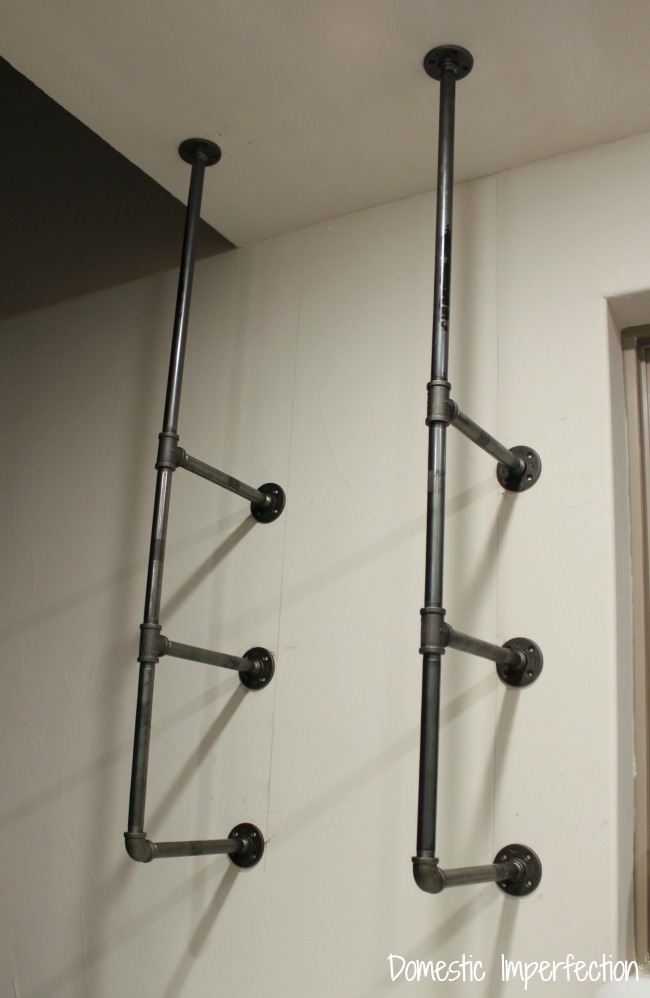
Next we hung them. To do this Adam first had to add some blocking in the ceiling so they could support themselves and the weight of dishes. If you make these you can hopefully use a stud that is already in place, but we didn’t have any wiggle room with these so we had to take the extra step. After that is was just a matter of screwing them in and making sure everything was level.
For the shelves we used a pine 2 x 12, cut it to size, sanded smooth, and stained and sealed. Here are the products I used –
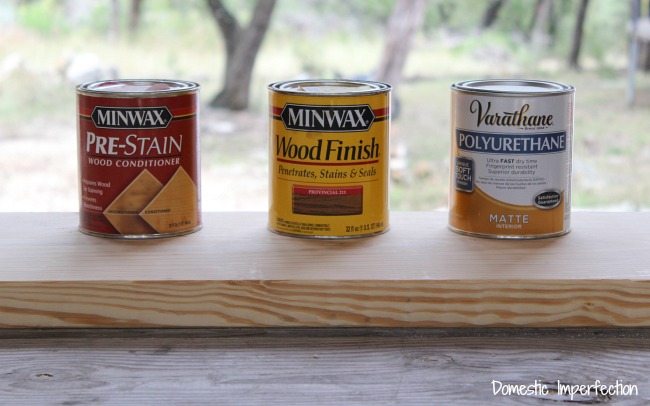
If you use pine it is SUPER important to use pre stain, it gives you a nice uniform finish instead of the blotchiness you would get if you skipped the pre-stain. Here is an example from years ago…
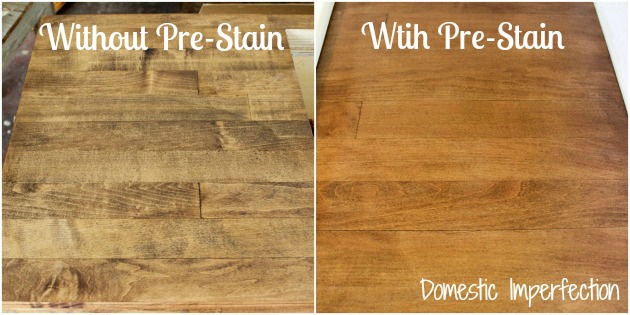
That is actually maple and not pine (another hard wood to stain), but you can clearly see the difference.
Anyway, I then used two coats of stain and sealed them with the matte sealer.
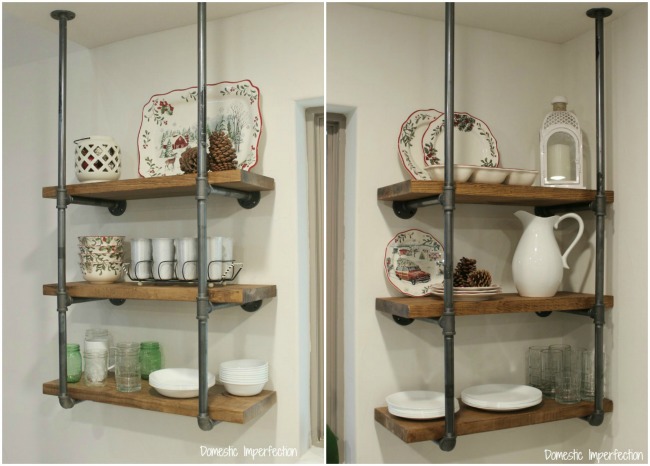
Here they are completely assembled…
I love them. I love the way they look and that we are one step closer to a finished kitchen…and I especially love that I have a place to put my dishes that the toddler can’t reach.
I loaded the bottom shelves up with all our cups, plates, and bowls…but it turns out that I don’t actually own that many. It’s everything we use and need, but it’s pretty much just two shelves worth. So the rest of them I went ahead and decorated for Christmas, and now – for the first time ever – I’m a step ahead when it comes to the holidays.
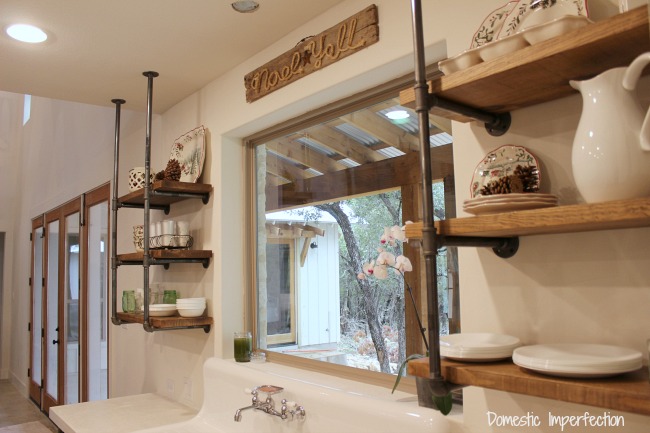
So there you have it, another thing crossed off the kitchen to do list! There is still loads to do in the kitchen, on this wall alone we still have to tile, add window and sink trim, a light fixture, roman shade, and cabinet doors. But hey, the fact that we are getting anything accomplished with a newborn and three other kids in the house is good enough for me.
This is gorgeous! I’ve been following your blog for a while now, since the blueprints for this house. I have to say, though I typically prefer full two stories over one or one and a half, I LOVE your house. I want to live there (not in a creepy way-though I’m small and will fit in a closet :) ). If we ever get the chance to build, or even get a new house to redo, yours will be where I look for inspiration.
Looking good, Ashley! I, too, am impressed as hell that you are progressing and even POSTING with 4 under 6, and especially the newborn! How are you all doing/feeling?
Bravo to another successful project. I’m just wondering what color is your super cape? I mean 4 children and all you and your husband have accomplished. It’s amazing!
That view is AMAZING! Oh wow! The dishes would be a delight if that were my view!
That view is AMAZING! Oh wow! The dishes would be a delight if that were my view!
I love this look. I don’t think it will ever get old. The house is really coming together!
The dish with the car made me particularly happy. Reminds me of the cars my family owns.
This is exactly the post I needed to see! I’ve been trying to decide between a industrial pipe sidebar and a more farmhouse style one. I’m REALLY leaning towards the pipe now that I see it in your kitchen! Also congrats on the new little guy!
Us RUDE [reusers of Unloved Discarded Excess] Guys from Australia discovered your blog via our FB friend in the UK. She posted your brown paper flooring. Look forward to following Domestic Imperfection.
I love how your home is coming along.
I liked these decorations a lot, it was a little rustic but chic at the same time.
Awwww… these are gorgeous!!!
Noel Yell? Weird. What does that mean? Oh, it probably says Y’All. Haha I had to look at that sign in each picture before it clicked for me. I like the shelves and have been wanting to try open shelving since you posted about it in your last place. Do you worry that the wood will be pushed off the rods, or did you secure it in some way? I was thinking if the wood was routered to cup the shelf brackets, this would help prevent it from moving side to side.
I had the same issue as Cece here… Noel Yell? Is that a southern thing? Oh… y’all! Tee hee.
Question for you about the shelves: Do you have issues with the wood sliding around on the pipes? Did you glue them to the pipe or otherwise affix them? Issues with little boys trying to hang on to them as they climb up on the countertops and dislodge them? Not that my 5 year old son would ever do that, no, never… ;-)
Good luck with four kiddos! I wish I had that many, but alas, the husband is not on board. I suppose I do enjoy my sleep though… tradeoffs? Keep up the excellent work with this blog (when you have time!). Love reading it!
Ha, yes…Noel Y’all. My mother-in-law gave it to me as a Christmas last year. As for the shelves, the wood is really heavy and sits perfectly between the raised fittings oh the front and back, so they aren’t going anywhere. If you wanted to be extra sure they won’t move I think a bead of clear caulk on the top of the pipe would keep it from moving and be the simplest solution. That being said, if a little boy is determined to move them, then they will move. All my kid dishes are going in a drawer in the island though, so mine don’t have a reason to get on the counters…not that that means they won’t! And thanks about the kiddos! I think that if Adam wanted to keep going I would be on board, but he is done too…surgical measures are being taken. I think if men had to be pregnant and give birth no family would have more than one!
From the time we started designing our house I knew I wanted some open shelving in the kitchen. Not all open shelving (because it would look cluttered), but just enough for our everyday dishes. We put open shelving in our last kitchen and really loved it, I liked having the dishes out in the open, and since we used them everyday dust was never an issue.
Beautiful project! Clever, handy and quite impressive. I love the rustic feeling it brings up. Industrial is trendy lately. :)
Very cool project!
Hello Ashley, I have never seen this type of shelf anywhere and it looks awesome. I will use this idea in my kitchen and know I am sure that it will increase the beauty of my kitchen. My wife will also love this idea. Thanks for sharing this post. Keep sharing such more post…
Very beautiful!
This is amazing! Thank you
Very good idea!!! Thank you!
That was amazing. Can i ask a question to you? thanks
goodsite
this site is very interesting
thankyou
Thank you for giving me the oppurtunity to comment on this very interesting site
Thank you for giving me to commeny on your site which is very useful for me
this site is very interesting
thankyou
thank you for sharing
Thank you because your sharing
How do i get more information about this? vielen dank!
thanx sharing informatiion article
terupdate. Nice Post! Thanks for sharing this information
good sites..
thanks..
kami menyediakan situs
Data Sgp terlengkap di dunia
GOOD MORNING GUYS
Amazing.. Nice
Thank you for sharing
Indonesia football gambling platform
Amazing.. Nice
Thank you
tanks bro welcom
hasil pengeluaran togel Dewatogel tercepat dan terakurat
Merissa, it was so good, I wish I had some to eat right now too! One of the reviewers of the original recipe said she made it with all purpose gluten free flour + 1 teaspoon of Xantham gum and it turned out great. Come tell us if you try it!water leak toronto
Great One….
Check my Website
thanks for sharing
poker online – poker idn yang terbaik dari kami , dengan adanya idn play yang memberikan dukungan kepada anda maka anda tidak akan ketinggalan dalam mendapatkan , berbagai cara telah kami berikan agar anda bisa menghubungi kami di sini ,
Very helpful