
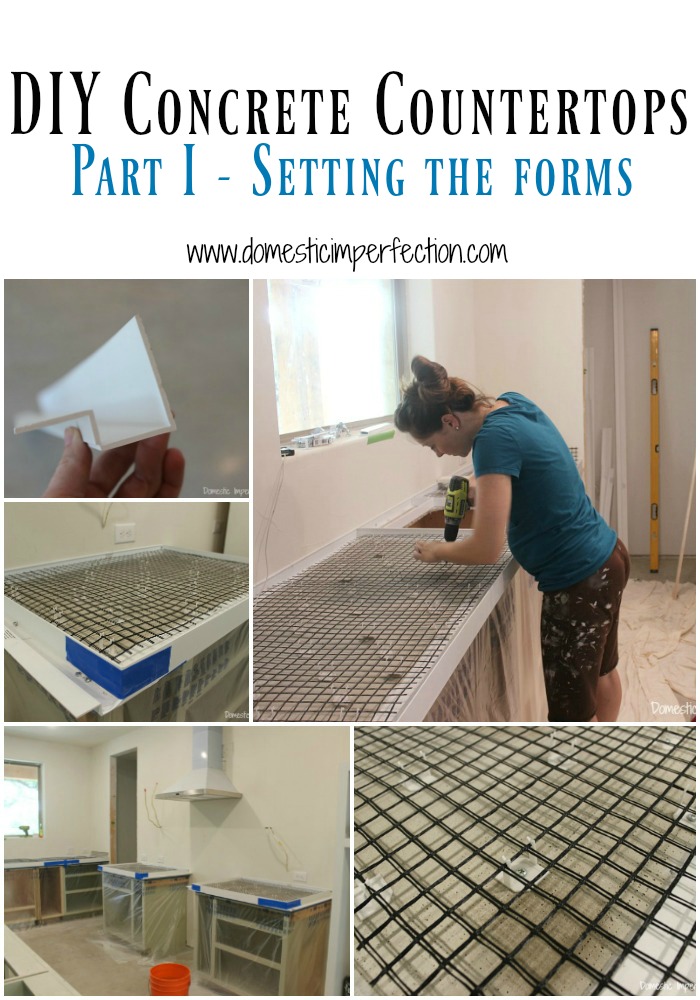
DIY Concrete Countertops, Part I- Setting the Forms
Well, we did it…we actually poured our own concrete countertops! Adam and I spent hours and hours (and hours) researching this before we did it. We read tutorials and watched YouTube videos and generally felt prepared and confident…but honestly, the process still didn’t go quite like we thought it would. Turns out no amount of research or reading can compare to actually getting your hands dirty. I already knew that…but now I know it better.
There are a lot of steps and information to share about this process, so I’m breaking it up into three parts so that the post isn’t crazy long and overwhelming. Today is the first part, which is setting the forms and prepping the countertops for concrete. This is the easy, non-scary part of this process, since there isn’t a time crunch (unlike when you are actually pouring the concrete) and if you mess up you can just start over (also unlike the actual concrete). Also, I realized while writing this post that I hardly took any pictures…I took lots of the pouring process and not much of the forms. Sorry.
For our countertops we chose to do white concrete. I fought concrete for a while because I really wanted white quartz countertops, but the price of quartz is kinda crazy. I knew I needed an alternative, so once I discovered white concrete was a thing (I was under the impression concrete counters could only be gray or stained dark) I was completely on board and pretty excited. After spending lots of time looking into it, Adam and I decided to pour in place countertops was the way to go. There are two main ways to do concrete countertops, you can either pour in place by building forms directly onto the top of your cabinets, or build forms separate from your cabinets and then transfer the slabs to your kitchen. I wanted to pour in place because it seemed more user-friendly, plus doing it this way created a solid surface without seams.
After looking around at our options we decided to use supplies from Z Counterform to do ours. After we decided to use them I sent them an e-mail to see if we could barter advertising (aka, a tutorial) for supplies, and they agreed. So while this is a sponsored post, I would have used Z Counterform and blogged about it either way.
Alright, let’s get started!
So here are the supplies you will be using to make your forms…
Durock (cement board)
Z Counterform Edge Profile
Chop saw
Fiberglass Mesh
Z clips
Drill
Screws
Caulk
Tape
Dropcloths
If you are doing an undermount sink (we didn’t) you will also need…
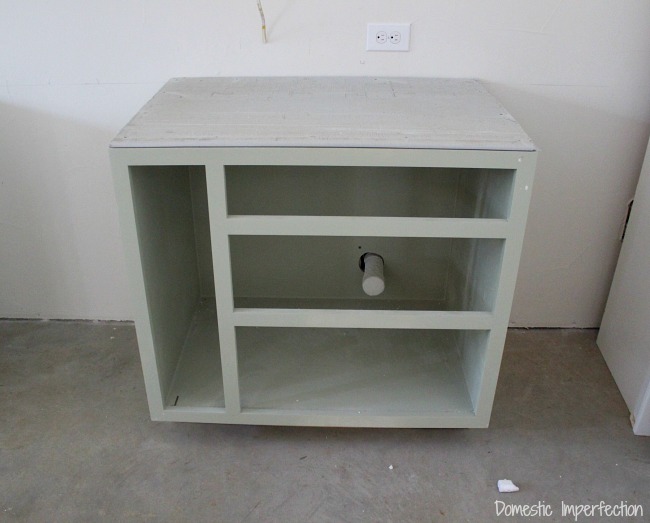
Step one – Attach Durock to the top of your cabinets
This is the material that Z Counterform recommended to use and we didn’t question it. You can buy it at your local hardware store and it runs about $10 for a 3 x 5 sheet. To attach it to your countertops you cut it with a razor knife and secure with screws.
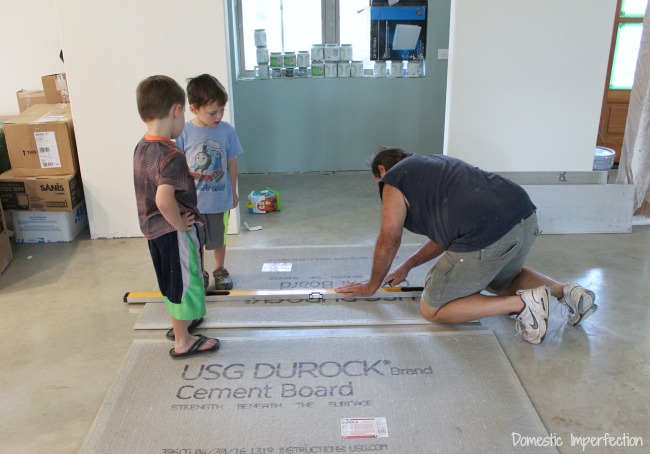
Make sure it overhangs your cabinets by a 1/8 inch or less so that you can attach the edge profile.
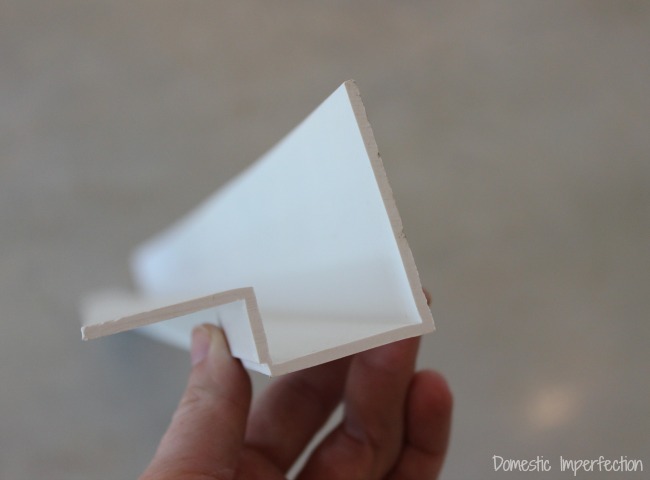
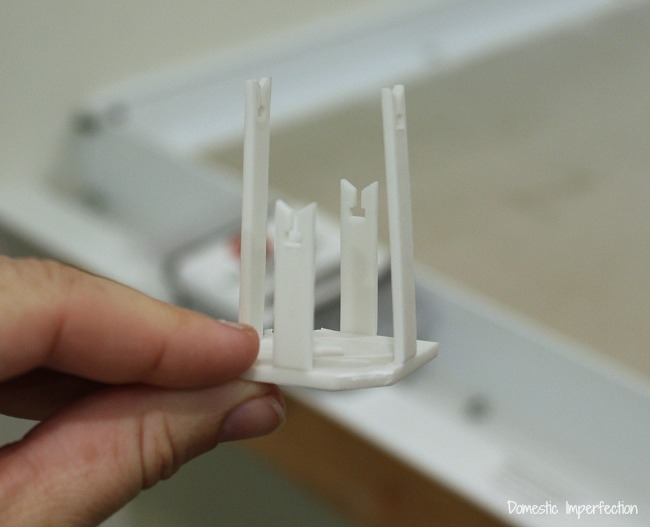
Step two – Assemble the edge profile
This is what really sold me on using the Z Counterform system for our countertops. They have a ton of different edge profiles to choose from, from bullnose to ogee to square (I prefer the clean modern look of the square).
For this step you measure you countertops, cut the edge profile with the chop saw, and attach to the Durock with screws.
*This would be a great place for a picture of the installed edge profile, if I had taken one. #fail
The edge kit comes with both the front profile and pieces for the back. The front pieces break off after the concrete is dry and the back pieces stay forever (you won’t see them, don’t worry).
Also, for the sides that don’t need an edge profile but need to stop flush with the cabinet (like on each side of the stove or fridge) you will have to get a little creative. We started by trying to attach a scrap piece of wood to the side, but ended up using extra edge pieces turned backward to get a nice flat edge.

Step three – Caulk everything and tape the joints
This part is very important. After all the edging is in place you will need to caulk each and every joint to keep the concrete from leaking once you pour. Don’t forget to caulk where the separate pieces of Durock come together and the top edge of the back pieces.
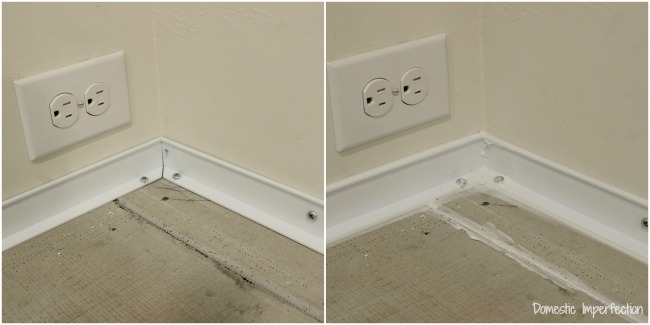
Where the corners meet at 45 degree angles will also need to be taped on the outside to keep everything square.
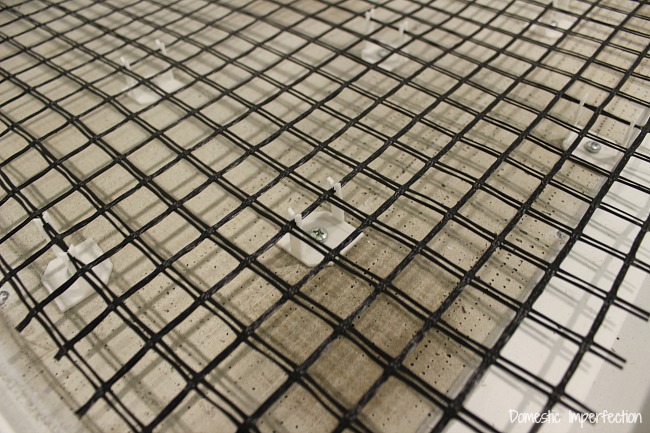
Step four – Roll out fiberglass mesh and cut to size
Z Counterform makes this part really simple by providing a roll of fiberglass mesh to reinforce the concrete (usually you would need to reinforce it with metal). You simply roll it out and cut it with scissors.
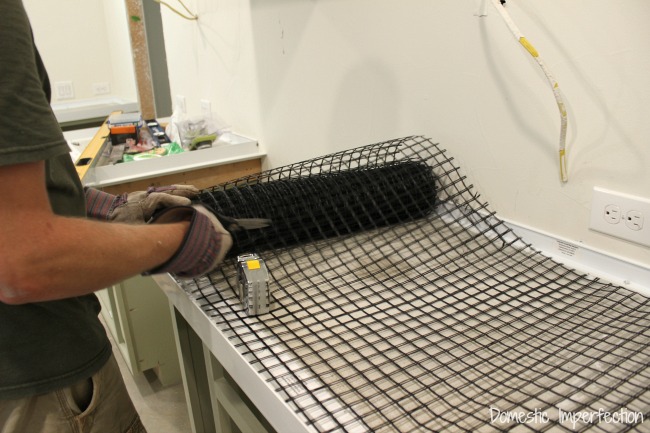
Special note on this part – Since the fiberglass was in a tight roll, make sure you install it with the curled edges facing down. If you install it the other way you may (or may not, it’s a gamble) be able to see them after you pour.
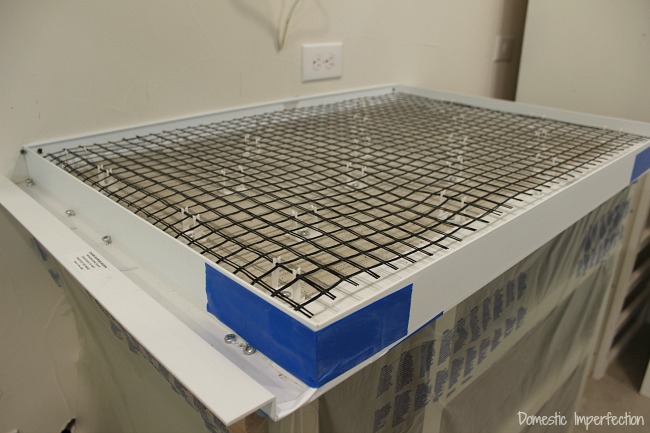
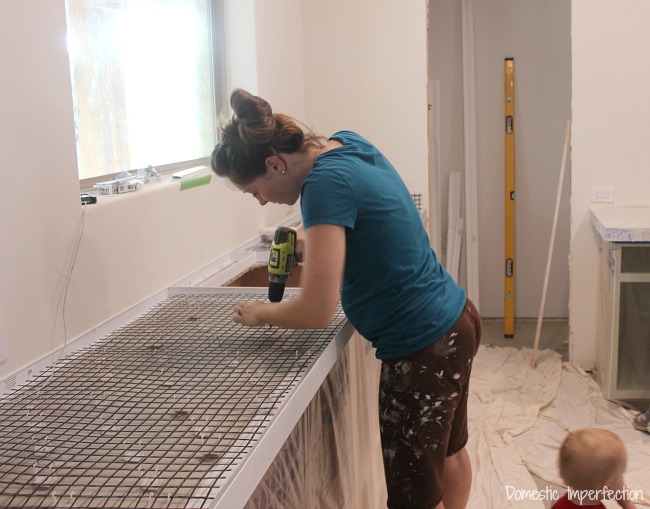
Step five – Attach the Z clips
The fiberglass needs to be in the center of the concrete to do its job correctly, so Z Counterform makes these little doodads called Z clips that make it really easy.
You break off long pieces (those are for thicker commercial countertops) and attach them to the underside of the fiberglass. Just space them out every four or five squares and screw the clips into the Durock.
Step six – Cover the cabinets and floor
Pouring the concrete is a very messy process, so you will want to protect both your cabinets and your floor. For this we found a really awesome product at the hardware store that already has tape attached to plastic, and the plastic unfolds and it plenty long once it is attached. Covering the cabinets took all of 2 minutes.

And that’s it, you’re all prepped and ready to pour! The next post will cover that whole process (this is where the fun and anxiety begin).
Continue to part II….
*This post is sponsored by Z Counterform
Ok, so this is a full action packed movie for me to read. I swear I heard the soundtrack while I read it. ?
Haha, well then this part is just the slow boring movie intro…the next part is WAY more interesting!
Sooo…I kind of accidentally had an image of its movie poster. I am not crazy I just welcomed the distraction. ☺ Enjoy.
Background: grey concrete. The letter Z (white) breaking through it, bits of grey going flying etc.
Below it white but smaller capitals: A TRILOGY
?????
(Please, pretty please do not be mean and don’t split the final into two as movie industry likes to do nowadays… ?)
I can’t wait for the next post! Quartz is soooo pricy, but I really want a solid surface!
I’m so excited to see the next part!
Did you stain the concrete ?
No
I’m excited for your next posts about this! You’re a brave lady. We just put concrete countertops (white w/ gray veining so they look similar to marble) in our new kitchen… but luckily, that was in our contractors scope of work, so we didn’t have to DIY. Whew. I was nervous just watching them do it, so I can’t imagine doing it myself haha. Can’t wait to see the finished product!
I’m so interested to see this process. I’ve seen it on so many posts but not actually how you do it.
I keep forgetting you’ve got #4 on the way! How are you feeling?
Honestly, we’ve been so crazy busy I’ve barely had time to even think about the fact that I’m pregnant….or maybe I’m just so used to being pregnant now that it feels normal, haha. I’m felling good though, but I’m only 29 weeks…the fun is just beginning :)
I just found your blog a week ago and have not stop talking about it since!! I was so happy to see the update on the kitchen situation!! I’m so excited about the next few stages and can’t believe I get to see it all happen. Thank you so much for this blog!!
You’re welcome, glad you enjoy it!
I wonder about the wight of the countertops… did Adam took any special adjustments to the cabinets or did he gave them more strength by building it “special solid and stable” so that they can carry the heavy load (PLUS the wight to come with the stored utilities)?
Is there anything to pay attention to (integrity of the cabinets)? Or will standard cabinets “do it” without a trace?
Greetings from Austria – I LOVE your blog and I’m really looking forward for the rest of this “thriller” :D
That’s a great question. Adam built our cabinets with much thicker plywood than comes with standard cabinets, so it’s not something we really thought about. I can tell you that the weight isn’t as much as it looks, most of the thickness on the final product is fake. Do you see the picture of the edge profile? The horizontal part is what sits on the cabinets, the it goes down, out and up, which makes it look like 2 inches of concrete on top when it is really only about half that.
Let me e-mail my contact at Z Counterform and ask him about standard cabinets and the weight, I’ll post his response here in the comments when I get it.
Ingrid,
Most cabinetmakers would suggest using 3/4″ plywood construction to support the weight of concrete. I went with a high grade 5/8″ ply because we are cheap… Also the pour in place Z forms allow for a thinner top and less weight due to the drop down edge profiles making for a thicker look. I would definetly suggest bracing standard 1/2″ cabinets. Particularly any over 30″ in width. It’s not hard if you have the top off the cabinets. Use dimensional lumber where you can and plywood where you don’t have much room. Brace along the top of the cabinet backs into the studs and between each cabinet from floor to top.
Haha, it looks like Adam and I responded to this at the same time. His answer is, of course, much more technical than mine.
I am so happy you are sharing this diy with us.
I too am interested in this idea and would be
very nervous about the process .
My husband and I just finished ours last week. They don’t tell you how messy sanding can be but in the end we are really happy with the countertops. Good Luck!!
Great post, looking forward to the next ones! We are building a house and are planning on doing concrete counters for our kitchen as well using the z counterforms, http://www.thevanderveenhouse.com
Seriously CAN. NOT. WAIT. to see these. I am super jealous of how great these are going to be.
I just wanted to say that I really, really appreciate how transparent you are about your sponsored posts and how you use them. It’s very refreshing and it’s nice to feel like I can actually trust your recommendations.
Thank you Liz, that means a lot. I promise you can trust my recommendation, sponsored post or not.
I have been checking your blog EVERY. SINGLE. DAY. because I’m dying to know if you’re having a girl or boy!!!! I’m on my toes here!! Finally decided to comment so maybe you’d feel a nudge to reveal it to your oh-so-loyal readers (no pressure=] )! Btw I think that it’s great that you respond to comments. Most bloggers claim they respond but they don’t!
I’m sorry to have to tell you that I won’t be announcing the gender….because I don’t know it. Don’t hate me! I posted an explanation on instagram last week – https://www.instagram.com/p/BIIs0-gg093/?taken-by=domesticashley
Love your blog and have been trying to talk my hubby into concrete countertops for awhile now.. maybe your posts will sway him!! But I am most interested right now in that product you used to tape off the cabinets– some kind of tape-backed sheeting? If you can give me the name of that product I’d be so grateful. We do lots of DIY projects and could really use a something like that (right now in the midst of a down-to-studs bathroom reno)!! Thanks and good luck!!
The sheeting was great and cheap, here is a link – http://www.homedepot.com/p/3M-ScotchBlue-24-in-Pre-Taped-Drop-Cloth-with-Dispenser-PTD2093EL-24-s/204344770?AID=11210757&PID=4003003&SID=irpq4p7cuf00equw001rw&cm_mmc=CJ-_-4003003-_-11210757&cj=true
You know what, that’s not the one we used…ours was longer than 24 inches. It’s the same product though and we bought it at Home Depot.
Yes, we went to HD today and saw the 2 sizes..the guy said they have a ton because people don’t know they can get the tape and sheeting together…true, I didn’t know either! Thanks so much and best wishes on a successful remodel!!
Looking great so far!
Thanks for partying with us this week at the Merry Monday link party!
We all hope to see you next week!
Kate | TheOrganizedDream.com
I’m excited to see what happens next! You are so brave to take on DIY concrete countertops. I’d love to try it (I’ll see how yours turns out first, LOL)
Thank you for linking up at the #HomeMattersParty this week!
Just joined your site, and I am soooo looking forward to seeing the final results of your kitchen and your concrete countertops.
What was the sq ft of the countertops?
These are great tips to follow!
Thanks for sharing!
Hello I was wondering if u used any plywood under the duroc cement board for support
No, just the cement board without plywood.
This is a great tutorial and love the honesty on how this can go. Seems like Z form makes this process less complicated.
What was the price vs quartz. You said you had or wanted to barter with the manufacturer of the edge forms etc, so were you strapped for cash or jusr really cheap? Im not understandung the reason for bartering on googs when quartz is apparently ungodly priced ( which it really isnt if you shop around) I am curious to see a breakdown of cost, instead of taking someones word for it! I also noticed the rangehood and the kitchen cabinets rhemselves, quartz woukd have been an upgrade, because you didnt spend eeally anything on the rest of tbe room.
That was an excellent tutorial, thank you for taking the time to write it. The form is most important part and it looks like you did an great job setting it up!
its very good .
Choosing between concrete countertops and black countertops in the kitchen depends on personal preference and the desired aesthetic. Concrete offers a modern, industrial look with customizable designs, while black countertops create a sleek and elegant appearance. Consider factors like durability, maintenance, and overall kitchen design to make the best decision for your unique style and needs.