
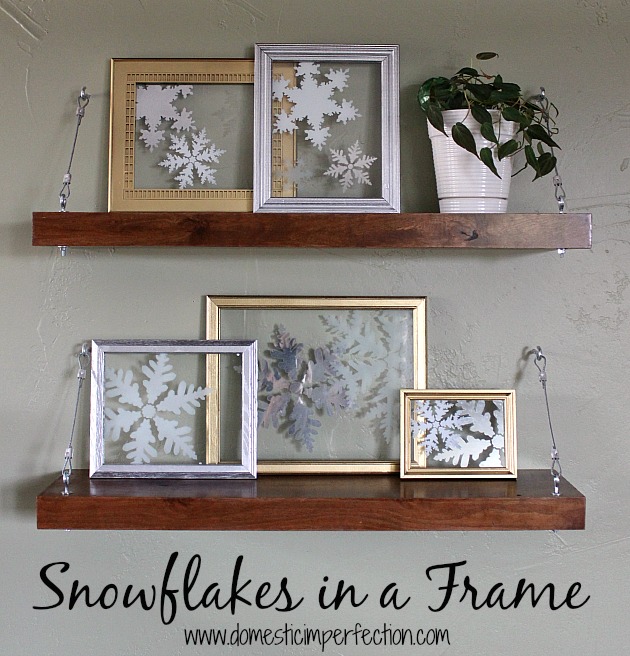
Framed Metallic Snowflakes
Today I’m sharing with y’all my third and final Christmas craft. This one is a little more difficult than the other two, but still super doable. You should probably read the tutorial though, instead of just scrolling through the pics and taking off on your own. Yeah, I’m onto you.
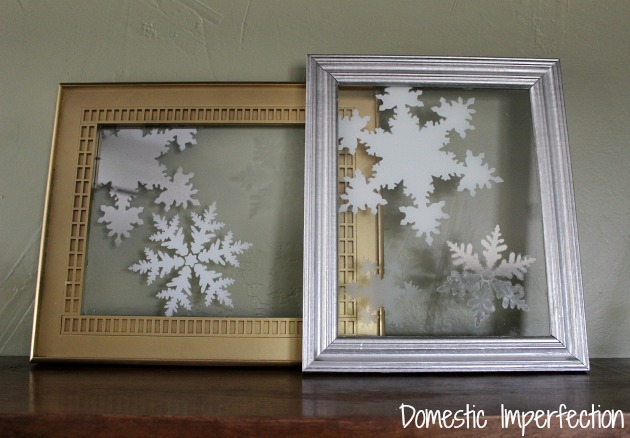
Yesterday’s idea was for all those old frames that are missing glass, today’s idea is for all those frames lucky enough to keep their glass intact.
Materials Needed –
- Frames with glass
- Spray paint
- I used gold, silver, mirror effect, frosted glass and white
- Spray adhesive
- snowflake stencils
- glass cleaner
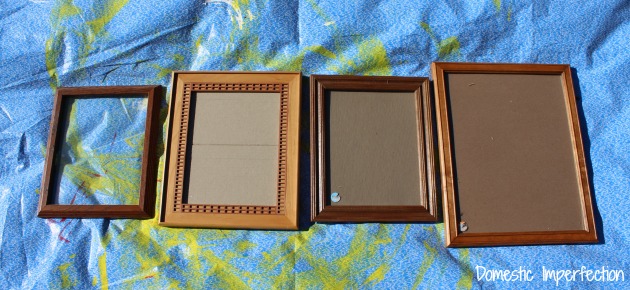
The first step is to round up your random frames, take out the glass, discard the cardboard backing, and spray paint those suckers. I chose gold and silver by Rust-Oleum.
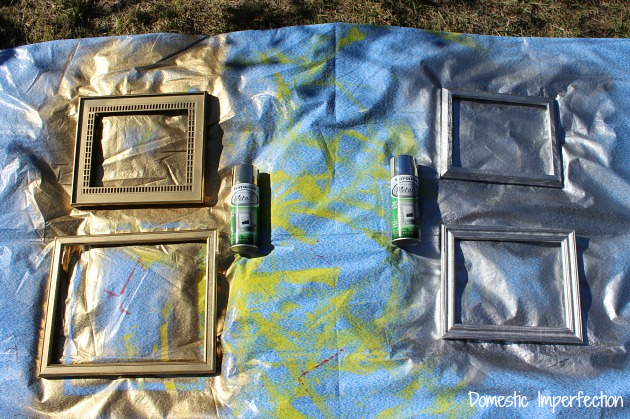
Try not to drop your hot chocolate, glass of wine, or frosty cup of water when I tell you this, but until this project I had never used gold or silver spray paint. I don’t know what I was waiting for, this stuff is amazing…especially that gold. It’s the perfect gold…not to 80’s pinkish or overly yellow and chrome-y, it’s modern and delicious. 2014 might just be the year of gold spray paint around here.
Moving onto the meat of the project, the snowflakes. You will need the glass from the frames, more spray paint, spray adhesive, glass cleaner, scrap paper, and snowflake stencils (you can buy them HERE).
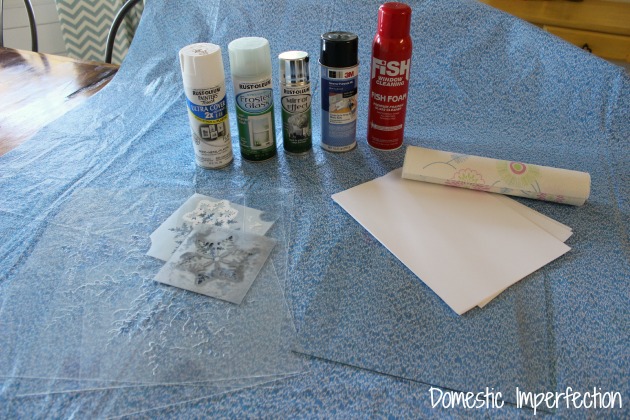
Here is a closer shot of the spray paint it used.
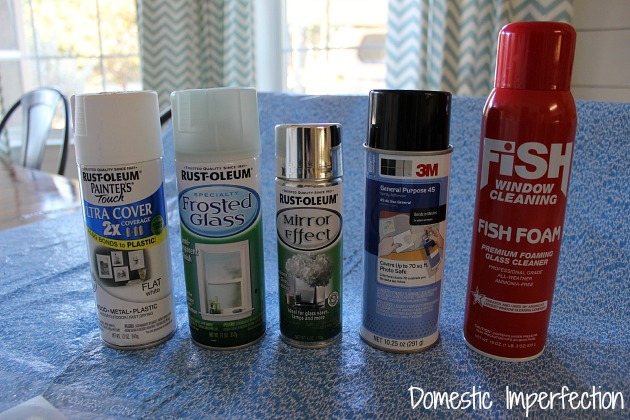
The first three cans are what I painted the snowflakes with…plain white, frosted glass, and mirror effect (all are by Rust-Oleum, cause they make the best spray paint). The fourth bottle is spray adhesive by 3M (bought it on amazon), and that last one is the glass cleaner (fish foam is awesome) to clean the glass with really well before you begin painting.
At first I tried to spray paint the snowflakes without any adhesive (I’ve never had to use adhesive before), but the result was less than stellar.
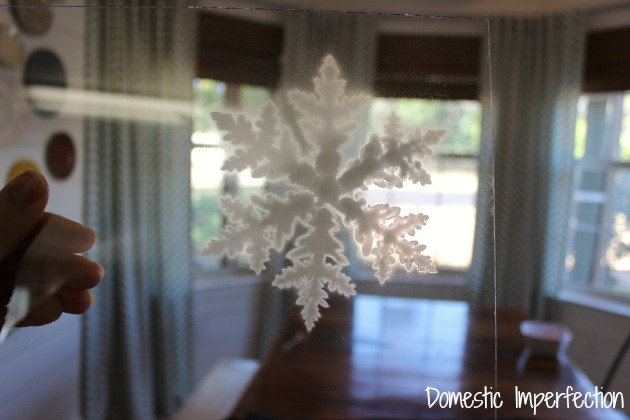
If I was going for an artistic “snowflake melting on your warm car window” look then this would be perfect, but I was hoping for something a little crisper. Here is a snowflake I did with the adhesive…
Much better. Since I have never used spray adhesive before let me share a few things I learned along the way…
1) Less is more. Seriously, you need hardly any for it to work properly. If you use too much you are going to hate this project and then probably hate me for telling you about it.
2) Lightly spray your stencil and then let it sit and dry for a few minutes before placing it on your glass. You want the adhesive to stick the stencil, not the glass.
3) If you use too much glue and slap it on your glass too fast you will be left with a ton of sticky stuff around your snowflake. Then you will grab your paper towel and fish foam to try and scrub it off, but in the process you will also scrub off a large portion of your snowflake. Consequently, the sticky adhesive will still be there and you will have to go find a new piece of glass. That’s just a hypothesis…it’s not like that’s what happened to me or anything. That would be so out of character.
After you place the barely sticky stencil on the glass, cover up any exposed glass and spray paint the snowflake.
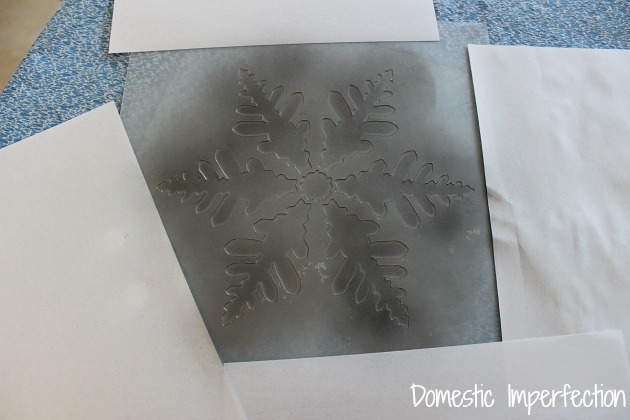
That is the mirror effect spray paint, and it’s actually pretty amazing. When you first spray it on it look gray and horrible, but then as it dries it starts to look like a mirror.

When it’s all dried and set it actually IS a mirror. A dirty kinda fuzzy mirror, but a mirror nonetheless. Pretty cool.
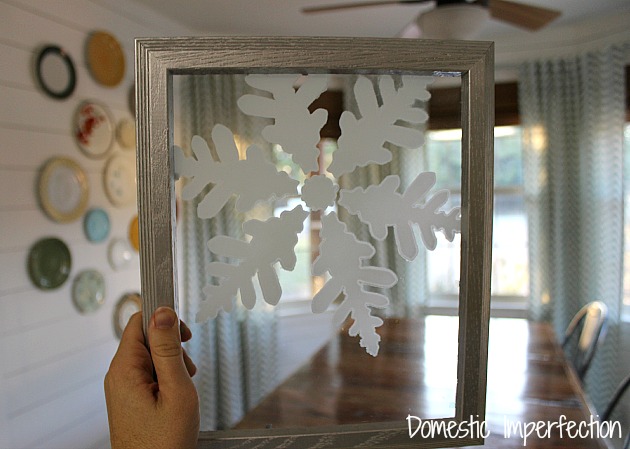
After you’ve made all the snowflakes insert the glass back into the frames (glue with E-6000 if there aren’t tabs) and hang wherever you want! Make sure you put the sprayed side of the glass toward the back of the frame and clean the front. (If you have to clean the side with the snowflakes just know that the mirror kind rubs off somewhat easily, the frosted glass can take some scrubbing, and the white is somewhere in between.)
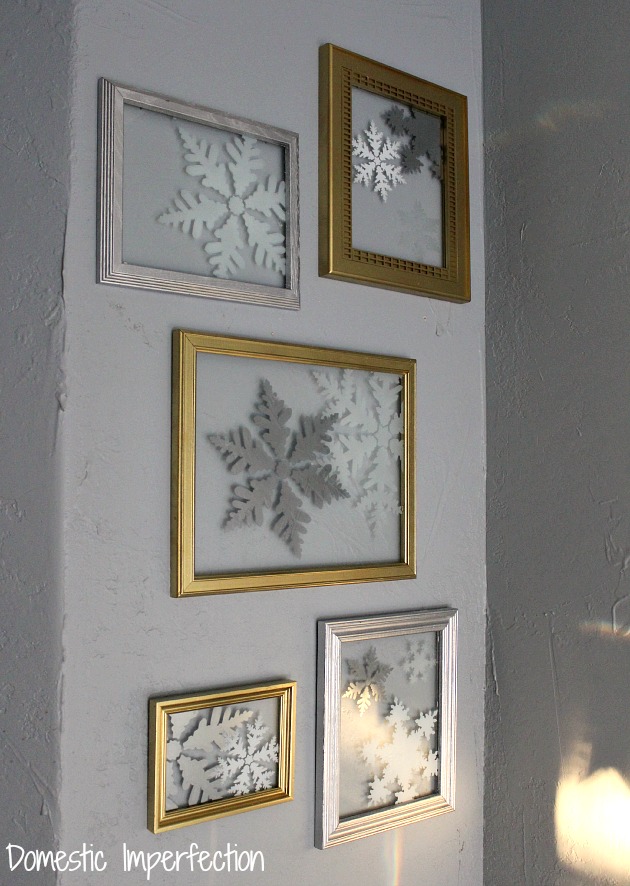
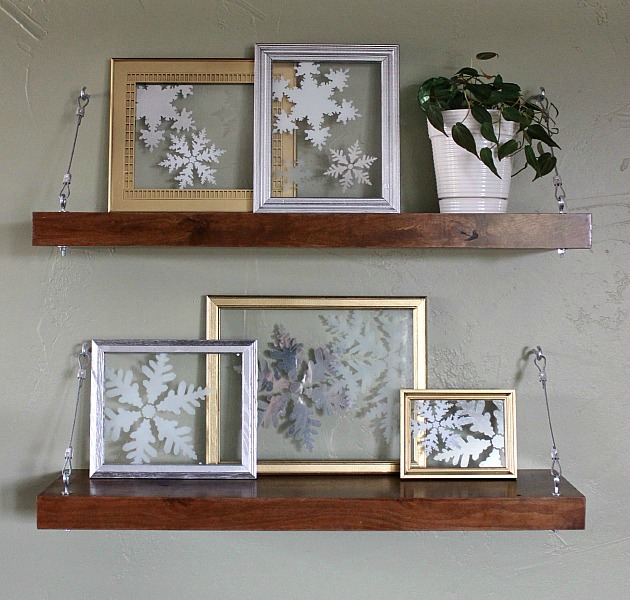
So that’s the tutorial…aren’t they pretty? I’m pretty sure these metallic snowflakes are my favorite Christmas craft to date.
More Christmas Blog Posts
- Metallic Framed Snowflakes
- Vertical Christmas Banner
- Christmas Bedroom Tour
- Mini Ruffle Christmas Trees
- Kid and Budget Friendly Christmas Windows
- Christmas Wreath Chandelier
- Rustic Christmas Wall Art
- Empty Frame Ornament Art
- Tree Skirt from a Tablecloth
- Muffin Tin Advent Calendar
- How to make a Jingle Bell Wreath
Another great idea to use those old outdated picture frames that everyone has stored away ( I have a box of them) or you can find them at yard sales really cheap! Love the silver and gold and the snowflakes are beautiful! Thanks for sharing!
Cindy
Yes, I have a closet FULL of frames! I could do a whole month worth of frame projects without any problem…I promise not to do that to you though :)
SO pretty!
Very pretty craft! I shall pin it for next year ;)
No need to pin these until next year. Since they are snowflakes you could use make them and enjoy them the rest of the winter. So I say it is a perfect time to make them!
Pinned!
I have a confession to top yours. . . I have never spray painted anything, EVER!!! I know, crazy, right? If I win this contest i would really like to give this a try. I actually read through the whole tutorial and you gave such clear instructions that I feel I could tackle this without messing up too badly. . . lol!! These are really pretty and as one of the other comments says, they would be pretty for the whole winter season, so no reason to have to wait until next year.
Merry Christmas to you and your family and best wishes for the New Year. Can’t wait to see what you have planned for us and the blog in 2014!
Cute! I like these – good crafting right there.
Just found you and love your ideas and your entire website! I’m going to enjoy browsing through all your projects. Two young children and you have time to redo your whole house AND blog about it……you’re amazing!
ASHLEY
I LOVE THE SNOWFLAKE PICTURES. HOW DID YOU CREATE THE SHELF BRACKETS HOLDING UP THE SNOWFLAKE PICTURES? DO YOU HAVE A TUTORIAL AVAILABLE? THANKS.
I have a post on them here (not a tutorial) – https://wildfireinteriors.com/2012/01/pre-blog-living-room-floor-shelves/
We did the same thing with our kitchen shelving, you can read that post here, it’s a little more informative -https://wildfireinteriors.com/2013/01/open-kitchen-shelving/
What’s up everyone, it’s my first pay a visit at this
website, and piece of writing is in fact fruitful for me, keep up
posting these posts.