
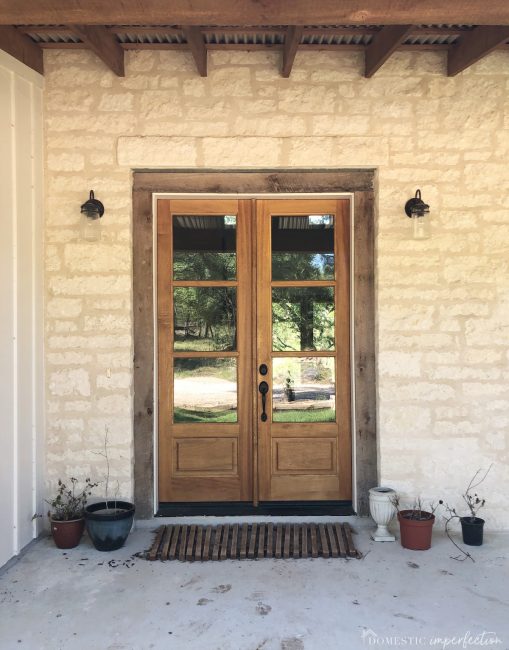
Entry Refresh and a Wooden Doormat Update
Today I have the most well-tested follow-up post for you ever. Not a year, or two years like most of my follow-up posts, but SEVEN years. So what project are we talking about today? These babies…
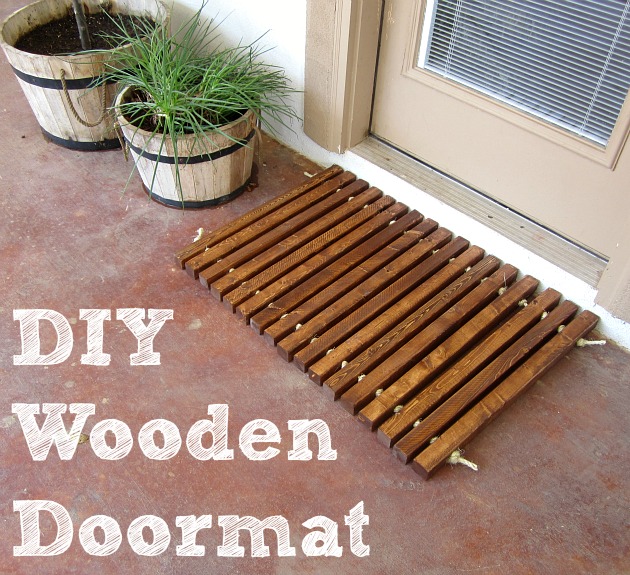
I made these wooden doormats back in 2012, when my blog was just a year old and I only had two kids. It feels like yesterday, but it wasn’t. It’s crazy how quickly time goes.
In the original post I said that I had no idea how these mats were going to work out…if they would catch dirt and serve their purpose, or if they would instantly warp and get thrown in the trash.
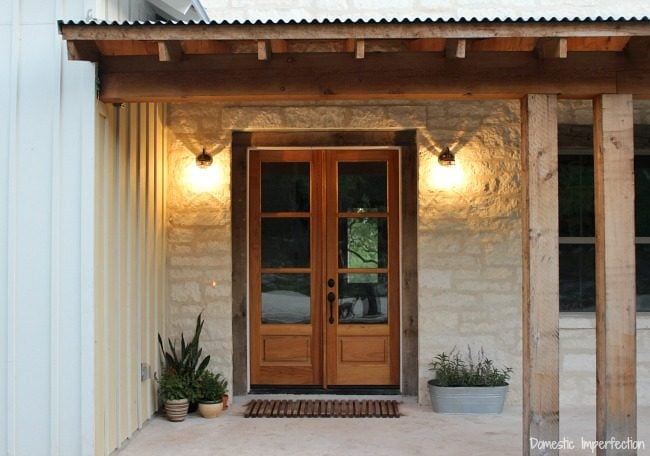
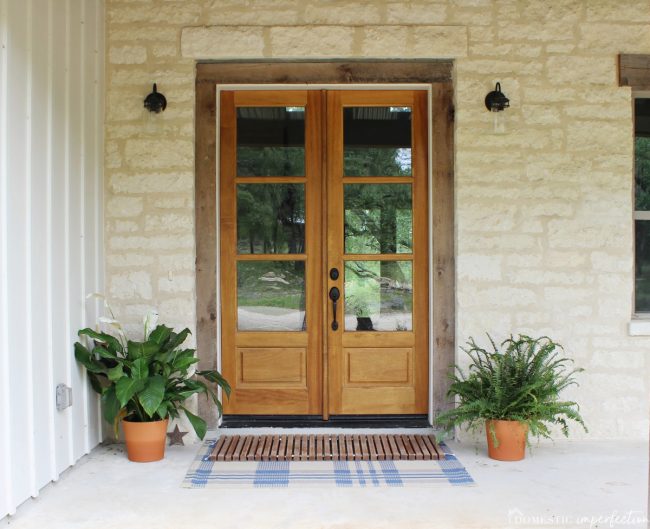
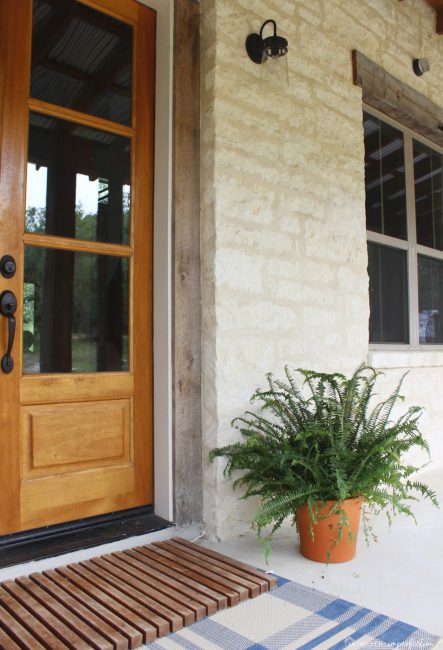
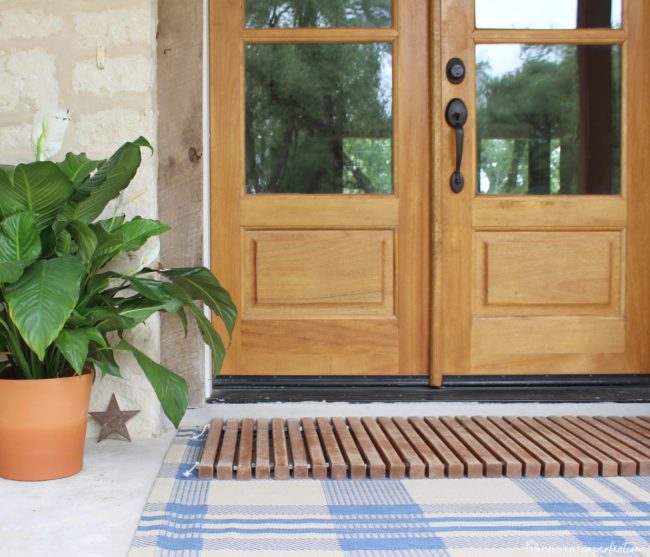
Well, seven years later….I love them. They came with us to the new house, and I have one at the front door and one at the mudroom door.
Not only do I think they look good, but they catch dirt really well. They have not warped even a little and are nice and worn looking now, which I actually prefer to them looking fresh and new. However, the current mat situation was taking that a little too far.

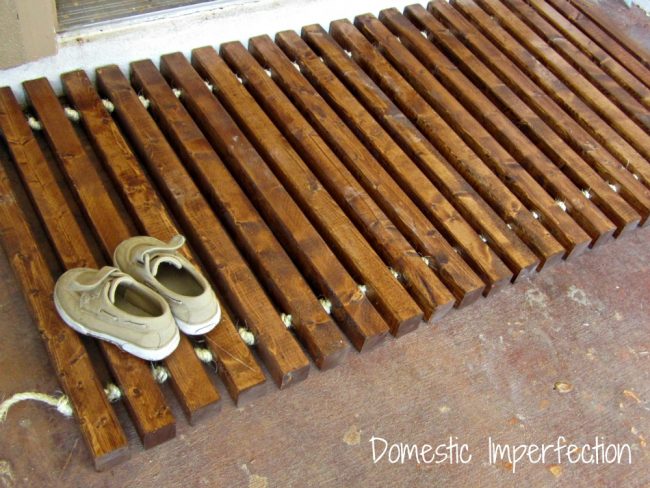
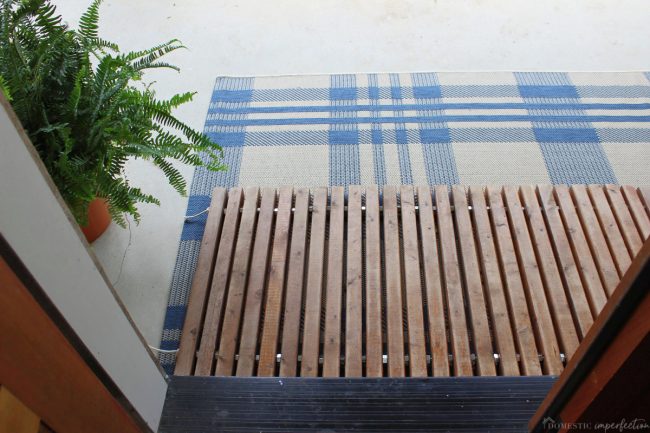
The rope that holds everything together has stretched out quite a bit, and the mats have become really loose and a trip hazard. If you step on them just right the loose slats will roll and your life will flash before your eyes.
A couple of weeks ago I finally got annoyed/embarrassed about the state of our entry, and decided it was time for a refresh. The first step was to tighten up the wooden mat before it broke an unsuspecting ankle. When I originally did this project I bought pine 2×2’s, drilled a hole at the top and bottom, stained them, then ran a rope through to hold it all together. To keep the spaces even I tied a knot between each piece, like this…
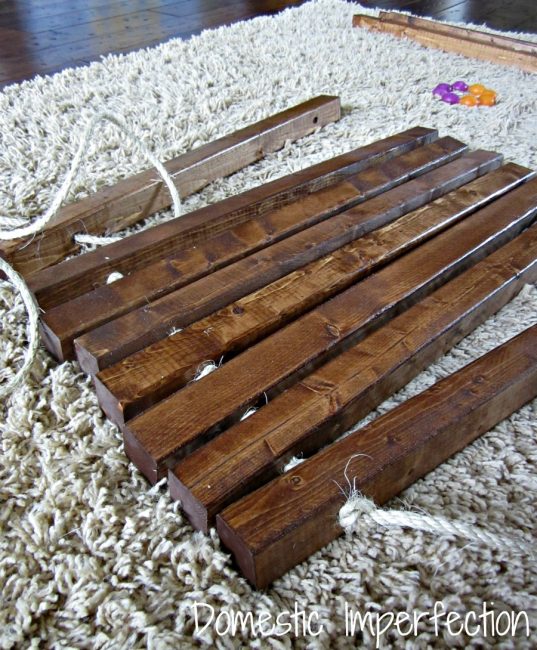
This time I decided to do something different, and instead of tying a knot between each slat, I’d use a nut as a spacer. Then when it loosed up I could just retire the ends instead of taking the whole mat apart. Plus, metal accents on anything is a win in my book.
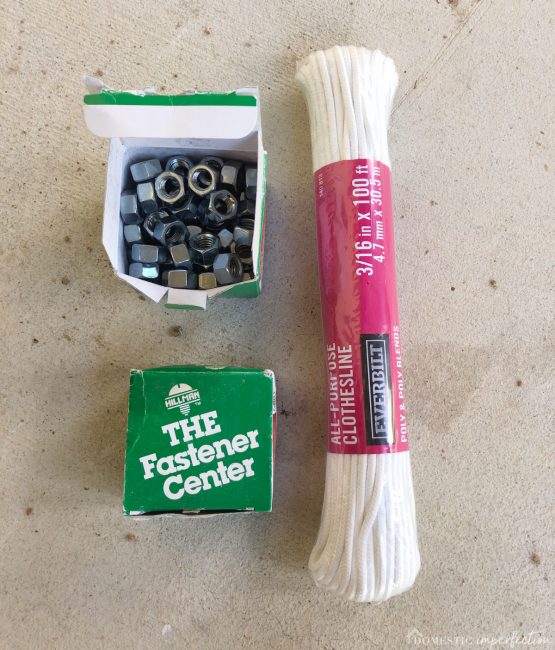

This made redoing the project super easy, and I really like the end result. If you decide to do this project, nuts instead of knots is 100% the way to go. It goes WAY faster and I will probably never have to unassemble the doormats again.
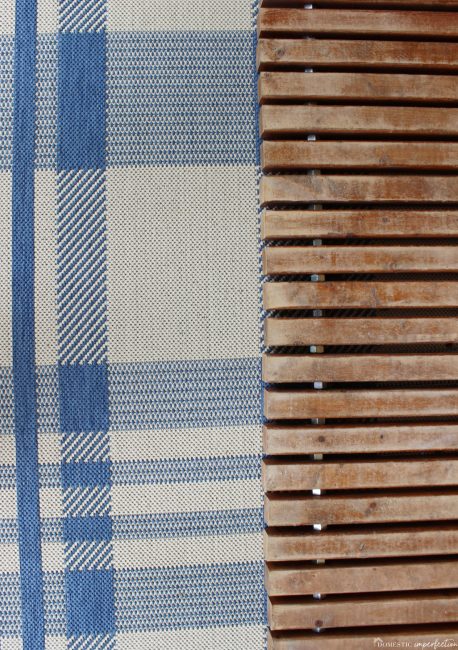
I thought it needed another layer and some color to break up all the mismatched woods we have going on, so I bought a 5×7 outdoor rug to go underneath. Then I added some non-dead plants in terracotta pots, and boom…safe, simple, and non-ugly entryway.
CLICK HERE FOR THE ORIGINAL WOODEN DOORMAT TUTORIAL
Entryway Source List –
- Doors – ETO Doors
- Stone – Cream limestone (3/6/9) with a German Smear mortar
- Siding – Shoji White (SW)
- Modern terracotta pots – Home Depot
- Blue and cream rug – Overstock
- Sconces – Kitchler Lyndon (although I wouldn’t choose these again)
- Door Hardware – Schlage Plymouth
You may also like –
Choosing a rock (is making me crazy)
Six months and 7K in landscaping…
Floor Plan and Elevations for the New House
Omg, this just came up on my Facebook page. I thought you had stopped posting! Something must have happened with my subscription because I haven’t gotten a post in my inbox for ages, at least a year or more. This is awesome , I’m so glad to see you’re still blogging! I will go back and read all the ones I missed. ????
Clever lady, it looks super now.
Brilliant! I think I would actually be able to pull this off without husband help. We have 4 exterior doors on our 1600 sq ft house and we have mats on all of them, but a couple could use replacing soon. Thinking I might try a wooden spacer though, as I am not a fan of rusting metal nuts potentially staining my patio. (I am great at imagining all the ways things could go wrong, so sorry!!)
It was very beautiful …
So, I know you used 2″x2″, but how long is each piece? Looks awesome aged like that!
This project just made it on my to-do list! It looks beautiful!
I’m curious what issues you have come up with regarding the sconces? I’ve had them on my “wish list” waiting on sale since seeing them on your blog!
Quite a solid idea that frankly looks very neat and elegant. Since it is a DIY project, I will definitely try it out with the nuts because I want a permanent door mat. A cool invention indeed.
Wow! The new upgrade looks really cool. Thank you for sharing the tutorial!
http://hotmail-emaillogin.email
It’s good to know how well they held up. I might make some soon – we need some outside mats that will actually catch dirt in our new place. They still look great!
Incredibly talented. Very innovative work. Thanks a ton!