The Grass is Always Greener (Three Years of Yard Work)
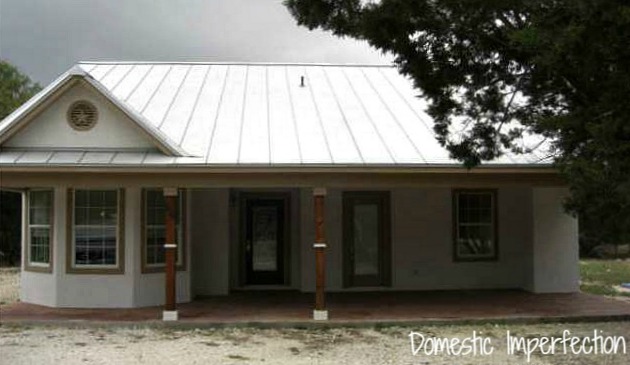
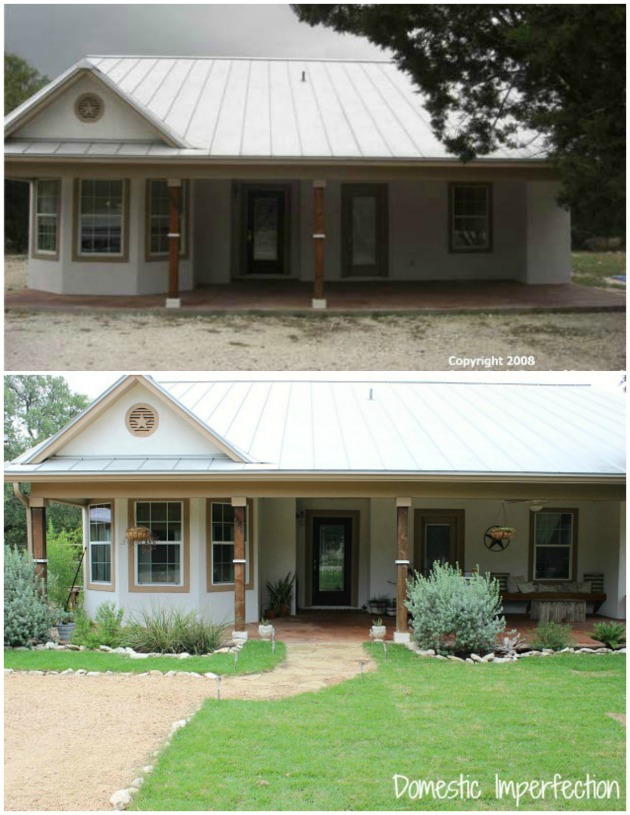
Lets start at the beginning…the very beginning. In 2008 Adam and I purchased our first home. It had been on the market forever and despite being a newer house it needed some serious TLC. One of the major downfalls and the first thing everyone noticed was that it had no yard. No grass, no driveway, just a lonely house surrounded by gravel…the gross white dusty kind that sticks to your shoes and is always on your car. Gotta love it.
(Also, I never took a before picture of our house, this MLS picture is all I have.)
I lived here for a year by myself and worked on the house when Adam was being a hero over in Iraq. During that time I planted flower beds along the front. It wasn’t as easy as it sounds, I had to use a giant pick and literally chip away at rock to get them to be deep enough to plant anything in. Number of pictures I took during this process – 0.
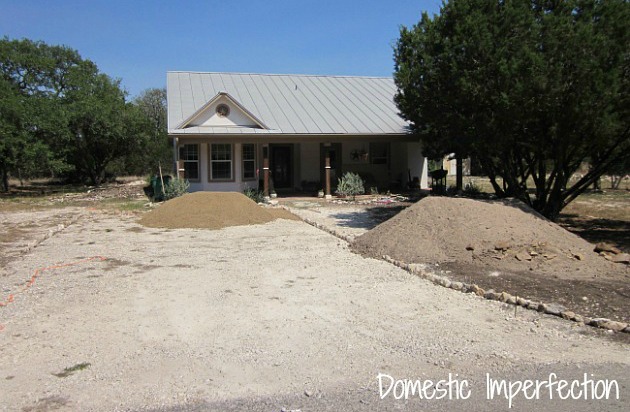
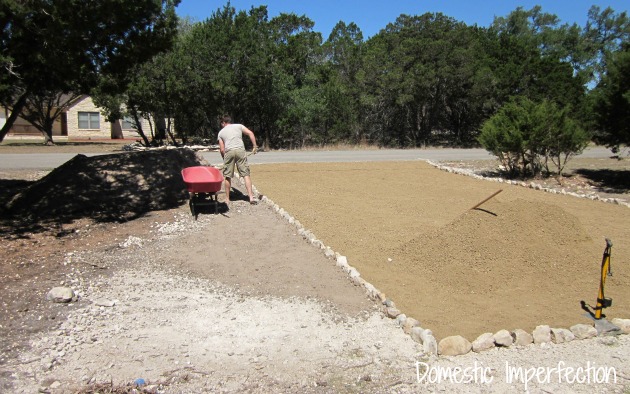
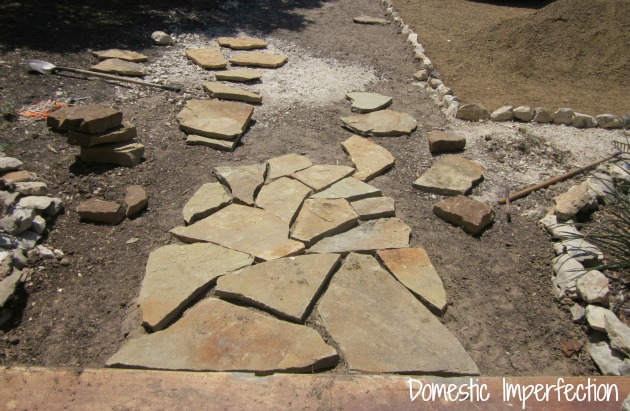
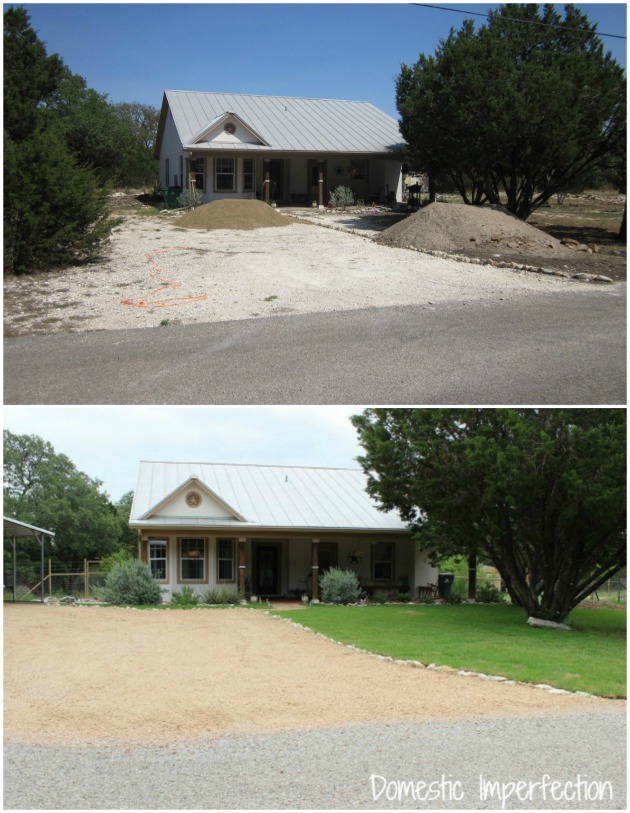
Fast forward to Spring 2011. Adam was out of the Army and we were settled into our house. Elijah was about a year old, I had just (surprise!) found I was pregnant with Levi, and I had started this blog a few moths prior. One of my first posts was about Adam and I creating a driveway, flagstone path, and planting grass in the front of our house. I wrote one giant post about it (it should have been four or five) and it made a huge impact on the curb appeal of our house. (Go HERE to read that post…my pregnant hard working self of two years ago would appreciate it)
Good news! I did take pictures during that process, here is the general idea…
We spread dirt and planted buffalo grass seed in our new yard. I watered it like a good lawn owner should and it began to come up…kinda. It was loads better than the gravel pit of a yard we had before, but it was sparse and just…not great.
Spring 2012 I started to get desperate. “WHY is my grass refusing to grow?” I started to do crazy/genius things like soak the grass seeds (we had lots leftover) in water for a few days, spread them, and then cover the areas in dirt and old sheets to keep the sun from scorching the seeds/new grass. It worked better than not, but we spent about a month of spring with nasty old moist sheets littering our yard. Number of cool points we scored with the neighbors – 0.
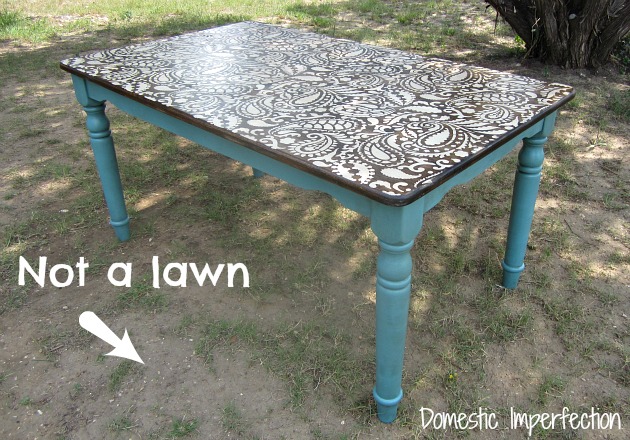
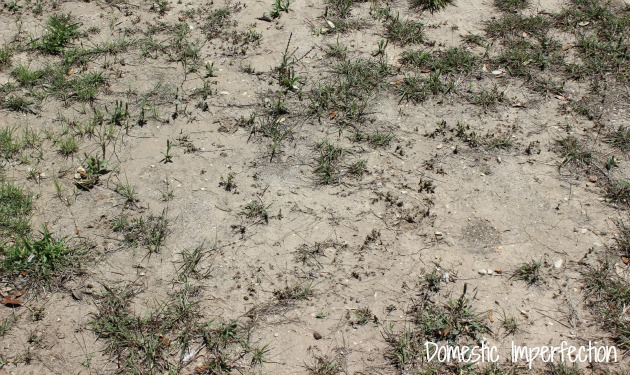
Despite my best efforts and the moldy yard sheets the grass still never took off. Lets take a look at the paisley stenciled table I did last summer. Don’t mind the table…look at the grass.
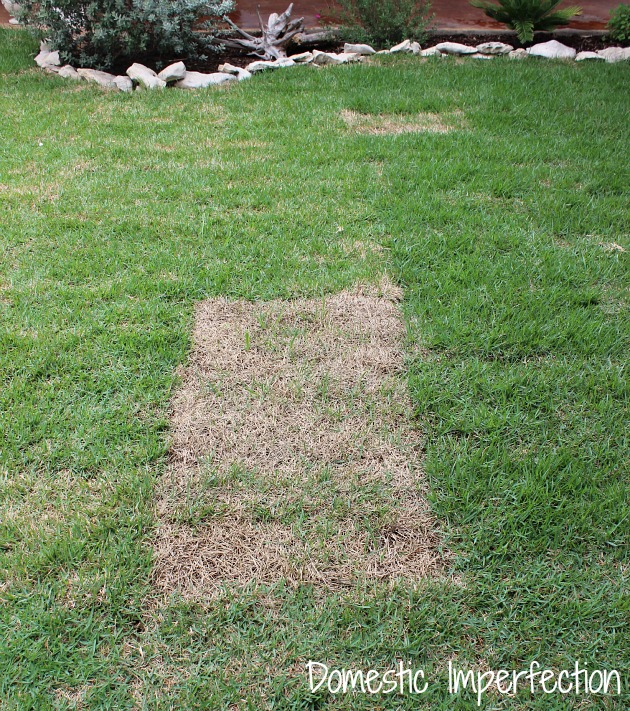
So this spring, when the grass looked liked this….
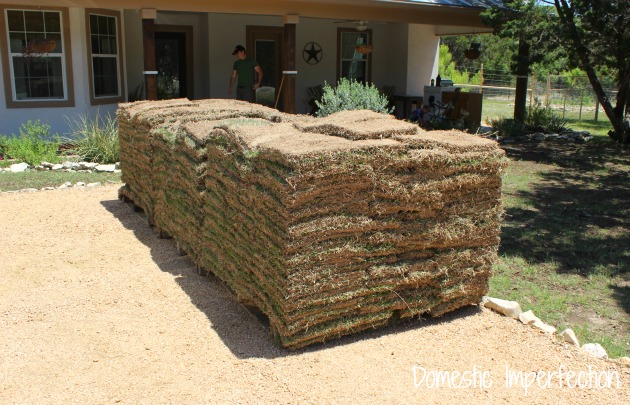
…we decided to give up. We tried to grow grass, and we suck at it. Enter $600 worth of wide blade Zoysia sod. Lush, drought tolerant, loves south Texas heat. Recommended by my can-grow-anything brother.
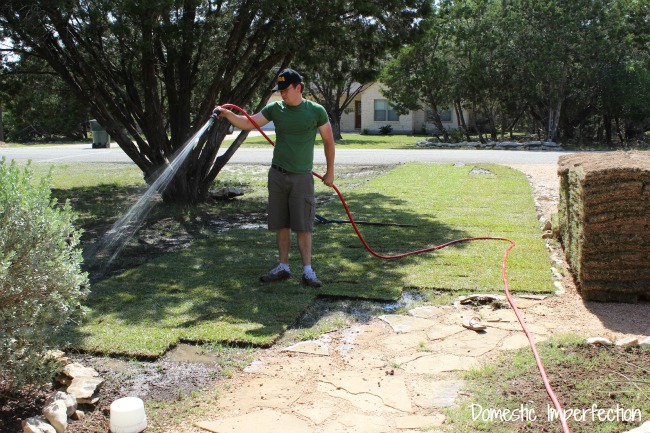
It’s best that you lay sod all in one day, right when it arrives, so that it doesn’t dry out and die. Adams brother Taylor (our perpetual helper) came over and helped me get started until Adam got home from work.
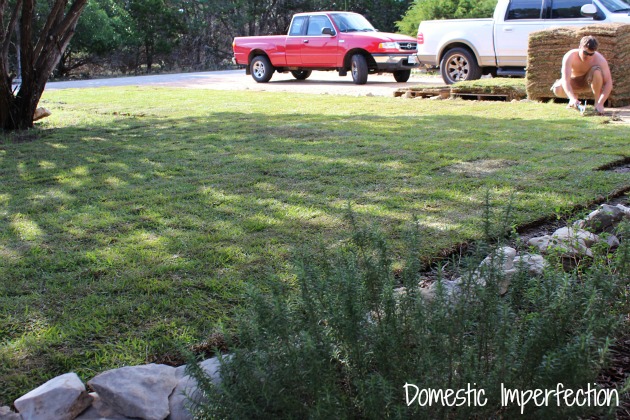
I just have to say, if you are not a patient person or love instant gratification you will LOVE laying sod. After two years or coaxing our grass to grow it was awesome (and maybe a little frustrating) to suddenly have a lush green lawn in the span of just a few hours.
We really should have just started with sod. Live and learn…our next house will get sod immediately.
There are a few dead spots where the layer on the top of the pallets dried out a bit much, but it will fill in eventually.
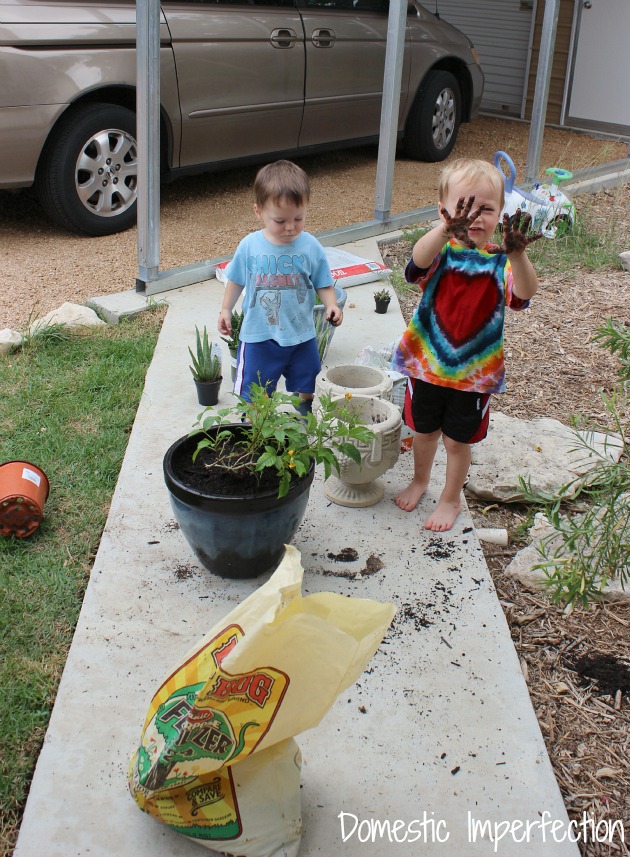
After the sod was in I felt obligated to pay attention to rest of the yard, so I let the boys pot some news plants….
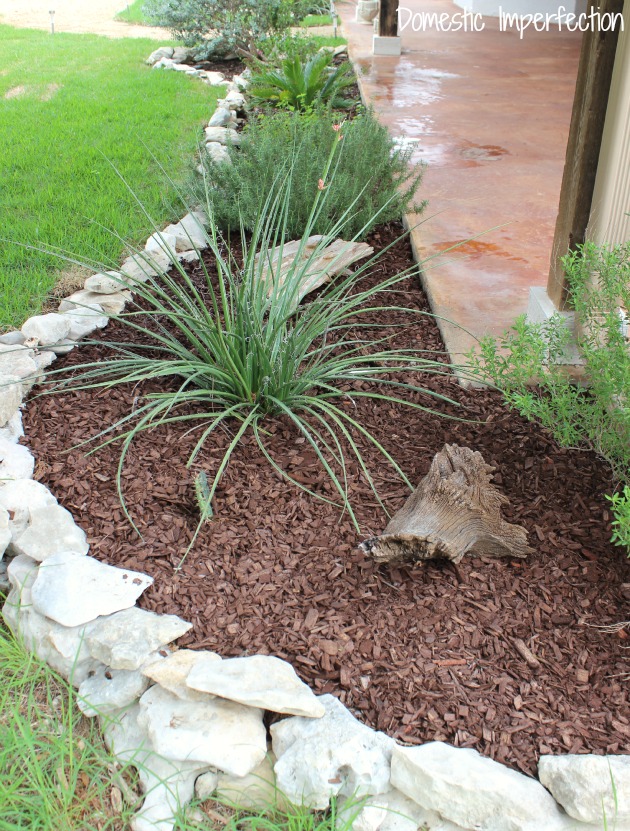
And I weeded the flower beds and added some fresh mulch. I really should come up with another name for them since they never have (and never will) see a flower.
And then … then, we all took a step back and soaked up the awesome.
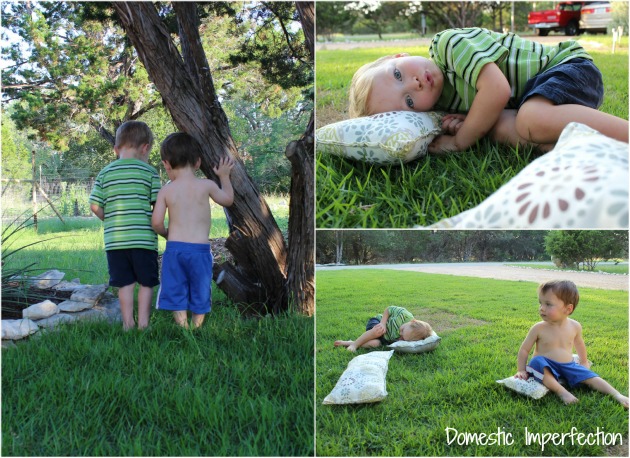
I’ve never had a lawn before. I grew up in the country where it was dirt, stickers, and fire ants. I feel like such a lush lawned city slicker when I look out into my front yard. It’s so nice, green, and CLEAN. Great to roll around in and lounge on the porch pillows that never seem to stay on the porch…
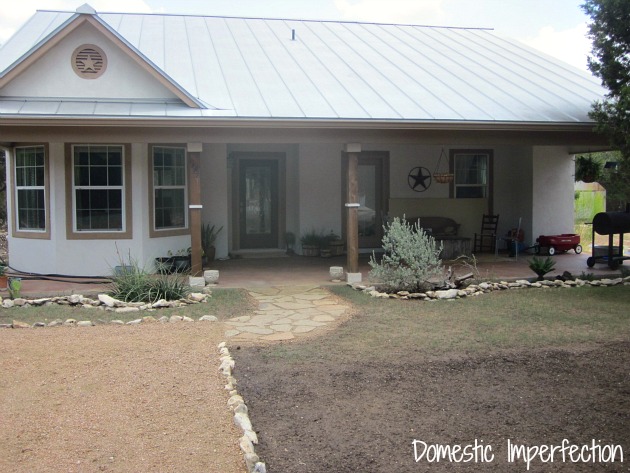
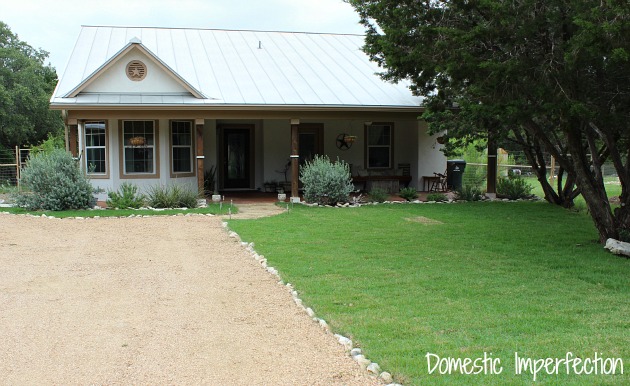
Now for everyone’s favorite part, the before and after pictures. Looking at these makes me feel very productive and accomplished… and maybe a little tired. Here is the first one, our house when we bought it in 2008 and today.
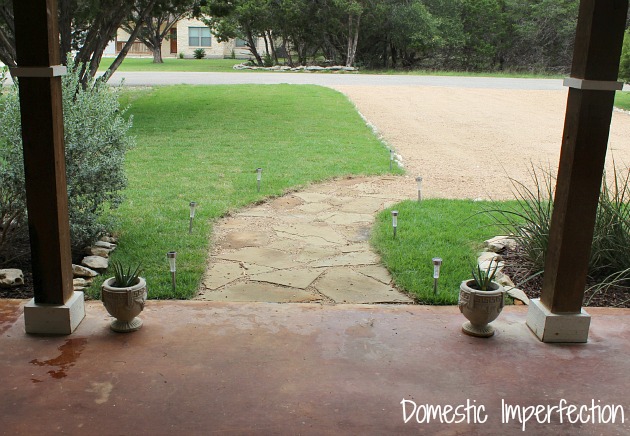
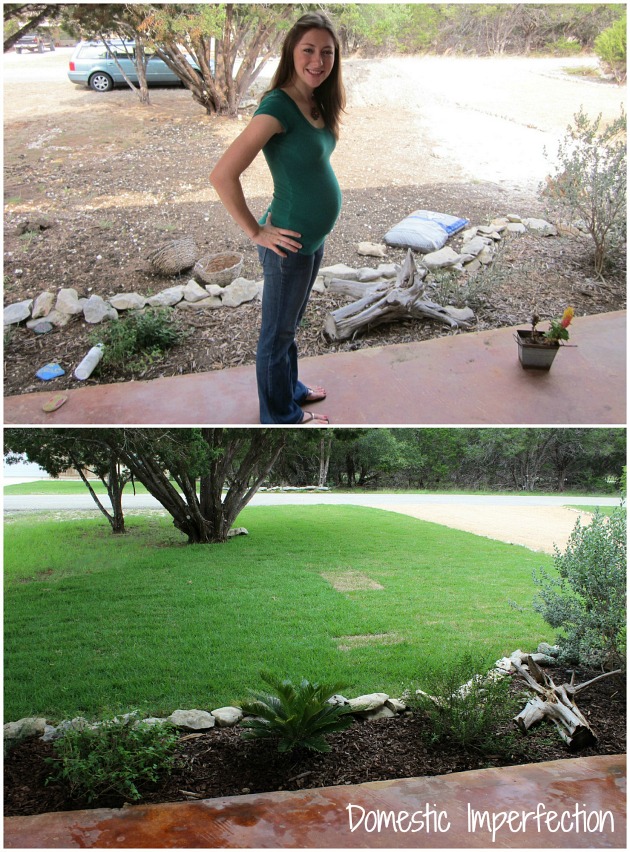
Here it is looking out from our porch. The first one was actually a pregnancy belly shot, it’s the only picture I could find. This is May 2011 when I was about 14 weeks pregnant with Levi and we had just started our first curb appeal project.
May 2011 and today.
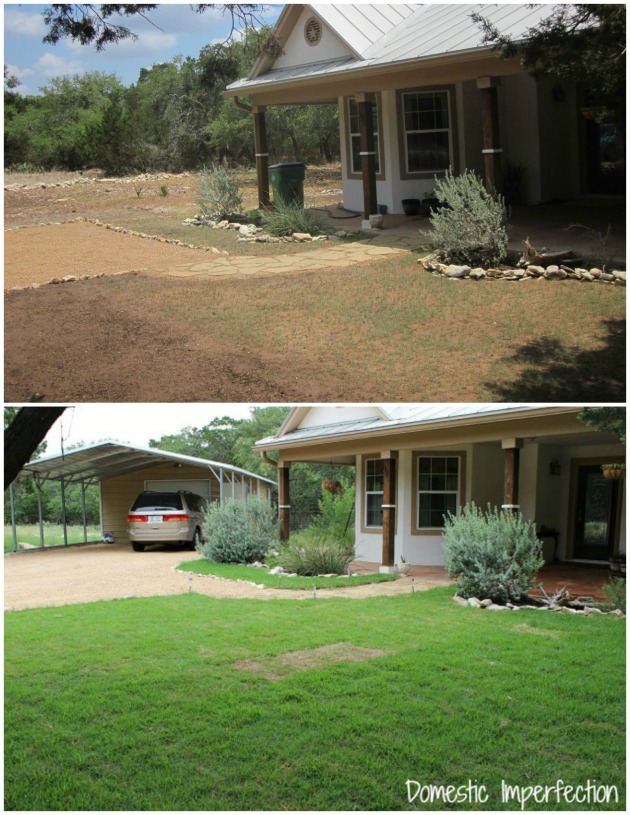
One more from the side (you can read about adding the garage HERE, HERE and HERE.)
Ahhh, I love it. Before and after pictures are the best, aren’t they?
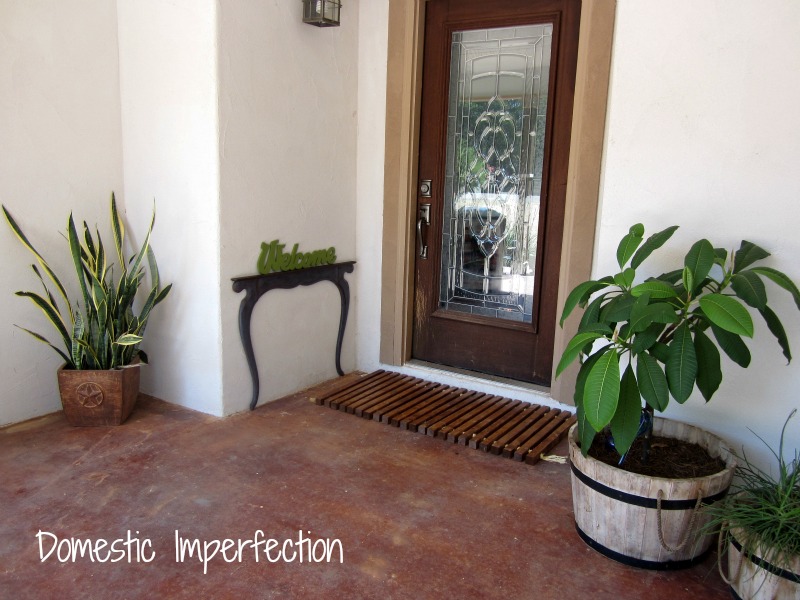
Now I have a random question. We want to refinish our front door, its a nice mahogany door that isn’t in great condition. We would love to refinish it in a natural wood, but the problem is that the neighbors giant lab comes over during thunderstorms (and fireworks) and scratches it frantically. He hasn’t been around in awhile, but the door has deep gouges that refinishing won’t fix. We could fill it with wood putty, paint it, and never be the wiser, though it seems like kinda a bummer to paint over a nice wooden door. BUT a wooden door would never look great and the thought of a fun colored door makes me a little excited. Soo…paint it or refinish it? And if you say paint it, what color?
Heres a picture to help aid your decision, you can kinda see the gouges.
Update – see what I did HERE.

Paint it. A nice brick red.
Here where I live in Australia, I gave up on lawn. We seem to have drought all the time and to me it’s a waste of time trying to keep rescuing it. I wish I DID have a lovely lawn like yours! Kids and grass just seem to go together, don’t they? Good job!
We are in constant drought mode and on strict water restriction every summer, which is another reason we put off sod for so long. Hoping it says green (or at least alive!) during the dry summer months.
Great transformation! We have to wait about 6 months in order to put sod in our new backyard, funds issues, and I loved watching the green roll out! As far as the corr goes I would paint it, something fun… I always love a good blue ;)
Lovely! I love the wood in your close up shot but its a dark hole in the distance shot so a bright color might be a better choice. Luckily you have all neutrals on the house so now is the time for the WOW. Will it be turquoise, orange crush, red, or blue. Have fun choosing!
I love paint! A bright blue would look great!!
Why don’t you stencil it like you did the table? You could even do it a color like turquoise & white! Yard looks great!
Oh my gosh…I would have never have thought of that! I wonder if I can get Adam on board…he’s pretty iffy about painting it at all.
orange is my suggestion. a darker orange. the most part of the door is glass, so it wouldn’t
be too overwhelming. http://www.houzz.com/orange-front-door/p/16
The before and after is amazing!!! I would go a brighter colour, in looking at one of your pictures it’s pretty dark under your porch… or go beautiful red and install lighting to pop that stunning door!
I vote for paint in a dark turquoise.
I’m thinking Cosmic Berry by Valspar.
I’m thinking BRIGHT YELLOW with WHITE accents. A little
Ooooh a deep purple paint would be amazing. Maybe something like this, from Pinterest obvi… http://pinterest.com/pin/8514686768270650/
You did a great job, and I love the before and afters. I need to get my act together and do a post on before and after our remodel. I’ve kind of dropped that part of it. My daughter went to school in Texas and even her University couldn’t maintain the grass, so I know it’s a tough one. Your property looks great. If I were you I’d go buy a cube of Irish Butter and take it to the paint store to have them duplicate the color. It’s a warm, creamy, edible yellow tone. My neighbor has it on her house and it looks gorgeous – really a stand out. Happy summer and many blessings! Tia
Thanks for the input Tia! You really should put together some before and afters…they remind you how far you’ve come and make you feel pretty darn accomplished. Lots of times I feel like we are crawling along with renovations, but then I see a before and after and all that goes away!
Sod seems like magic! I feel your pain when it comes to scorched grass. I live in the CA central valley where 99 degrees is a cool-down. I’ve always dreamed of getting sod for my scorched lawn.
As for the front door, looking at pics of the entire house, I would say green. Either a sage green or the green in the porch throw pillows. It’s a weird color and I’ve never seen it on a front door before, but I think you could really pull it off!
I too have been struggling with grass seed (plus dandelions) and you have convinced me that sod is the way to go! For a door color I LOVE all the green paint you have inside and outside you house. I would match the door color to the green you have in your porch pillows and green chair, if that is still current. Also for balance I would be tempted to paint the other (kitchen?) door beside it too. Maybe a longer door mat to the actual entrance door to differentiate it?
I am adding a porch onto my house and have been considering adding a 2nd door so the house entrance is not right into my kitchen as it is very cramped. I too would end up with two doors about 6 ft apart and keep brainstorming on what I would put in the space btwn the 2 drs. All I usually end up with is plants and maybe a trellis to add height btwn the 2 and provide something to look at in the snowy Cdn winter when the plant dies.
Its funny you mention that green chair. I took it out in the backyard to sit in and watch the boys play, then I forgot to put it back and it sat outside during a week of thunderstorms. It’s pretty much toast now, which I’m bummed about. I’m going to have to find another and paint it the same color!
That second door goes into our laundry room and I have yet to find a great solution to separate them. I just threw some plants there too :)
Ha ha, I’m so used to seeing your boys in diapers. It’s like they’re all grown up!
Oh, your lawn looks great!
Oh I know, they look like little boys now. They mostly wear underwear these days and I have pledged to never post pics of my kids in their underwear online. I actually had to go find cloths and force them onto the boys so I could take appropriate pics of them rolling around in the grass!
The yard looks amazing!!! Enjoy your grass! I’m attempting to grow grass in my yard. It’s currently all weeds, so it might be a long battle, but I vow to win, one day!
Good luck with your battle! I would have been thrilled if I had been able to grow weeds, haha. No seriously.
It all looks great! Like you my currency is sweat equity and elbow grease which is more difficult to come by as I approach 70. I like Jill’s idea of purple. My house is butter yellow with sage trim (I’m a foodie) and I have a purple door, makes it easy to find since after I painted mine everybody inthe neighboorhood did some version of yellow and green. About the dog, he will scratch a painted door, too, so how about tacking on some copper or brass sheet in some areas? Even if he scratches it, it will develop a patina over time. Keep up the good work,I really enjoy seeing young people with your drive and ideals.
Thanks so much Thea, and your house sounds so fun and pretty!
Your house looks amazing! It is so gratifying to look at before and after pictures, especially when a project takes longer than a weekend! We have been working on our front and backyard since we moved in (7 years ago). We had no money when we first bought our house, so it really has been a slow process. But we do a little every summer and it keeps getting better! I think your door painted would look great, but I don’t have much in the way of advice for a color. I am actually thinking of painting ours a robin egg’s blue. :)
I don’t really think you can go wrong with robins egg blue…its beautiful, fun, and peaceful all in one!
Paint it red or navy blue.
WOW! That is a huge transformation…
Personally I’d paint the door and the porch columns a pretty, pale aqua color. It would bounce quite a bit of light around the porch without being in-your-face about the color. Just my 2 cents.
Thanks! Your two cents is perfect and I *think* that’s the way I’m leaning. I think a red might look good as well, but I just love blue.
Normally I would say deep purple or navy blue for your frontdoor, but I think your front porch is too dark for those colors. So, what about a bright yellow??
Love the grass! You (and Adam of course) put a lot of hard work in your front yard and it’s showing!
What an awesome transformation – I’ve watched as it has unfolded, but seeing the before and after together really gives a ‘wow’! My front door and bedroom (French) doors have the same problem as yours (but from my dogs), both inside and outside. I have decided to fill in and paint, just not sure what color since we’re debating on painting the house too. I say pick a color that makes you happy and go for it – if you don’t like it you can always repaint it ;-)
Patty
So true, you can always repaint…I’ve gotten good at that over the years! It’s hard to pick a color for the door, usually I have an idea of where I want to go with something but this one is just so wide open. I see lots of paint samples in my future :)
Looks superb Ashley! You guys really have to put in a lot of HARD work to grow anything in Texas! Door color – I vote for the Brick Red!!
Great job on your yard and curb appeal. It is a remarkable transformation. About the door: you could paint it which would be pretty…something bright that will stand out from the exterior walls, but you will end up with the same problem with the door if the dog continues to scratch your door. The only thing I can think of is a decorative wrought iron exterior door. You could leave it open and close it when the dog’s trigger occurs. This idea needs more thought, but it’s a start maybe. I can certainly to using the pick axe in the yard to dig holes…been there, done that. Ain’t Texas great? lol
Brick red for me… although I think a nice sage green would suit the natural look of the house. But hey, you know my talent for decorating.
Your new lawn looks great. I notice that your porch seems rather dark. If you do decide to paint your door choose a bright color to make it pop and bring attention to your porch area. I also suggest an exterior door with decorative grill work to protect your door from the dog. I’ve seen nice ones at Home Depot.
Thanks for the input! I agree that it looks quite dark and needs something to brighten it up. It’s not so much that its dark is that its just really deep…same difference I guess!
Some wood fillers are stainable, like Rock Hard Putty, so you could repair the grooves and still have a stained door. Having said that, the next time Fido scratches it up it will be back to the beginning to fix it up again. Paint in that regard would be easier to repair. As for color, green would look good, but so would deep red, terra cotta, or an aqua. I don’t think I see green as often as the other colors, even purple. So I like to go with something a little different than everybody else. It’s looking great.
Wow, what an amazing transformation in the yard! Way to go.
If you were to mend your door with the stainable filler, what about a coloured stain? There are some really nice colours, one I like is a beautiful milky-aqua that looks like a mountain stream. I think doing the columns to match or complement the door would look great, too.
At the beginning, you guys put the “sweat” in sweat equity, now I think you’re putting in the “equity” :)
I hadn’t thought of colored stain either…you are making my decision harder rather than easier. So many great suggestions!
We definitely did put in some equity…sometimes it’s nice just to throw money at a problem and not have to think about it anymore!
I vote for going ahead and painting the door, you’ll love it and if you go with a fun color it will make the front of the house really pop. To help with the door scratches I’ve put pieces of plexiglass on basement doors when our dog lived down there and would scratch up the doors. That way the wood on your door doesn’t get ruined and the color of the door still shines through.
That’s such a great idea…thanks!
I LOVE seeing all of your transformations, and this one was big! I like the idea of paint to give it a pop, especially if you plan on painting the columns and trim. I am leaning towards a yellow or a minty green (which I am really in love with right now). Good luck I am sure your decision will be beautiful!
what a great blog! you sure have done a fantastic job on your yard!
Refinish it. Top the places that take the brunt of the abuse with 1 vertical & 1 horizontal bras plate, to protect it in the future, too.
The B&A pics are great! Y’all have really been working hard!
Love your “after” :) That green makes such a difference to the curb appeal! Everything was gray/brown/tan/taupe dust colors before. I have seen some beautiful natural wood doors and I think you might want to test filling the gouges and staining. Some fillers take stain extremely well. However, I really prefer painted doors on houses of this type and my recommendation is to paint it marigold – somewhere on the orange tinted side of yellow.
Looks great! I think I have the same sod — Palisades Zoysia? I’m really happy with it. It looks a lot like St. Augustine (just a bit narrower) and is super drought-tolerant. With just the little bit of rain we’ve had so far this spring (you’ve maybe had more?), my lawn is totally green and lush. Definitely water the heck out of it to get it started, though — I think we put ours in around the beginning of May a couple of years ago and watered every day for two weeks or so, then every other day for another couple weeks (which cost A TON but got it well-established).
And I agree about painting the door and the columns — or even all the trim, if you’ve run out of projects. : )
What a great job, you must be so happy with it.
For what it’s worth I think a bright yellow door would look very nice with the cream and tan masonary.
Maybe you could find some sort of decorative metal piece (s) to put on the door to protect it in future, like metal flowers or stars or something… or you could put a sheet of clear plastic over the bottom half.
I’ve just read that applying epsom salts (aka magnesium sulfate) to any kind of plant, especially grass, will make it greener, healthier and happier. It’s wicked cheap and not some weird chemical. I bought a bag at Wal Mart for 3 bucks (maybe a 1 lb pound bag?) and added it to everything I’m growing. Your house looks LOVELY!
ps I hate growing grass.
Thanks for the tip, I’ll have to try that! This grass is going to need all the help it can get…plus epsom salt IS wicked cheap.
I got a metal plate that’s meant for you to hit at elbow-to-shoulder height on swinging doors like in restaurant kitchens and put it low on my door where my dog scratches. It looks good and keeps the door from getting more damaged. Got it at either Home Depot or Lowe’s, can’t remember which.
Ashley – Wow! Fantastic job on the landscaping project! You both maust be very proud of the results – your home looks beautiful! So many homeowners do not take in the long term view of what it means to develop and maintain a great lawn and greenscaping. Well done!
Wow, what a great job! What a great looking home. My question is about your drive. It looks really great, is it pea gravel?
It’s decomposed granite. It’s similar to pea gravel except it gets really hard over time and doesn’t move around much.
It looks terrific!
Your yard looks great!!! the grass makes ME wanna roll in it too… I just painted my front door a kinda dark ruquoise color – and I LOVE IT!!! just the pop of color that was needed on our brick with white & black trim home. I read on another blog that if your home faces east, that a good Feng Shui color to paint your door is turquoise, and it stuck with me… I haven’t noticed any increased good fortune yet, but I am sure it is only a matter of time. Does your door face East? if so, decision made! lol!
p.s. I just started following you, bcuz you CRACK ME UP!!! I love that your projects don’t appear as “Look what I easily whipped up in one breezy little naptime….” Thanks for sharing the real down and dirty, and sometimes how ‘not’ to do things. Seriously, much more helpful!!!!
You did an amazing job! Thanks for sharing.
Thanks for writing this piece. I learned a few things that will hopefully help me going forward.