
How to Build Thick Floating Shelves from Plywood
Alright everyone…if y’all are looking for a fun and entertaining blog post, then you’ve come to the wrong place! Today I’ll be sharing a detailed tutorial for the floating shelves we have installed all over the house, most recently in the office and bathrooms.
I love these shelves because they are simple, functional, and budget-friendly. The thickness is my favorite part…they look like they cost a lot of time and/or money, even though that isn’t the case. They are made from plywood so the thickness is fake….they are actually hollow in the middle.
*This tutorial is for floating shelves that are attached to the wall on three sides. It is possible to make a floating shelf that is attached to only the back wall, but you will need to slightly alter this tutorial and buy a bracket LIKE THIS.
MATERIALS NEEDED
- Plywood (we used 3/4 inch)
- Stud finder
- tape measure
- pencil
- level
- table saw (or something like the Kreg Rip Cut)
- miter saw
- brad nailer
- 3-inch construction screws
- wall anchor (maybe)
- putty, sandpaper, caulk, and paint and paintbrush (if you choose to paint them)
HOW TO MEASURE & INSTALL THE HIDDEN SUPPORTS
First, you will need to locate studs in the back and side walls and mark them with a pencil. (If your shelves are not deep enough to reach the closest stud, you must use sheetrock anchors.)

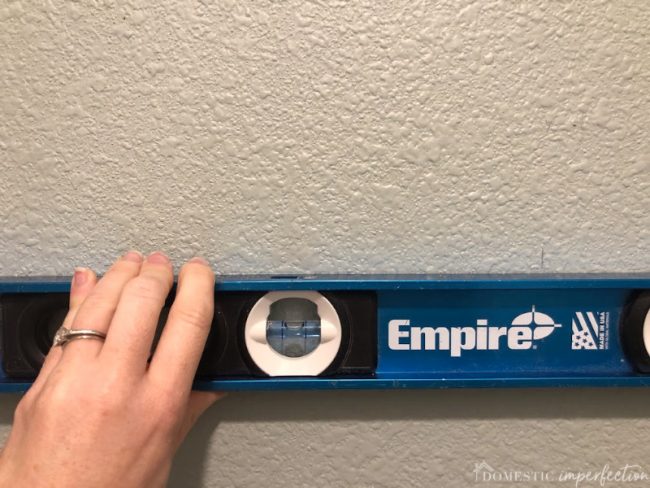
Then use a level to mark a line across the back and side walls at whatever height you choose for the shelf.
Next you will cut your hidden shelf supports.
- Back supports – Cut a 1”x2” board 2” shorter than the length of your shelf (you will need one of these for each shelf).
- Side supports – Cut a 1”x2” board 1” shorter than the desired depth of your shelf (you will need two of these for each shelf).
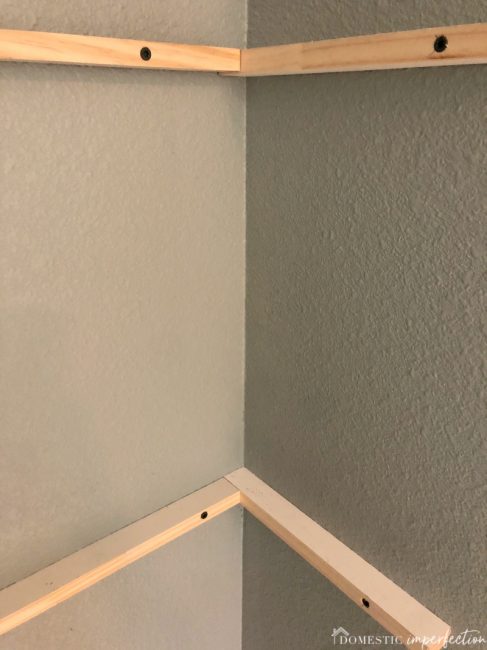
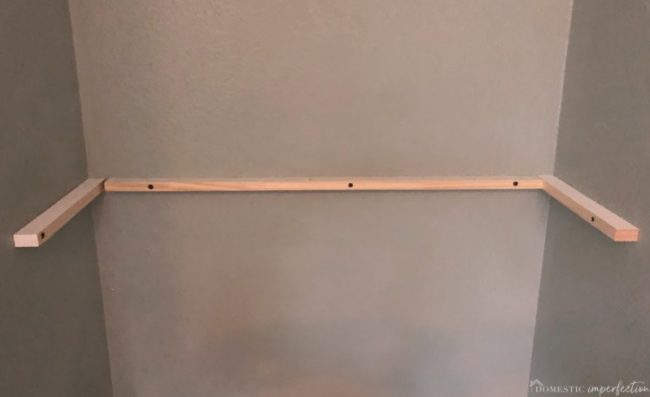
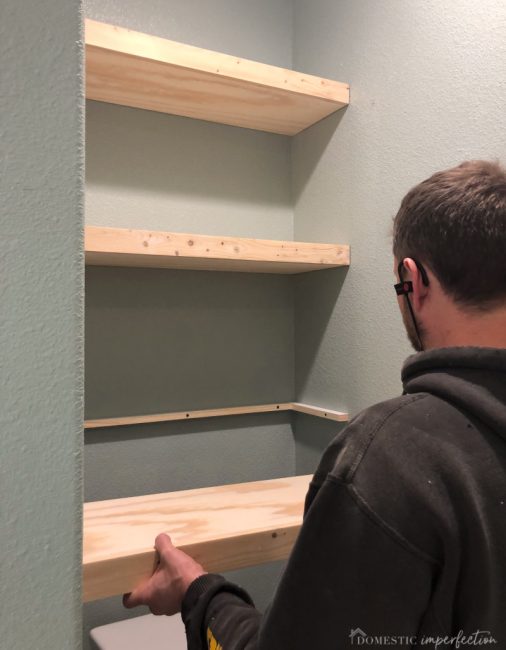
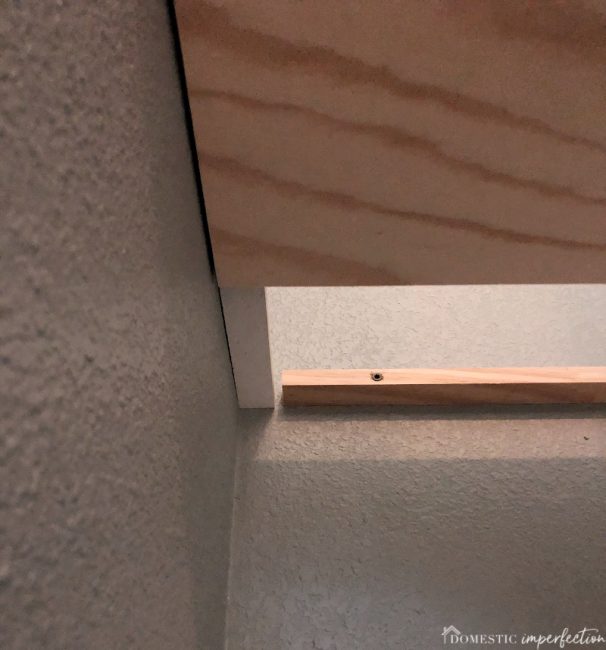
Next you will attach them to the wall, placing the support on your pre-marked line. Start with the side supports, butting them up to the back wall and attaching to the studs using 3″ construction screws (make sure you are drilling through the wide part of the board and not the narrow one). If there is not a stud near the leading edge of the shelf you will need to use sheetrock anchors.
After the side supports are in place, add the back support. The finished product should look like this –
HOW TO MAKE FLOATING SHELVES OUT OF PLYWOOD
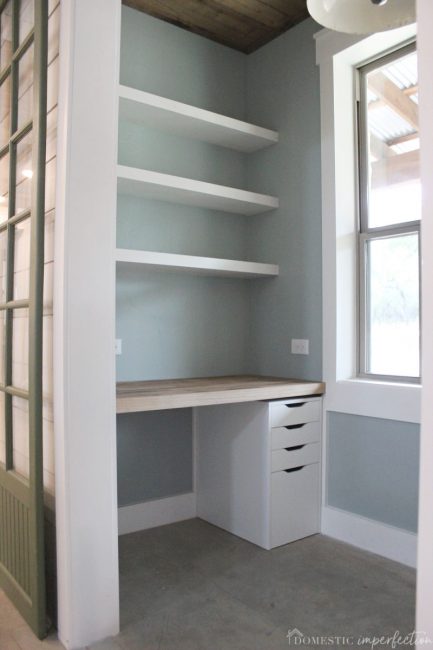
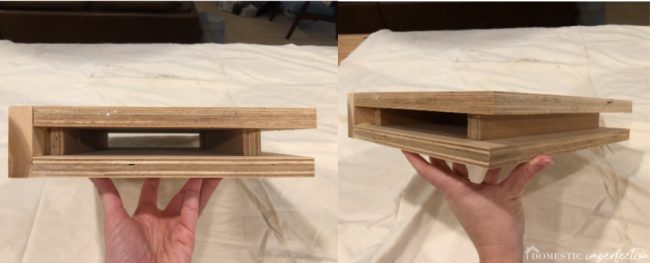
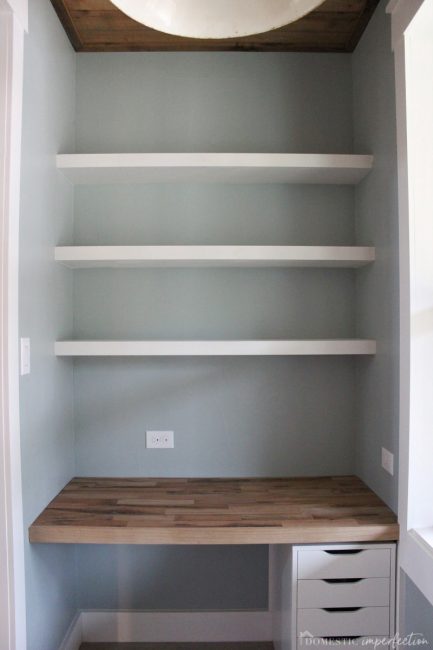
Once your hidden supports are installed it’s time to make the actual shelves. Here is what the finished product looks like…hopefully having this visual in your head will make these instructions easier to understand.
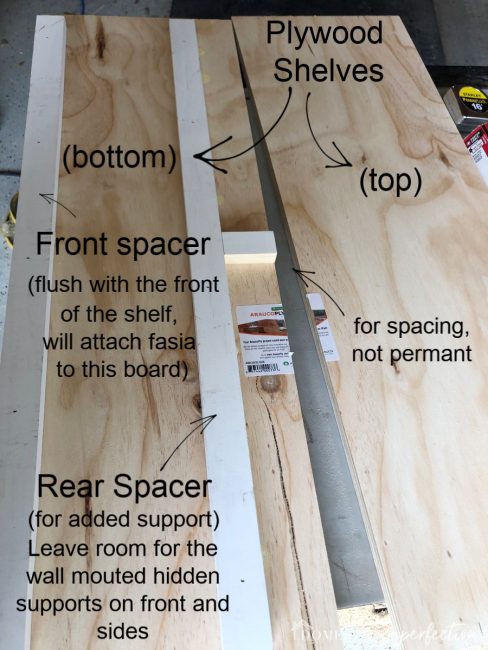
First, you will cut the two outer shelf pieces. Measure your back wall, this will be the length of your shelf. Make this cut on the light side (maybe a 1/4 inch less than the back wall dimension) or else the shelf will be too tight to slide into place later. After you have cut your shelves to length, cut them to whatever depth you have chosen for your shelves, minus 3/4 of an inch. For example, our shelves are 12 inches deep, so we cut them to 11 1/4 inches. This is because you will be adding a front fascia piece later, which will add 3/4 of an inch in depth.
Next, you need to cut the inner spacers. Cut two boards 4” shorter than the length of your shelf. Make sure that the thickness of the spacer is either the same or slightly thicker than the wall supports. Then assemble the shelf as shown in the picture.
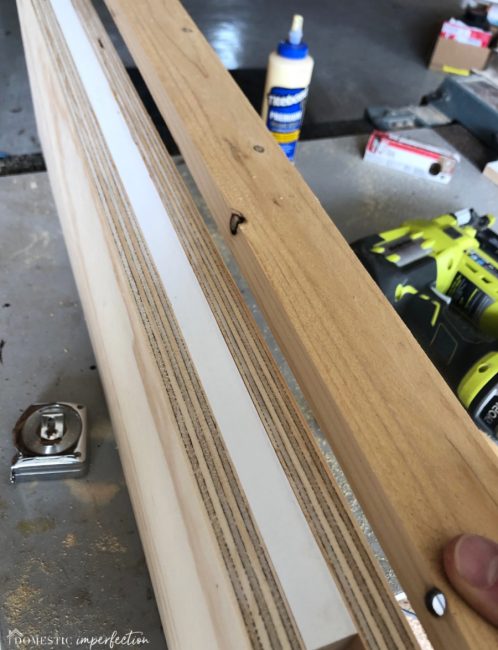
Are you still with me? We’re almost finished! Now you will need to add the front fascia piece, which will cover up the innards and make your shelf look faux thick. Cut a 1” x 4” board to the length of your shelf and then rip it to the thickness of the shelves. Attach it with wood glue and brad nails, just like the rest of the pieces.
Now just slide the shelf onto the wall supports! You shouldn’t need to attach the shelf to the supports as the tolerances should be tight.
Then just caulk and paint!
Not too hard, right? I can’t tell if this tutorial was easy to follow or clear as mud, so if you have any questions please ask in the comments!
Update – CLICK HERE to see the finished office!
Office Remodel Links
Office FAQs
- Office wall color – SW 7621 Silvermist
- Barn door color – SW 6180 Oakmoss
- Trim/Shiplap color – SW 7008 Alabaster
- Floor – Sealed concrete
Seems simple enough! And super clean looking without the brackets showing. Thanks for the tutorial :)
Those are really nice shelves, and the project looks doable. Thanks for the tutorial!
The thickness really gives it an upgraded look. I’ve built shelving before but I need to go back and make these thicker shelves, looks great!
I loved a tip, I’ll do it at home !!
That’s a great idea to use unused space in house. I’m planning to make some shelves in my bedroom’s empty space.
Thank you very much for such a good tips.
Thank you for your office finish out, gave me a good laugh along with the inspiration to tackle something productive today :-). It’s beautiful, congratulations! I’ll be browsing more of your posts if I fail at being productive on my feet….
nice job, for the beginner, if you do not know how to use stud findder while doing some DIY home renovation , try to know the plasterboard by your fingure you will feel the different
Such a nice built, good idea for me to try in my apartment.
I like tho idea! Its very imaginative. I think, I might try it in my bathroom.
It is very clear and relatable. I’m not a skilled anything but I believe I can do this and will try it this weekend. I like the support shelves against the wall, but the plywood shelves appear intimidating to me. I will attempt to have my husband handle that part.
Your shelf is 4″ thick? Sorry, I was getting lost. If the shelf.is.4″ thick, how’d you arrive to that if the plywood is 3/4 (top) and 3/4 (bottom) and then the middle is 2″. Wouldn’t that be 3 1/2″?
A video in YouTube or here would be highly appreciated and very helpful!
What if front of alcove is narrower than the back of alcove? You can’t slide shelf into position.
I’d suggest build-in-place rather than pre-building the shelf. The supports go in as directed, then custom cut top and bottom; add the inner structural supports to bottom and brad nail to the supports; add top with glue and probably brad nails; add front piece and you are good to go.
Agreed
Then you would made the se.f in the wall area. Place top of shelf first , then place b I ttom of shelf from underneath….A ,title harder but easily durable
.
Do you know what the maximum weight each shelf will hold. I would like to use this type of shelf for lots of books.
If you use 3/4″ plywood as suggested, it’s going to be very sturdy. If you are concerned, check out using a french cleat.
Easy to follow and well done!
I’d suggest build-in-place rather than pre-building the shelf. The supports go in as directed, then custom cut top and bottom; add the inner structural supports to bottom and brad nail to the supports; add top with glue and probably brad nails; add front piece and you are good to go.
These are beautiful! Love it!
Hello,
I just came across this article via pinterest. I’d like to try it though I have a question. What are the small boards you use on the wall as well as the spacers? Do you need to have anchors on your screws? Ty.
This looks like a cool way to make floating shelves, and I would like to try it. But there’s one thing I need a little clarification on. Are the supports, spacers and fascia cut from the plywood too? Or do I use 1×2 and 1×4 boards? It looks from the photos like it’s boards, not plywood, but I don’t see these boards in your materials list. Also, could you say a little about what type of plywood to use? Thanks!
I am currently making these at home and I used pine boards for the supports. They come in the right dimensions at Home Depot and are not expensive. And you are right, they are using boards not plywood for the fascia. Otherwise you would see the layers of the plywood on the edges. I used birch plywood for the shelves. It’s more expensive than pine, but I plan on staining them to match the birch countertop I used for the desk. If you plan to paint them, pine is fine and much less expensive.
I have used the same idea to build a surround floating shelf in a walk in closet in my master bedroom of the house i built and with the price of 3/4 inch plywood why not use a thinner plywood for the cladding , meaning the top and bottom of the shelf, even with say, 3/8 ‘s plywood there is plenty of strength because that comes from the supports within the “sandwich”. I actually went a step further in that area i used a low grade 1/4 inch plywood and then clad it with a nicer looking luan with a veneer side, so i have a wonderfully rich grain pattern on the visible” bottom part of the shelf and the top is never seen as it is above eye level. so far the shelf has withstood all of our xmas decorations and lighting on top of my wifes clothing that she rotates on and off if the hangers, winter /fall/ summer etc 3tc. the floating shelf can have many different applications and as far as the thickness , that’s completely up to you to decide, i prefer the thicker look for shelving that holds larger items and the thinner look goes well for the inside of closets and in the kitchen..
Looks great really nice
Hi! We used your plans and they worked really well, except for the fact that our wall is wonky and is skinnier at the front than at the back, so we couldn’t slide them in. We took them apart and installed them separately instead.
One problem that we’re having, though, is that they smell quite strong even a week after. We used sanded plywood and painted them with an interior primer and paint. Did you have this issue?
The paint smell will linger for up to a few days, but it shouldn’t be strong after a week.
Great post! I love the step-by-step approach you took. The tips on finishing the plywood really helped, and I’m excited to try this project in my living room. Thanks for sharing your expertise!
This post was incredibly helpful! I love the detailed instructions and the tips for finishing the plywood. Can’t wait to try building these floating shelves in my living room. Thanks for sharing!