A Birch Forest Hallway
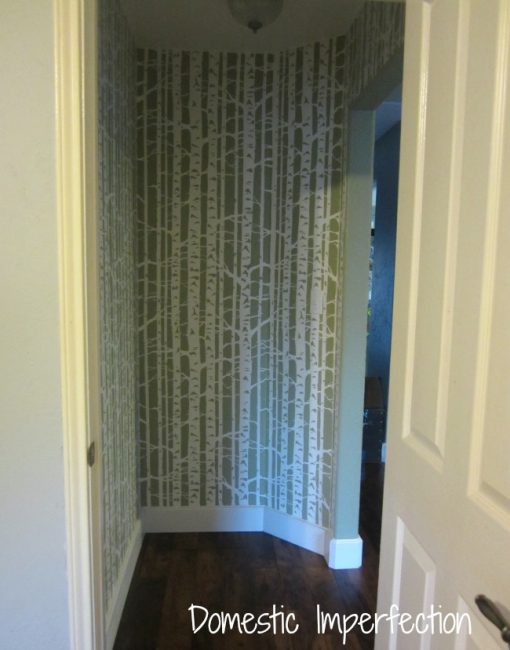
There is an awkward little hallway that leads to my master bedroom. Actually, calling it a hallway is quite generous…it’s really just a wall that blocks people from being able to see our bed from the street. That probably doesn’t make much sense, so allow me draw you a (horribly inaccurate) picture.
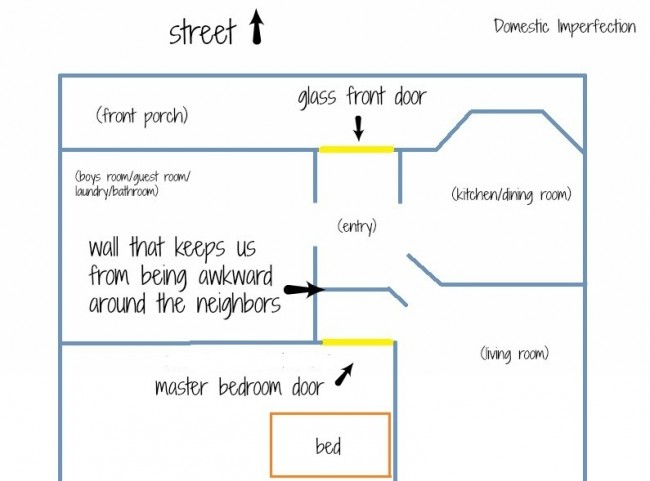
So as you can see, the wall is weird – but the wall is important!
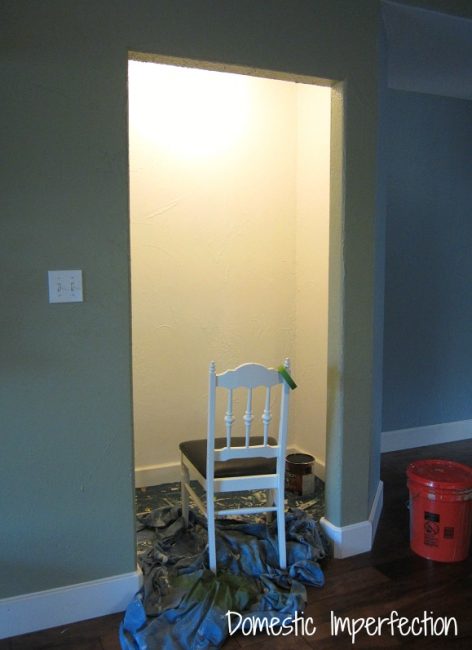
Here is what my little hallway has looked like since we moved in and painted…
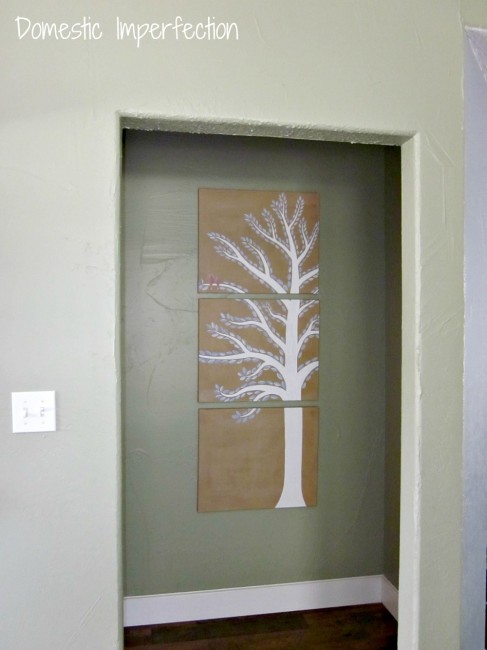
B.O.R.I.N.G.
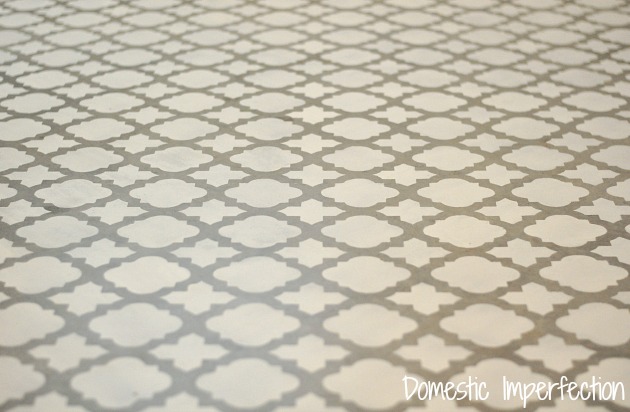
It’s a small space which means I’m free to go as crazy as I want with it. Did y’all not know that rule? The smaller the space the bolder you can be. Okay I made that rule up, but I think it’s a good one. So I wanted the hallway to ‘pop’ a little, while keeping in mind that you can see it clearly from all the main parts of our house. It may be small, but it still has to mesh. Usher in the Birch Forest stencil from Cutting Edge. I’ve liked this stencil since I saw it in Jen’s playroom over at I Heart Organizing.
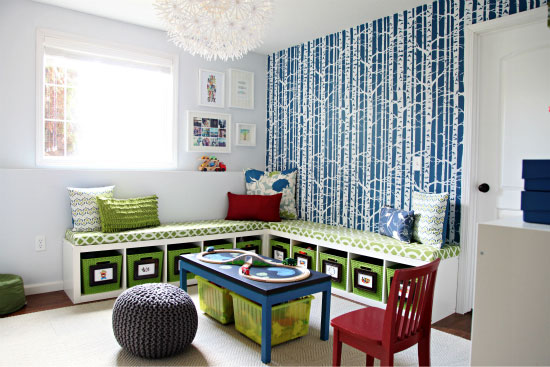
Forget the stencil; that whole room is awesome. Seriously, go check it out if you haven’t seen it.
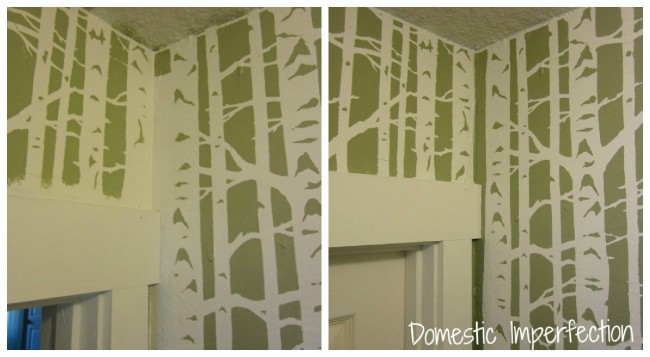
I ordered my stencil and when it came in I excitedly got right to stenciling This was my first time to stencil a wall, up until now I had just stenciled furniture (in case your curious, stenciling furniture is waaaaay easier.) So I did a couple of rounds and stepped back to admire my work, and when I did I thought it looked…off.
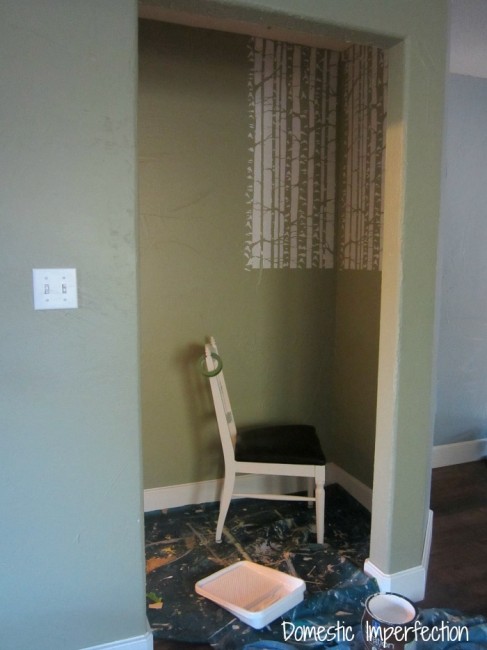
The trees were green and the background was white. That’s not what I wanted, I wanted white trees on a green background. I tried to tell myself it was okay and would look just fine when it was all finished, but I couldn’t bring myself to keep stenciling. So it stayed like that – dropcloth and all – for about a week. Adam really wanted me to hurry up and finish it, so he told me stories that went something like this – “Imagine a forest at dusk, the snow is softly falling and the remaining rays of sunlight reflect off the snow and make the forest seem bright and the trees appear shadowy and dark…” They were beautiful stories really, but we both knew they were total BS. I KNEW he agreed with me but I was never going to get him to admit it. He just wanted me to hurry up and finish.
Being an intuitive and obedient wife, I did what he wanted me to do – I waited till one day when he was at work, and the kids took naps at the same time (!!!), and I painted the whole thing white.
And then I stenciled and stenciled, and oh my gosh, it took forever.
Like days.
For another (easier) way to cover an entire room in pattern, check out the link below!
Read it – HOW TO INSTALL PEEL-AND-STICK WALLPAPER
The easiest wall to stencil is a big flat one without any windows or doorways – I chose to stencil a tiny pentagon with multiple doorways. It’s my own stubborn fault for it taking forever. I’m really glad this is such a forgiving stencil though, because I ended up painting all my corners by hand.
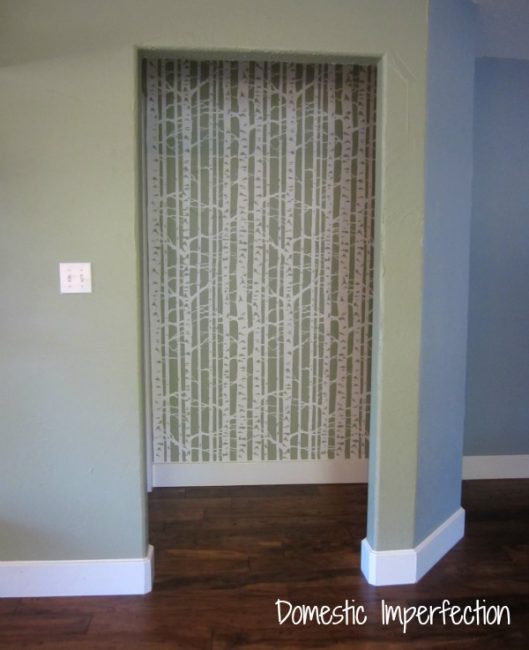
The finished hallway was totally worth it though, I think it’s really fun without being overwhelming.
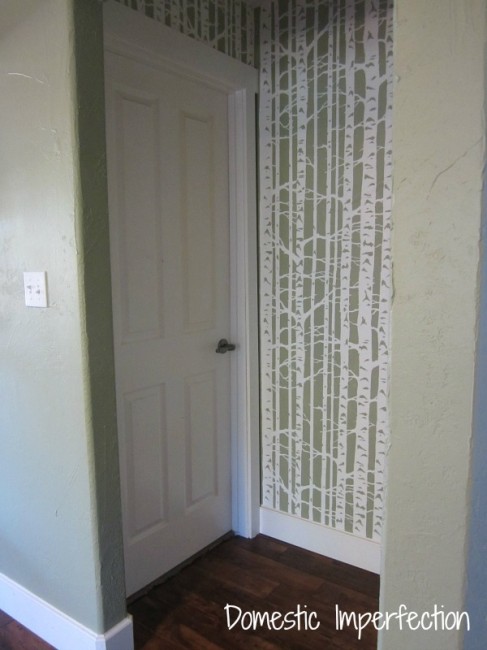
That cheap boob light is getting the ax next, once I find all the pieces I need for the DIY light fixture that I’ve already made in my head.
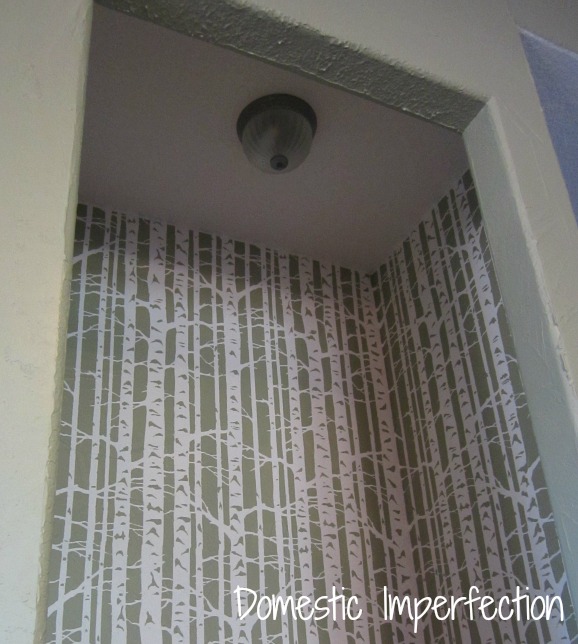
I obviously need some decor or something in here, but I don’t really have any ideas for that part. Suggestions are welcome! I would love to make it useful, but we don’t need shelves and it’s not big enough for much else.
Okay, so I actually did have one idea. Since it’s a birch forest I thought we might build a tree house, for the boys to climb on and hang out under. Allow me to draw you another picture…
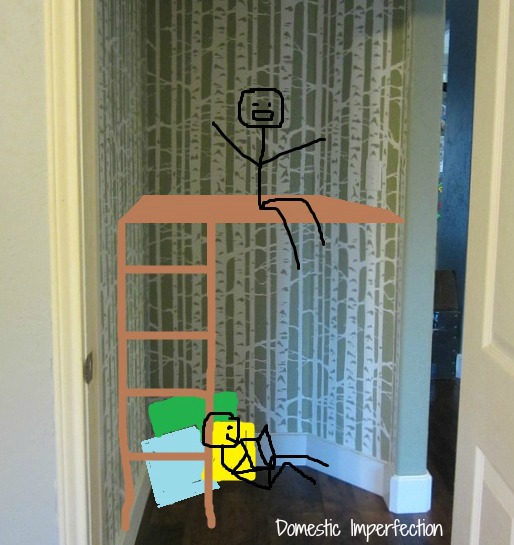
Brilliant, right? Except that it would be about a foot deep so it wouldn’t work. Also, my boys would probably just take turns pushing each other off and I am kidding myself to think they would sit quietly underneath and read books. It would have been fun, though, and Jen’s playroom would have had some serious competition for the best birch-forested playroom in blogland. Ha!
Update – click here to see the completed hallway!


I knew I liked you! I just bought that exact stencil!! Can’t wait ti get it on the wall :o)
Oooh la la!! Now that’s my kinda stencil! Can’t wait to see what you do with the light!
Great job, Ashley! Looks beautiful.
i think the stencil stands on its own and doesnt need anything on it. I notice Jen’s doesnt have art on it. It is great as is!
That is the perfect space for the stenciled forest!!
Great job !! Well done
Looks amazing !!
Your ‘drawings’ pretty much made my day. Especially that last one. I about choked when I scrolled down. Hilarious. Also, I love the wall. 2 thumbs up on revolting and switching the colors. Turned out awesome! ~ V
I looks amazing!
And by I, I mean it, of course. Maybe a nice piece of art for the wall? I’m sure you’ll come up with something amazing and I can’t wait to see what!
Lol, I’m sure you look amazing too :)
That stencil looks amazing! And switching the wall to white was definitely the way to go. Thanks for sharing!
Love the walls…maybe you could add a few bird houses in the trees, or stencil in some birds sitting on the branches…maybe a red bird, that would stand out well – I’ll be waiting to see what you decide, I’m sure it will be great
Oooohhh…I love the idea of little birds. I think I just might do that! Thanks!
I love it-it turned out great! My stenciled bedroom wall took forever too but I’m so happy I did it. I want to try that birch forest one soon!
It looks awesome! And I love that you call that light fixture a “boob” light. My house is full of boob lights too. How about a quiet nook for mama to imagine sneaking off to? (I have a 17-month old…I would like a little place to imagine sneaking off to!) Or how about a simple lighted fixture to light up that fancy wall??
Looks awesome! I like that rule. I’ve been thinking about stenciling a small space in my entry way, but stenciling intimidates me…
I love it and i love Cheryl’s idea of just one or two red birds!!! And for the boys maybe a small mouse hiding somewhere. Ooooooh how about your’s and hubby’s initials carved (painted, obvie) into one tree!!! :)
I like that idea too and think I might just do all of them :)
I agree, if you are going to do something, you might as well take the time to do it the way you want it, otherwise you’ll never be able to enjoy the finished result. Possibly a large black and white photo on the “fort” wall?
Love this! Maybe I’ll have to save up for one of these stencils!
I like the idea of the decor being part of the forest. What about a kid-sized park bench? That might be fun, and a place to wait and play until they’re allowed to wake Mummy and Daddy up (6:00 am? lol)
The stenciled nook looks great! Your house is really transforming, bit by bit. It must feel awesome!
I like that park bench idea too…and there just happens to be one on sale at my grocery store! I’ll have to measure it next time I go to see if it would fit. Thanks for the idea!
Cool! I hope it does. :)
AMAZING! Love this!
Looks amazing! As for adding to it, my mom painted a picture of trees a few years ago & put her and my dad’s initials on one of them. He’s since passed away, &I love seeing their initials in that tree. So yeah, I’m kinda partial to that idea. Also I’m thinking maybe some real branches (white of course) sticking out 3-D style near the top. Maybe you could put the birds on there…like those little clippy Christmas ornament ones. Whatever you decide to do will be wonderful I’m sure.
Holy cow! This could be the coolest wall treatment I’ve seen in a long time! I love the color choice too!
It turned out gorgeous! Why not make it a reading alcove for you? A cozy chair with a pillow a nice pretty light.
AMAZING! Absolutely in love with it!
That is a seriously unusual wall configuration, but I like it! Different from everybody else’s ordinary, everyday walls. Gives your house some character, you know? And I love what you did with it. I love all the ideas people suggested, the birds, initials, etc. I really like the idea of a tiny mouse!!! I would never dare try to stencil a wall, but you did a great job with it!!
Love nooks and crannies and rustic nature themes! I was going to suggest a small old rustic wooden chair with maybe a woven wood vase/basket with some forest-y looking stuff in it. Or maybe a larger sized rustic bird house ( you know the kind, with the door knob perches, old shingles etc?) that would sit on the floor beside the chair, instead of the basket. Can’t wait to see what you’ll create!
I enjoy reaading your post! Isn’t it great to say you did it yourself? Good design/ideas often get improved on as we see and think about it. It is also helpful to get feed back from others. You’re an inspiration to many. Thanks!
So true Nance, most of my projects morph as I work on them and end up being different (and better!) than I intended. I always get great ideas when I ask my readers for feedback. Thanks for the sweet comment and have a great weekend!
Beautiful! It looks a lot like your header. If you don’t have room to build a treehouse, you could take cute pics of your kids playing in a tree house and hang them in the forest. Yeah! Happy Thanksgiving!
It does kinda look like my header…I guess I like what I like, lol. Thanks for the suggestions!
BAHAHA. I love the happy reader you expertly drew in under the tree house. I stenciled a wall recently – a blank wall with no windows or corners or anything – and I ALMOST gave up on my whole entire life. It was torture. I salute you.
Oh I can see why the wall is so important. I just love what you’ve done with the birch stencil too – that’s gorgeous! For a suggestion on what to hang there: what about hanging a deer head?? Like, not a REAL one, like a paper mache one maybe??
love the stencil! i think you should take a round of wood and either carve or burn into the wood your initials surrounded by a heart. then you could screw in some hooks at the bottom so that it’s also useful!
LOVE it! Looks fantastic!
Oh Ashley, This is stupendous. Love it and you are right this is the PERFECT place to be a bit bold. I LOVE that stencil too and I am thinking where could I use it too. So glad you posted this on BeColorful.
p
Love how it turned out! Great choice for a small space!
This is really, really lovely. You did a great job. I used this stencil too and enjoyed it very much. Thanks for posting your pictures!
take out the “boob light” (LOL) and put a high hanging outdoor-sey earthy chandelier…?
Maybe like the one here from funky junk sisters? You could totally do this yourself, well cause you are my hero.
http://www.funkyjunkinteriors.net/2010/11/lighting-up-my-life-with-white-branch.html
Boob light! You are talented and funny too. I love the wall:)
Haha, you’re never going to think of them as innocent light fixtures again, are you?
I wanted to share a pin I found on Pinterest (http://pinterest.com/pin/259942209711825624). It might be just what you’re looking for in terms of an indoor treehouse for your wees. Beautiful stencil work BTW.
I love this, it’s kinda exactly what I had in mind! We don’t have the room for it in our hallway unfortunately…if we did it the fort would only be about six inches deep. My kids are small, but that’s pushing it!
I just found your blog through Pinterest and am having fun reading. I love how you raised your kitchen cabinets! It would work perfectly for my kitchen and laundry room.
The tree stencil is so cute. Makes me think of the Lion the Witch and the Wardrobe. It might be cute with a lamp post in the corner like this, http://narnia.wikia.com/wiki/Lamp-post . I like the birds and carved initial ideas too.
I love the lamp post idea! Wonder where I could find one for a super reasonable price?
You could literally hang birdhousees on the walls… i guess really flat ones or something.
Or put that one picture back up…. I liked the tree picture… and its a tree.. so lots and lots of trees…
Love the lamppost idea though.
You could try a tallish & narrow mirror on the flat wall – just touching the slanted wall so it looks centered. I don’t know what you have “to reflect” in the mirror… so maybe a small ledge with candles? I don’t have a website.
I am SO GLAD someone else had trouble with that stencil!! I’m working on our half bath and using the same thing. This is our first house and also my first room reno, and it’s disheartening how long it’s taking and how hard it is! I linked the most recent post regarding our bathroom – I’m sliiiiightly further than that now, but the stinking room still isn’t done!! (I started in July. >.<) The walls we decided to use the stencil on were narrow and none of them were totally smooth – I had an outlet on one wall, a light and sink hookup on another, and light switches on the third. The night I finally decided I was going to finish the stencil I broke my roller and had to go back to using a paintbrush (takes about a billion times longer and requires multiple coats)!
We're supposed to redo the bedroom for Christmas, and I just don't think I have it in me… :\