Upcycled Porch Entry Table
It took me forever to come up with a title for this post. The one it ended up with isn’t that great, but its better than “Antique Dumpster Vanity Mirror Holder Thingy Turned Faux Outdoor Entry Table”, or a variety of other things I things I came up with.
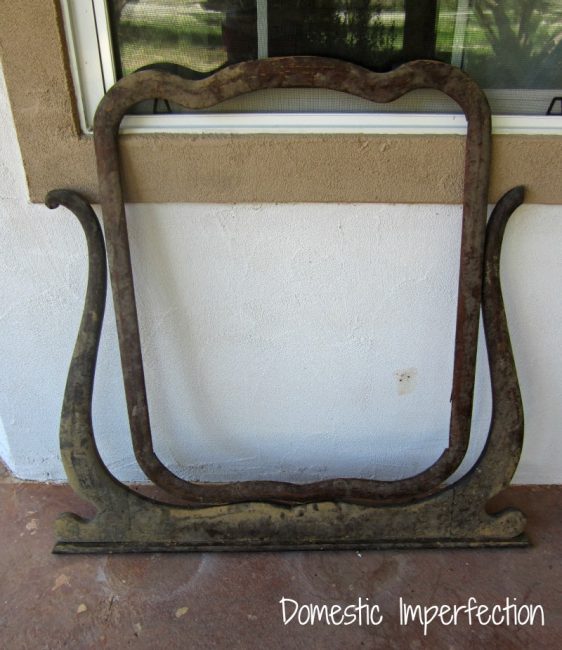
So a few days ago I showed you this broken old vanity top that was found near a dumpster…
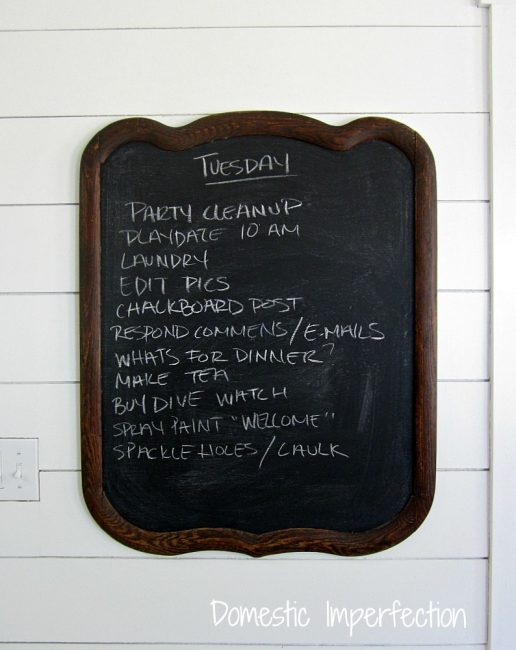
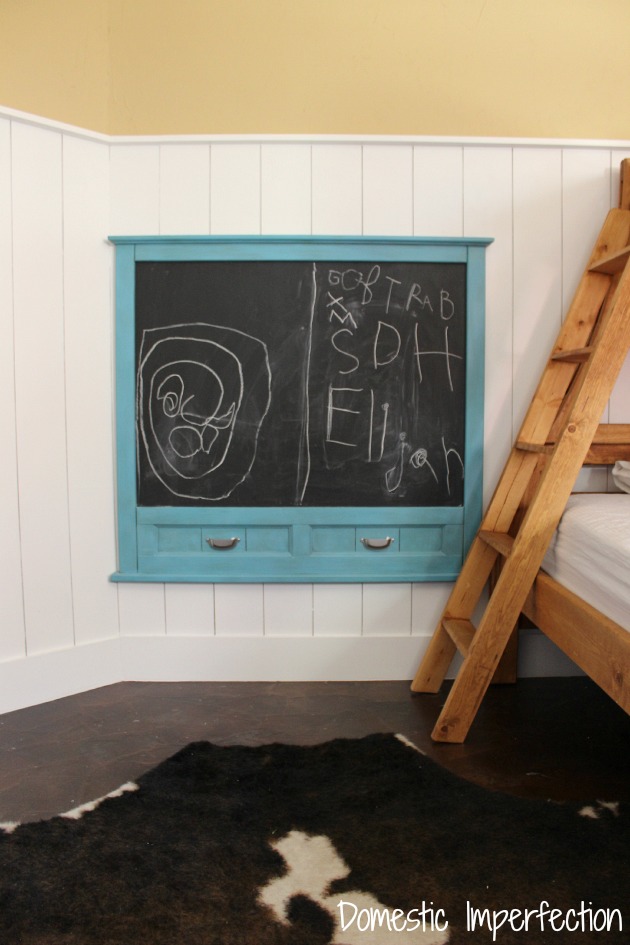
and how I turned the mirror frame into this chalkboard.
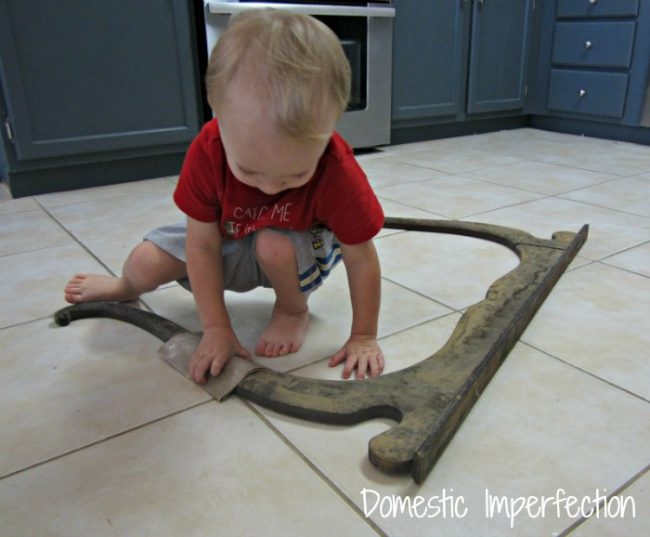
I wanted to use all the pieces of it (what can I say, I like a challenge) and when I looked at the part that held up the mirror I saw an upside down table. Well, flat table. But I had an idea and knew exactly where I could use a fake flat table in my life. So, Elijah and I got stared by sanding it down and cleaning it up. (I feel like a broken record, this is how all my projects start).
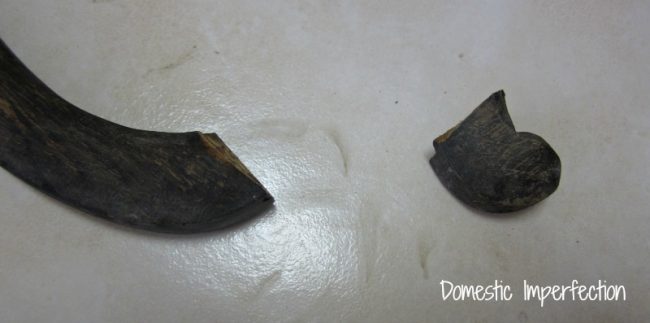
One of the “legs” was broken, so I was trying to figure out how to make it match the other (much prettier) side. I though perhaps I could get a small hunk of wood and whittle it down to match the other and glue it on. I was about to go wood hunk hunting when Elijah tripped over himself and fell on the good leg, breaking it off exactly like the other one.
Problem solved.
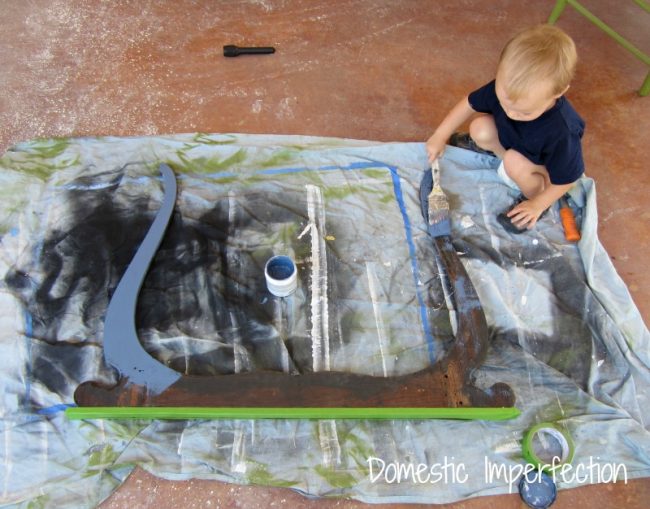
Since this table was going in my front porch I decided to paint it the same kitchen reject blue that I painted some of my other outdoor furniture. I taped off the top (since I wanted it to stay wood) and did something I’ve never done before….I handed Elijah the paintbrush.
He used to be completely happy just watching me work and soaking up all the DIY knowledge, but now he is ready to put his knowledge into action. The entire time I’m working now I hear choruses of “Tool? ME! Sand? ME! Paint? ME!”. I have a feeling projects are going to start taking much, much longer.
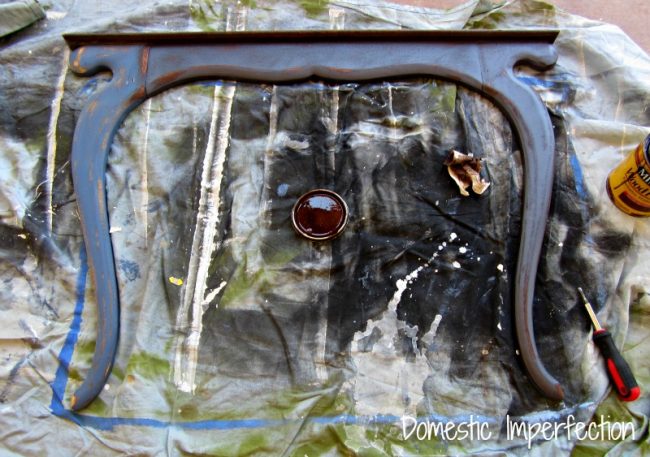
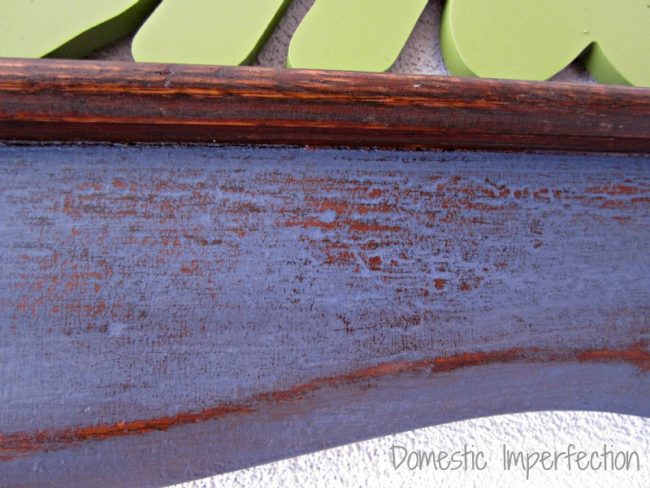
After some coaxing and paintbrush wrestling I finished painting it, distressed the whole thing with my orbital sander, and applied a coat of stain over the whole thing.
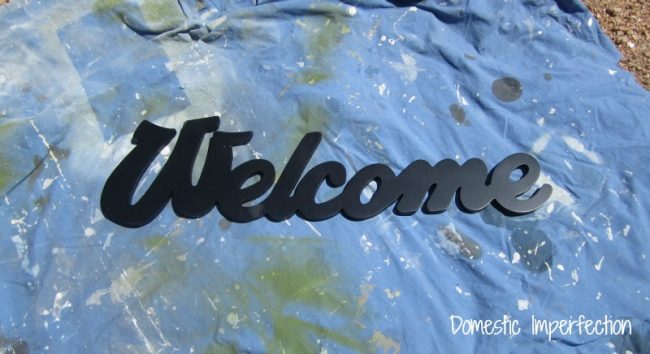
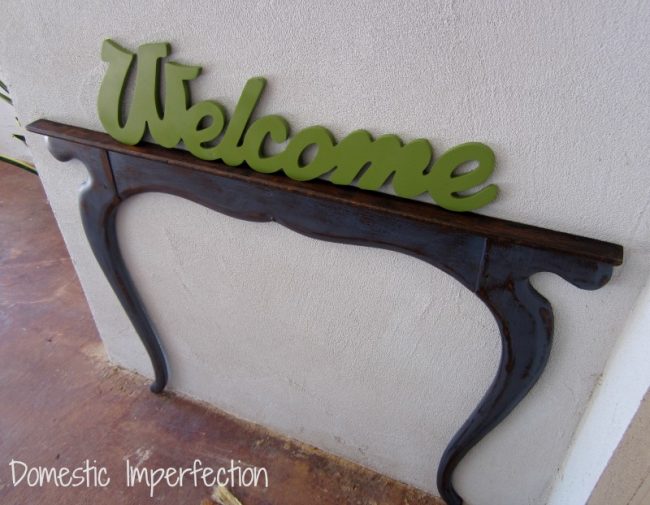
I found this welcome sign at Hobby Lobby for $5 and spray painted it green (to match the other 50% of my outdoor furniture).
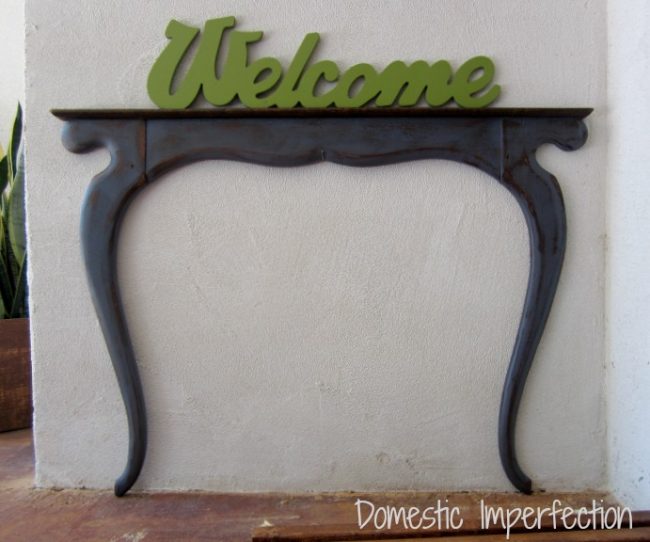
Then I secured my flat table to the wall with a nail, threw the welcome on top, bada bing bada boom… upcycled faux outdoor entry table…or whatever…

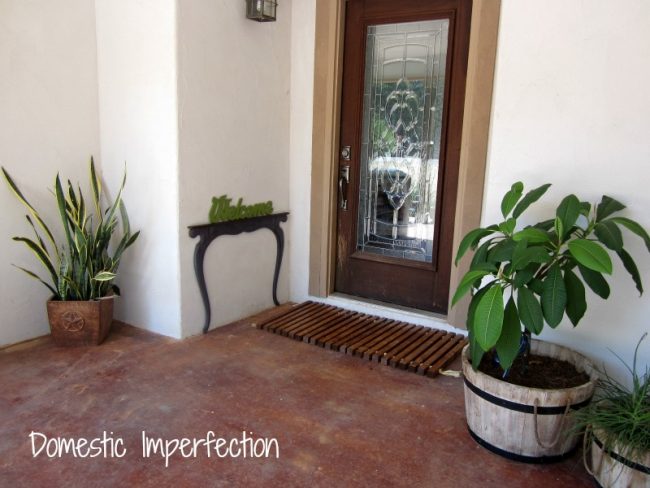
I love it! So cute and creative! It was definitely the perfect spot for it. Ps, I had to laugh really hard at the beginning of your post…. Some times I have a really hard time naming my posts, and mine usually end up with a not so great name anyways!
Those are great ideas!!
Such a CLEVER idea! I love that nothing went to waste, and that you repurposed it in such a cute and witty way!
The whole post….made me giggle, get teary and smile big….love your helper- I am imagining what he will come up with on his own at age say 16 or 26….love how this cam out and really give you a high 5 for the efforts….lucky break…
I would love to be able to pick out something and ask you to make something out of it. When I walk into a ReStore – I see junk. You find broken dumpster junk and turn it into wonderful creations. Fantastic job!
Love it! I wish I had just a little creativity in me to come up with things like this!!! Love the way it looks, beautiful. Thanks for sharing:)
It is darling! I love it. I am a newby to your blog but am loving looking through all your posts.
Painting with kids …. sigh. But oh so good for them!
This turned out so cute! I know it is hard to get things done with little “helpers”, but you really will never regret having let him be there with you, learn fom you and know that he is the most important thing to you! A great mom and a great DIYer! Way to go!
Awww, thanks Maureen :)
I love the blue paint, distressed, and stain combo. Looks great!
So cute and so creative!!!
LOVE it – it’s absolutely perfect in that space. Now I need to find some kind of beat-up something that I can part out for a similar use…
Ashley, this whole thing is great! From start (@ the dumpster) through the chalkboard project, all the way to attaching your new ‘table’ to the wall – so much fun! Your boys will always fondly remember the projects & ‘working’ with you, and I know I’m not alone in loving your whimsical, creative approach to all you do, & so generously sharing it with us!
That’s adorable! What a great idea. :^)
Love, love, love this idea! I am a long time reader, first time poster and am always so jealous of the amazing ideas you come up with!! Keep ’em coming!
I’m glad you broke the silence :) Thanks Amanda!
That totally ROCKS!!!
Absolutely love it! I have to find a great old frame like that, what a fabulous idea.
This is by far the most creative project I’ve seen. I love it and I love your blog. Thanks for sharing.
Really, really cute! I don’t think I would have seen the table. I love it when people see something others just don’t. :)
Super cute and a great way to use all of the parts. This would be cute inside too…maybe for someone with an entryway that is too small for a “real” table.
After reading through the comments….I wonder…am I the only guy with an RSS feed to your site!?
I can’t help it if I enjoy these crafty creations. Love the entrance “table”! :-)
Thanks Brian! I know your not the only guy follower, just the only one awesome and brave enough to comment!
This is so great, Ashley — love it with your DIY welcome mat, too. Did you paint your front porch? Is it a concrete floor? If yes, could you give a tutorial some time, and thanks for all your family’s work!
We haven’t done anything to our front porch, it was like that when we bought it. It’s concrete and is stained, but not polished. Eventually I’m planning on painting the concrete floors in the master bedroom, and I’ll make sure and share the whole process when I do!
Love it and I love the photos of your hunky helper! :)
What a fun project! It turned out looking more like a table than I thought it would (I didn’t get the two-dimensional thing till I saw it up there).
When I saw the picture of Elijah sanding, I thought, “He’s starting to do the actual work, not just play-working alongside”, and then lo and behold, you gave him the paintbrush. That’s awesome! It takes lot of courage to do that ;)
Cheers! Thanks for a fun post.
He is starting to do actual work…He doesn’t make things any easier or faster (yet), but he’s the most enthusiastic helper ever :)
I can see that he wouldn’t! But to him it’s all play AND it’s all help. And he’s darned cute, besides. :)
What a super COOL idea!! Pinning so I can keep an eye out for something similar … :)
That is so fabulous!! Love!
love love love it total genius idea love it
I like it, it’s very nice in that spot too – so welcoming!
OMGSH! That is the cutest thing ever!!!
The chalkboard is gorgeous. A real toe curler :)))
What a completely brilliant idea for the table silhouette. It’s darling.
As is your little helper!!
I really love the chalkboard! The green you chose for the lettering is my absolute favorite. I plan to use that color on a few pieces in my home. I just love what you do! Thank you so much for sharing!
Love this! Would love for you to share this at our Kitchen Fun and Crafty Friday link party…just posted it! http://kitchenfunwithmy3sons.blogspot.com/2012/09/kitchen-fun-and-crafty-friday-link_13.html
This is just genius ( and beautiful! )
Now that is CLEVER! Awesome idea!
that is so neat, and creative, and it’s the perfect spot for it! love your front porch, and am having major space envy right now!
Speechless love.
I absolutely love this! I love that it almost looks like a silhouette. Great job, Very creative!!
Love, love love it! Now I have to hunt around for something like it…lol ;o)
Guess what I found?!!
http://neverrush.blogspot.com/2012/09/welcome-table.html
I linked your pictures and your blog – Hope that’s ok with you! If not just leave me a message and I’ll take it down.
Aloha!
Heidi
Oh my goodness, that’s almost exactly the same! How much are they asking for it? If you want a wider top it would be insanely easy to just slap a wider piece of wood on the “legs” (not that you didn’t already know that). And you are more than welcome you use my pictures and link to my blog all you want…it’s doing me a favor! So thank you :)
Thanks Ashley! :o)
They are asking for $65 and it looks like it’s in pretty good condition. I think it’s a fair price :o)
Hope they still have it…I hope, I hope, I hope! :o)
Aloha Again Ashley!
Thought I’d give you an update. The woman that was selling it didn’t get back to me so I tried calling again today. She sold it to an antique shop yesterday (says she missed my message).
I asked for the information from that shop and called there. They wanted $100 for it. I was thinking what a great return for them…if they get it. Asked if that was the best price and she said yes. My friend went over there anyway and between the two of us we got it down to 79. My friend says it looks great and it’s already waiting in my shop :o)
This is so cool!! I love it and must have one!
I would absolutely love if you shared this on my link party going on now:
http://www.maidendshade.com/2012/09/youve-got-it-maiden-dshade-17.html
Thanks!
Love what you’ve done with both pieces…especially the “table”! Cute little helper :)
i luv it! now i’m on the hunt for something like this i never thot about it!
This is such a great idea! Love it.
Fabulous idea!! I love it!
I NEVER would have thought of that. But, I LOVE it! I totally want to recreate one for myself. Pinned! I’d love for you to share this at my link party on Tuesday.
Rachel
adventuresofadiymom.blogspot.com
This is a fantastic project! I love the idea of a flat “table” at the entryway.
Would you consider linking this up at my Pinworthy Projects Party? I hope to see you there!
I like how you always use “everything” from your finds. Love the chalkboard and i also like how you transformed the holder to a cute decoration for your front porch. You are very creative, and the “flat” table is just to cute. Thanks for sharing your inspiration with Sunday’s Best – you helped make the party a success!
That is so cool!
New follower here from the Not Just A Housewife Linky Party. Nice to meet you & I look forward to reading more of your blog!
I Loveeee this idea! If you ever find another one- I would pay you to make me one–
So darn creative!!
Kelly Ann
http://www.KellyAnnStudio.com
This is so off the charts creative. I LOVE it!! I wouldn’t have seen a table in there ever. You lucky girl, I should train my children to trip over things just right too. Save me lots of time with my power tools!
The chalkboard is great but I absolutely love how you transformed the rest into a flat table. Brilliant!
THAT is TOO COOL!! I LOVE it! I bet that draws a lot of comments from visitors. What a neat way to use it.
Now that is cute! But not quite as cute as your little helper ;-) I can just hear him asking to help. Makes me remember when my, now grown boys, were that age. What a time :-)
You Rock!!! what vision you have to see that as a table!~ Love love love it!
The faux entry table is great. I have a very narrow entry way (inside) where this would be perfect. Now I am on the hunt…Thanks for the inspoiration.
Super cute! I LOVE it! People always laugh at me…becuase everytime I see something I always say….I could do something with that!
That is AWESOME!!!!!!!! I have a dresser, mirror and frame exactly like yours. Mine were refinished in a light oak years ago when I lived at home with my parents. I dont like the oak at all and the frame and mirror are falling apart. I need to either have my hubby repair them back together…or do something like this if I can get the guts to do it since my mom would totally know:)
You have a great eye for repurposing!
I am so impressed with your creativity (and patience with a little helper!). What an inspiration.
I want to BE you. :D You are so creative. Featured you again this week on BeColorful. Thanks for linking up.
p
Oh, what a good momma you are! We all need to empower our youngsters more. Look what he can do! He’ll be a future DIY’er for sure!
Now that is just brilliant! I love projects like this I think they are the most fun to do. Very Creative!
You are so creative. My projects are like that, too. When we make it up as we go along, it takes trial and error. That is half of the fun. And when we finally get it the way we want it, it makes the pleasure that much greater.
I think this needs a little sunburst mirror hung above it and it’ll be perfect.
Clever girl! Both projects are fantastic. Elijah is quite the little helper. I learned many of my handy woman skills because my dad was willing to let me help him with his projects (which must have been very hard for the control freak in him).
One of best repurposed ideas I have ever seen. You have a very creative eye. Your helper is adorable and all you have to pay him with is love (at that age). Take care.
FABULOUS times one thousand!!! I LOVE this!!! I have no space for it but, BRILLIANT!!!
quick question – do you live where it gets cold in the winter and did you leave this outside?
I don’t really live where it gets cold…it gets below freezing a few times and my plants are inside, but no snow or sub zero temperatures.
So how is it taking your colder temps?
Fine I think. I don’t know, I’m going to have to go double check now. What should I be looking for? It honestly would have never occurred to my to bring it inside.
I’m thinking along the lines of the wood drying out, cracking. Rain making the wood swell…that kind of stuff ;)
This is amazing! The pictures with the sweet little one painting is just too precious! I will be pinning this!
Kathy
Ashley, I think this is absolutely brilliant. I’ve seen lots of these old dresser tops and now I know what to do with it. I’ve got to try this somewhere around my house. And I love how you turned the mirror into a chalkboard too. Pinning! Happy day to you.
That is so, SO cool! Now where am I going to find a faux outdoor entry table…