How To Caulk Like A Pro
My caulk lines have never been particularly good…unless you compare them to my husbands caulk lines, then mine look amazing. I’ve always hated doing a project (like baseboards, for example) and having them look perfect up until the caulking part when everything gets all crooked and sad. THEN I ran across this tip, this one simple trick, and it totally rocked my caulking world. It’s so simple that I am in awe that I never thought of it, rather I’ve used a plethora of objects trying and fix crooked caulk lines (like q-tips and toothpicks and wet paper towels). So even though this isn’t an original idea, I just had to come pass it along to my readers and save y’all from future caulk-induced headaches. So, without further adieu….how to caulk like a pro.
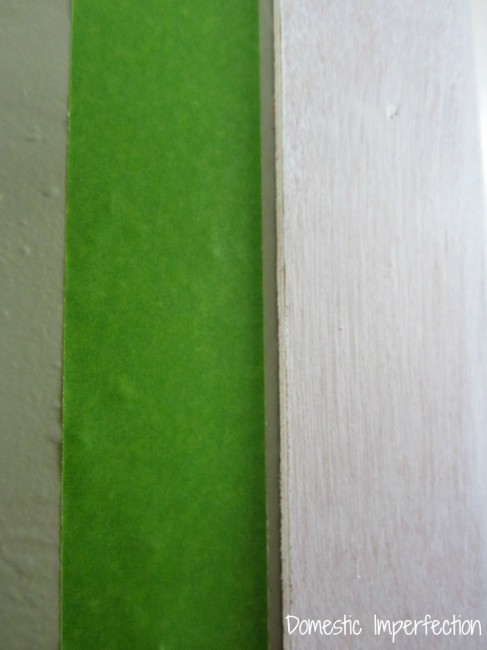
First, take painters tape and place it next to (but not right up against) to the area you are caulking. (In this instance I am caulking the trim around my new plank walls. )
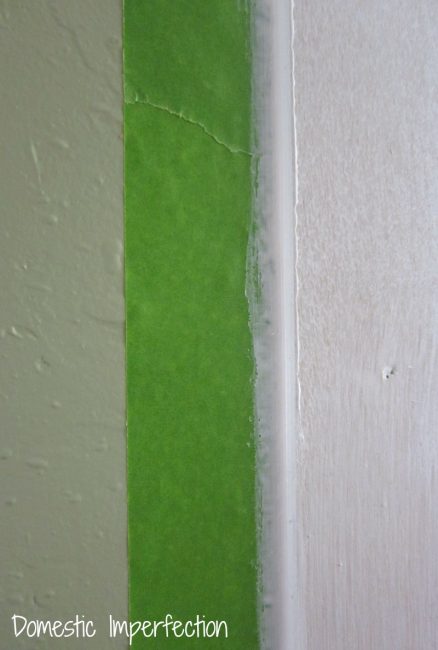
Then, place a bead of caulk along the crack and smooth it with your finger.
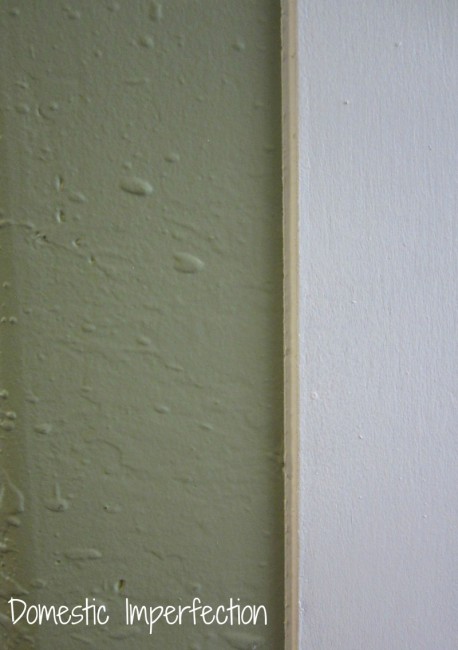
Then – while it’s still wet – pull up your tape!
BAM. Perfect caulk lines.
You are welcome.



Thank You so Much!!! Great tip!!
Seriously! That’s it! I might actually get back to caulking around the top of the shower enclosure if it works that well with the waterproof stuff. Thanks!
This is such a great tip. Thanks for sharing! I am always such a mess after a caulking job. I will definitely be trying this.
All the home improvement stores also have great tools that are specifically for smoothing caulk. I had always used my fingers too. They are completly worth the $10. You can find them in the paint section. They are a small hand size plastic tool. It will say that it is for caulk. Made my life {or my baseboards ;) }so much easier! And ridiculously faster.
Hi Ashley,
“totally rocked my caulking world” That’s why I love you and your blog, lol!
Thanks for sharing:) Di
YES! Thank you! :)
Never thought about frog tape! Great idea! Thanks
So simple and brilliant! Like all the best ideas. Thanks fo sharing.
Wow great tip, and our caulking always looks so bad, nice to think it can look as good as this. I’ve pinned so I have at hand! Thanks for sharing your inspiration with Sunday’s Best – you helped make the party a success!
That’s pretty cool. Never thought of that. You can also achieve professional caulking skills by using a damp rag to smooth out while it’s still wet. The combo of the two would be earth shattering (way over exaggerated). And I’m very proud of my myself for refraining from any obvious caulk jokes.
This is great. I’ve been caulking away (my first attempts) as we’re working on the house because it is for sale. I kept hoping I would get better with time, but my method seems to be put it all on, wipe it all off… so I’m going to try this! Thanks!
Another great thing when caulking is to mix up in a spray bottle liquid dish soap and water. you don’t have to put a lot of dish soap in, but be generous. spray the surface after you lay a bead down and then spray it on your fingers. the caulk will not stick to you and you can shape it like putty!
Great suggestion! Since writing this post I’ve started using baby wipes to go over caulk lines. It’s basically the same concept…plus I always have piles of wipes on hand.