
Teen Girl Bedroom Makeover – Before Photos & Design Plan

Well… we’re skipping ahead.
I know. I still haven’t finished my primary bedroom makeover, and I definitely haven’t started the primary bathroom that I already told y’all I was going to work on. But when the opportunity came up to makeover my 16-year-old stepdaughter’s room, it just felt like the right project to tackle next.
So here we are.
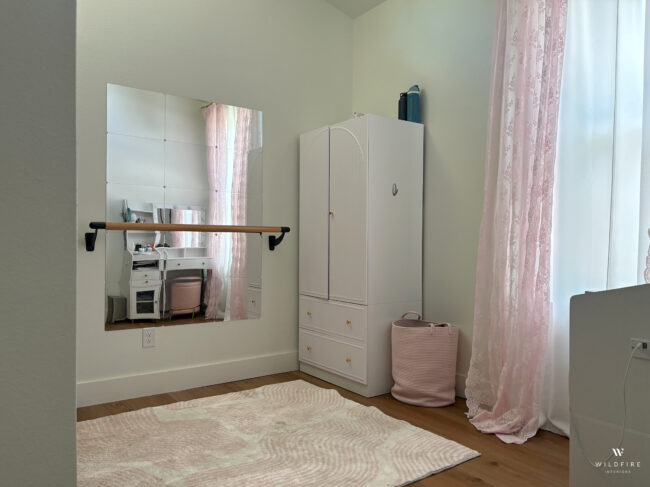
This makeover is in partnership with Love vs. Design, and I’m genuinely so excited about this one. I’ve been looking for an excuse to use their wallpaper in a real room ever since I tested it earlier this year. I’ll tell y’all that whole story in my next post because I have a strong wallpaper opinion to share, but today isn’t about that yet. Today is about showing you where we’re starting and where we’re headed with her room.
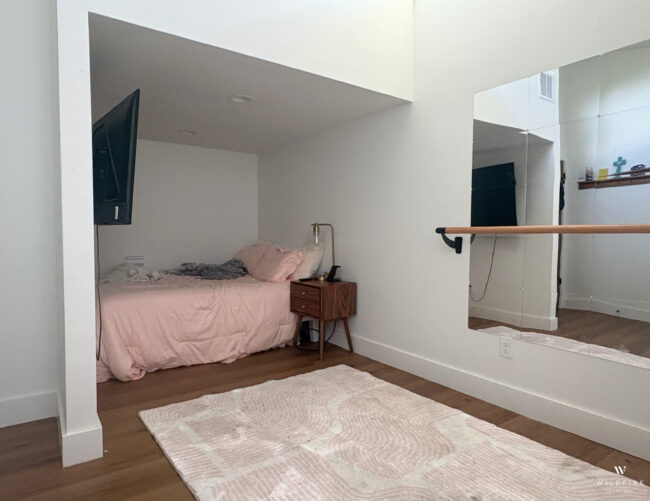
Molly’s bedroom is part of the addition we built onto our house two years ago, and honestly…all of the bedrooms in it are a little unusual.

This one is no exception, it’s the front bedroom and used to be part of the sunken one-car garage.
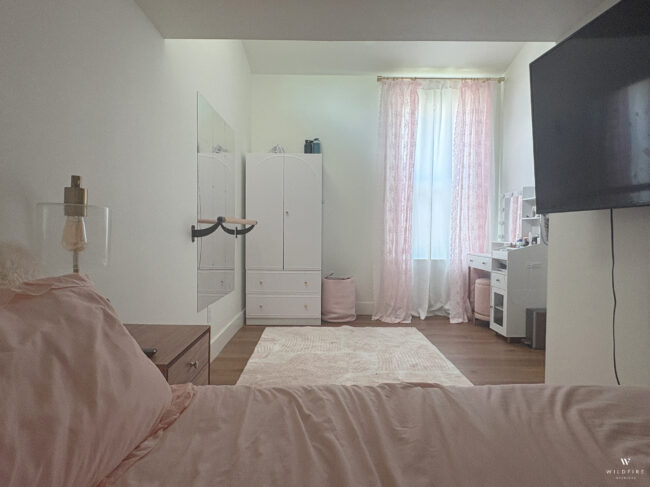
Part of this bedroom has tall ceilings, and the other part (the “bed nook”) has ceilings that are lowered to 6’6″. Why? Because when we were designing the addition, we needed a space for my husband’s college-age daughter to sleep when she came home for breaks/holidays/weekends. We couldn’t fit another bedroom into the garage’s footprint, so we used the tall ceilings in this room to create a small bedroom (accessed by a ladder) above the tallest part of the room. I haven’t shown it on the blog, but I can write up a post for curious minds. Anyway, that’s why this bedroom has ceiling weirdness.
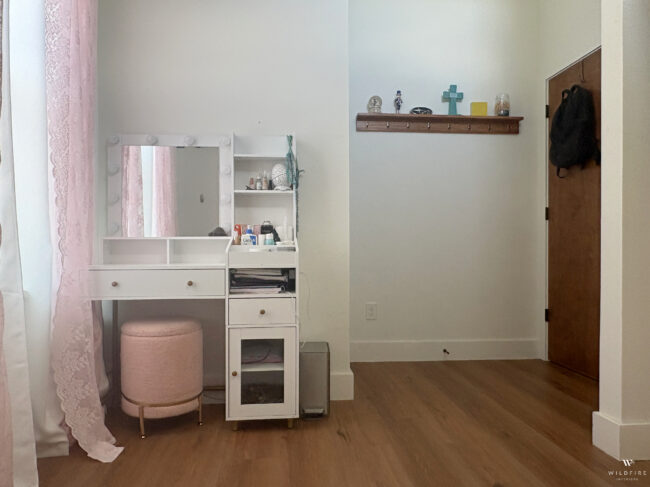
When Love vs. Design and I decided to work together, I needed a room to wallpaper. So I asked the kids who wanted a bedroom makeover, and was thrilled when my 16-year-old stepdaughter volunteered.
First We Make It Functional
I started out by asking her what she wanted to change, functionally. She only listed two things –
- Move the bed out of the nook and into the main part of the room
- Get a bigger wardrobe/more storage (the room doesn’t have a closet)
Those are very easy requests. The challenge then is what to do with a bed nook part of the room if the bed isn’t in there.
Her wardrobe and vanity would have to go in there, so I figured why don’t we make that section a dressing/get ready area? It can have her clothes, vanity, a full-length mirror, a hamper, etc. Like a walk in a closet, but… different.
Now We Make It Pretty
After the new layout for the room was figured out…now we get to make it pretty. It started with wallpaper. I’ll tell you how we picked the colors and design in the next post of the series, but here is the one she and I choose –

Next was the challenging part. The room is kinda…blocky? I think that’s a word. It’s basically broken up into three squares – the entry, the main section, and the nook. Aesthetically, how do you make that look good? Intentional? The answer is you don’t try to hide it…you highlight it.
This bed nook section feels like its own entity. Like kids building blocks. Let’s emphasize that.
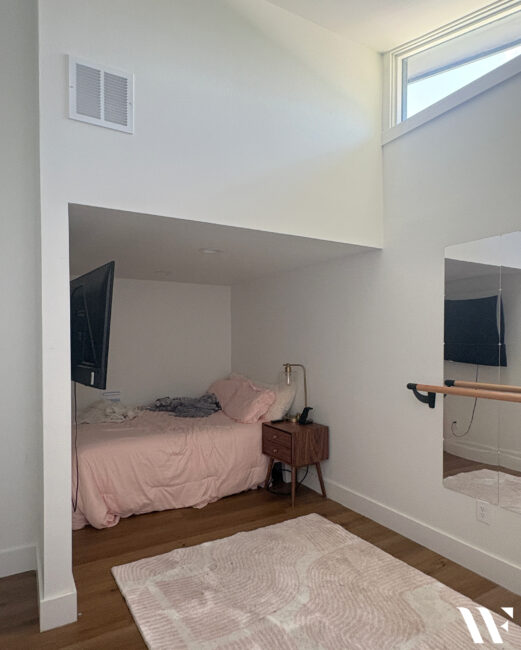
We decided to paint it pink, just that part (but color drenched – walls, ceiling, and trim) and have the rest of the room be white. She wanted a barely there pink, but I feel like if the white and pink don’t have enough contrast it won’t accomplish the goal. So we tried a few colors via Samplize (the best way to try paint colors, seriously) and landed on Sherwin Williams Resounding Rose.

(Colors are SW Pressed Flower, SW Resounding Rose, and SW Memorable Rose.)
Here’s the paint color and wallpaper together.

Pretty, right?
The rest of the room will get four-foot-tall vertical paneling (painted in SW Pure White) and then the wallpaper from the top of that to the ceiling. The paneling will give the room a little more texture and interest while still keeping it light and bright.
Furniture and Accessories
Here is what we have decided so far.
First, the wardrobe. The room doesn’t have a closet, so this is where all her clothes go. She wanted something larger and better quality. The one she has now is broken, small, and honestly it’s just not made well. I wanted something wooden, modern style, and better quality while still being really budget-friendly. I ended up picking this wardrobe from IKEA –

From there she needed a new bed. She just has a frame now, but I wanted something with a headboard. I showed her four options that I though would look good in the room –

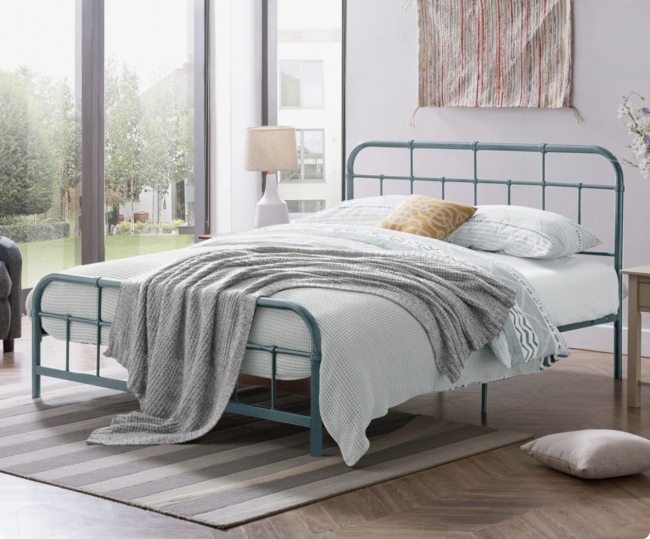
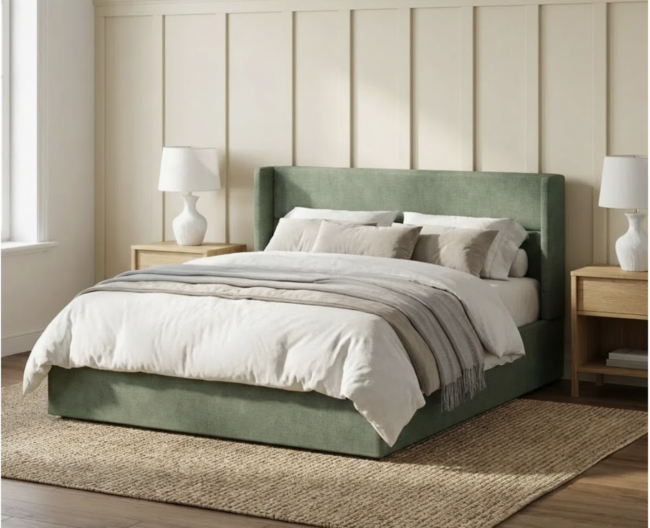

Wooden Arches Bed | Blue Metal Bed | Green Bed w/ Storage | MCM Walnut Bed
Personally, I was really rooting for the green one, but she chose the first wooden one. I think that one will look great, plus it gives her some much-needed shelving and storage.
As far as the rest of it the decor, nothing has been ordered yet. I was thinking dusty blue bedding, a gold full-length mirror. She’s keeping her vanity, and thinking I can add some slim shoe storage (this one?) in the “entryway” part. And a rug (this one or this one). Oh, also, I want to do a partial partition between the main part of the room and the dressing area. I haven’t nailed down exactly how I’m going to do this, but I want something to break up the space just a bit more, and be a display area. Was thinking pegboard or cork, so she can put photos, awards, hang jewelry, etc. We’ll see how that plays out.
Here is a quick mood board I put together so you can get a better feel for it.
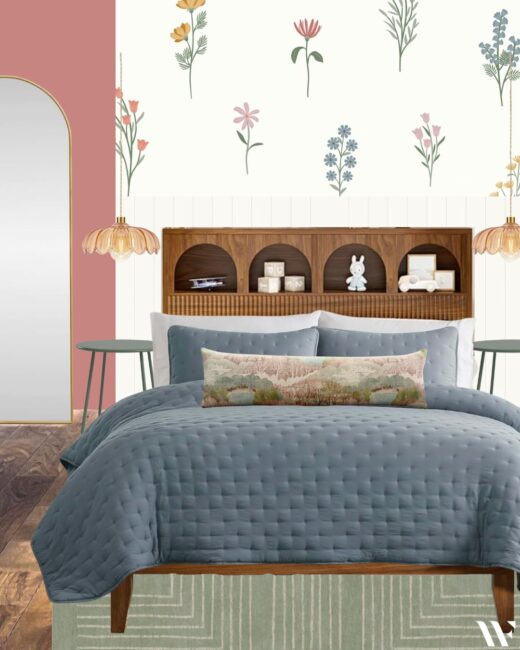
And that’s the plan! Normally my room makeovers happen at a snail’s pace because I spend forever hunting for the perfect accessories, but this one is going to move a lot faster. I don’t want to take over a teenager’s room for months on end, so my goal is to have this wrapped up well before I finish my own bedroom.
Can’t wait to see the finished project. The wall paper with the paint color is perfect!!!
The flower pendants flanking the bed are awesome! I think you could wall off about a third of the walk in closet nook and use a ceiling-track curtain to close the rest of the opening. Adds softness even if left open all the time, and smooth to use.
Oh wait, I kinda love that idea. Like curtain off the back 1/3 of the nook and make it a closet, then we could put the vanity and floor-length mirror outside of it, but in the nook. I actually like that more than the wardrobe, which I already bought but haven’t unboxed. Now I have to re-evaluate.