
DIY | Furniture | Paint Projects | Upcycling
Dumpster Rocker
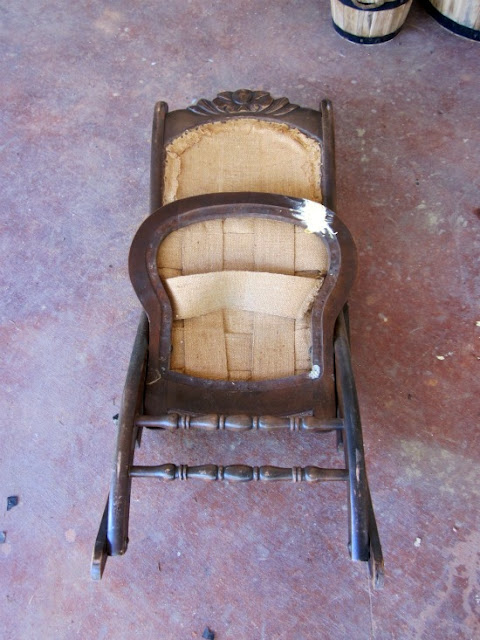
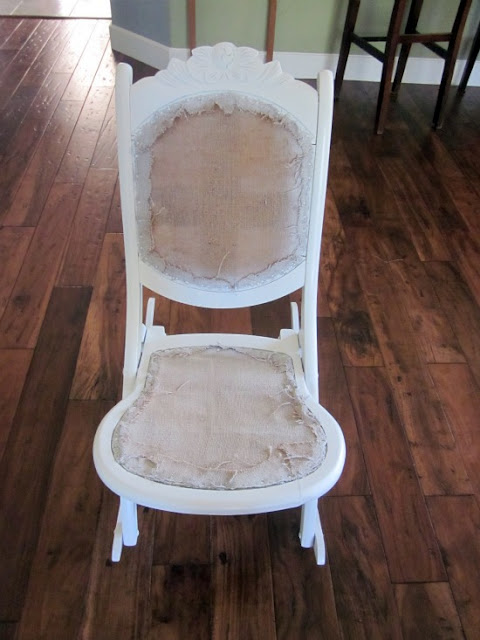
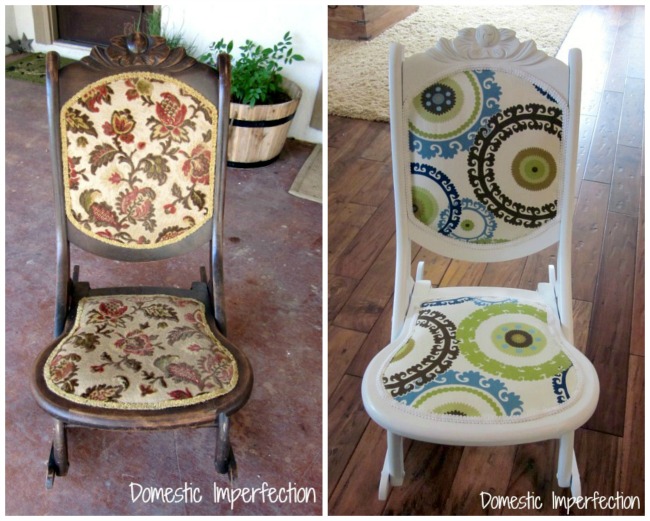
So, my aunt rescued this old rocking chair from a dumpster. She said she found a toddler rocker and asked if I wanted it. I of course said yes….who turns down a free dumpster rocker? Anyway, when I got it I noticed that it not really toddler sized, it’s way too big. It’s not really adult sized either though, its pretty small. It’s like a 3/4 sized rocker. We’re kinda small people though, so I decided to make it a front porch rocker. As soon as my husband saw it sitting on the front porch he cringed and asked “are we really keeping that nasty thing?” Umm, yes, but its not going to stay that way…did we just meet? Anyway, this is why he cringed, its a homely little thing….

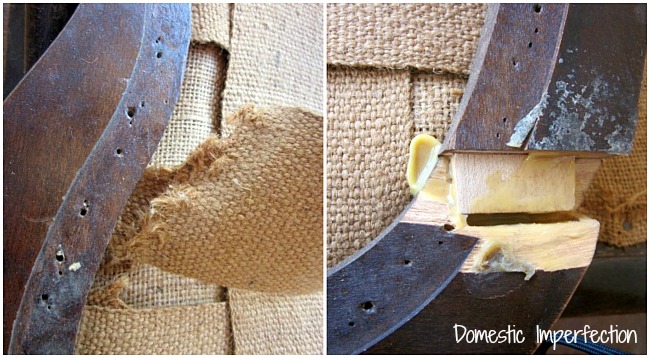
…and it might have had a couple of things wrong with it…
So here we go:
Rip off nasty (nasty!) fabric.
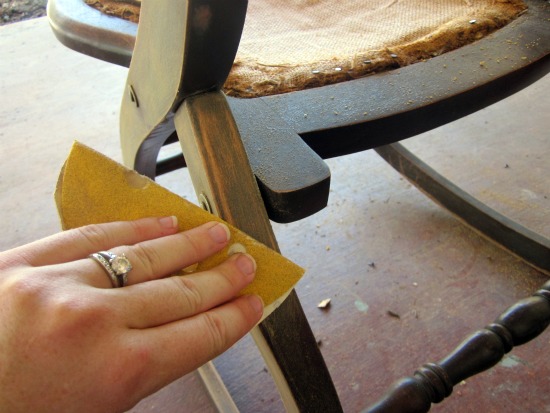
Sand.
Prime. (Kilz is my favorite)
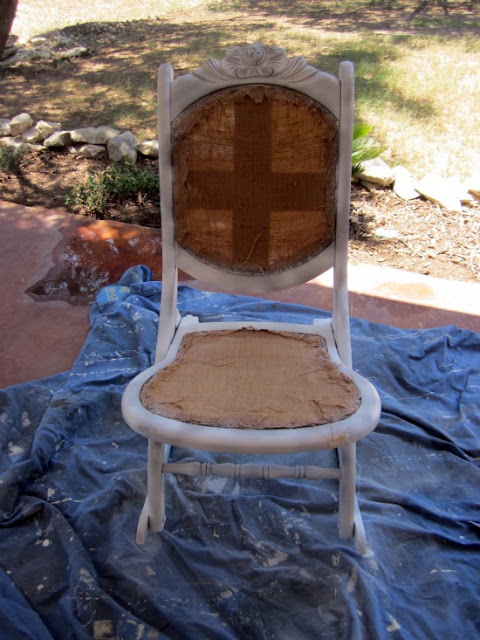
Paint.
Have the little helper help (haha) cut fabric.
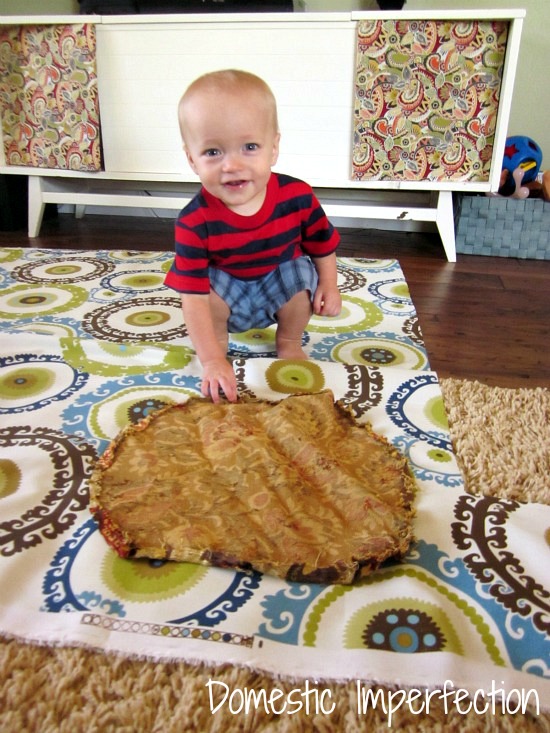
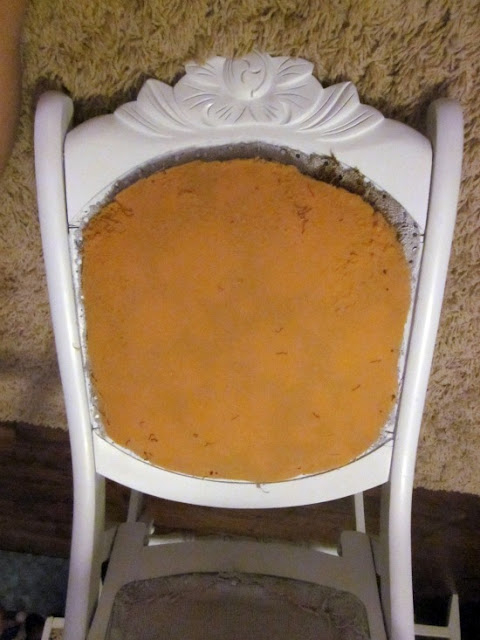
Replace nasty foam after drenching with Febreeze (I would have replaced it if foam wasn’t crazy expensive).
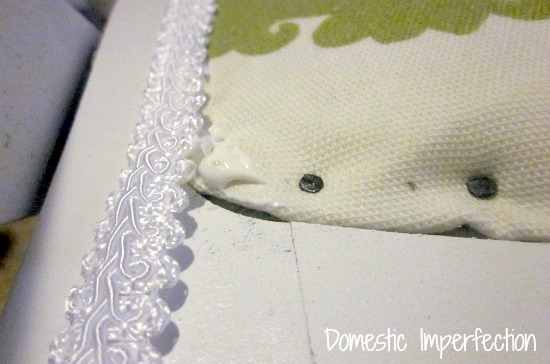
Cover with fabric, fold under edges, and nail.

Use fabric glue to add edging (I’m fairly certain that this is not how the professionals do it, but whatever).
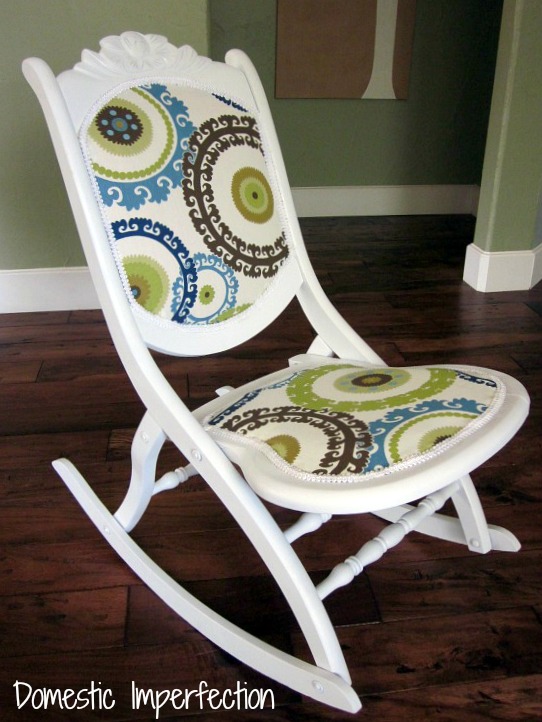
And here it is!
![]()


![]()
I spent about $10 fixing up this rocker..about $5 on spray paint and $5 on the edging. The fabric is leftover from being rejected for my dining room curtains. While working on this I came up with a little challenge for myself…to create an entire front porch for under $100. I would like about four chairs, an end table, a rug, a loveseat/bench and some wall decor. Should be interesting!
![]()
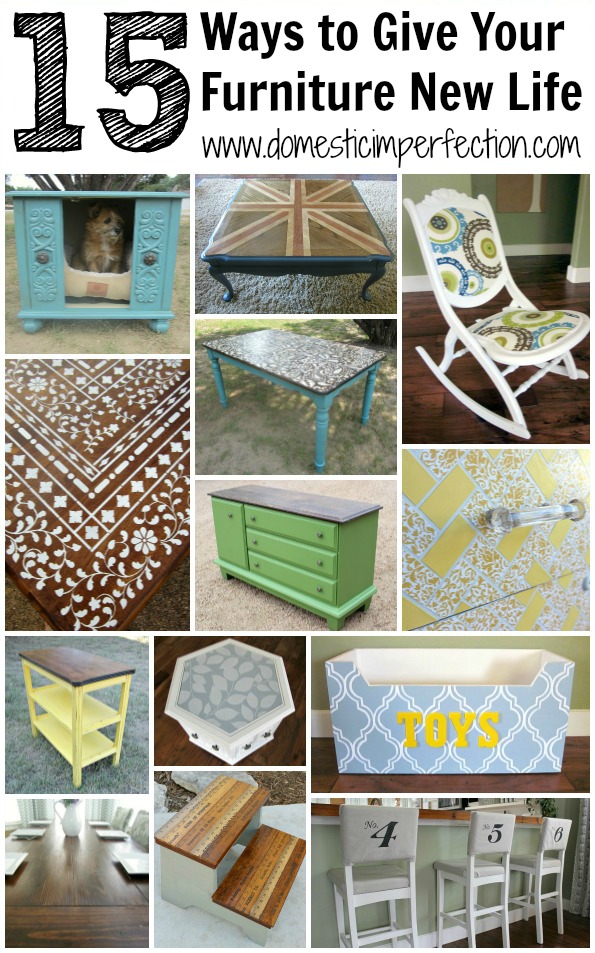
Looking for more furniture ideas? Check out THIS POST.
That-looks-AMAZING!! It looks like an expensive designer chair! I'm definitely inspired right now!
Ashley that looks awesome!!! Almost too nice for the front porch! =) Awesome job!
holy batman, this turned out AWESOME!
Looks awesome!
I don't remember exactly how I found your blog but I'm so glad I did and added you to my reader. I love all your projects and am always excited to see when you have a new post.
Wow! You rock! Teach me more! Teach me more!!!!!
Such a great upcycle!! Love the fabric you chose! Following your adorable blog now!! :)
Angela
What a CUTE out-come! And what a CUTE helper too :) Enjoyed this! You're pretty awesome!
luv luv the redo of the chair.
Any tips for good coverage with spray paint?
I'm inviting you to join our linking party every Wednesday at
http://www.passionatelyartistic.com/2011/07/hgtvs-cash-cari-with-linking-party.html
Have a fabulous week,
Maggie
http://passionatelyartistic.com
wow!!! i'm obsessed with this project!! great job and great fabric :)
Jackie
http://jaclyndesigns.blogspot.com/
I love this!! I just got done refinishing a curb side rocker too! :) It was a lot of fun and I was looking forward to it hanging out in my living room but it sold as soon as I finished it! I'll have to wait until I find another gem! :)
Wow this looks awesome! The before and after is very dramatic. I especially love the fabric. I would love it if you would stop by and link this up to the crafy link party going on right now at Lines Across My Face.
:) Rachel
http://linesacrossmyface.blogspot.com/2011/07/craft-link-party-2-cure-for-common.html
Wow!! You did a really good job! Looks fabulous!
I used to have a similar chair, only mine had a cane bottom. I never got around to redoing it and boy am I regretting it after seeing yours. It's fabulous and I love the fabric you chose. PRECIOUS! Love it!
holy moly, that looks amazing!! love the fabric you chose!
What an amazing makeover! The fabric is so cute and the white looks great. I host a linky party every Thursday and would love if you joined in!
I love it! Where did you find that fabric? It's gorgeous!
http://www.keepitsimpleyay.blogspot.com
You did such a great job, I love it! Beautiful fabric!
Dropping by from Motivated Mondays, I'm you newest follower :)
So cute! I am currently looking for a rocking chair to do such a project as a baby shower gift. You should link this up to my green of the week party!
Shayna @ http://shaydesoflife.blogspot.com
That is so sweet!
Love the fabric you chose!!
Your rocker is a sewing chair.
Was just going to say I had heard of smaller rockers being called sewing rockers. Thanks for confirmation.
o man i love the change:) thanks for sharing:)
http://jaysonandashley.blogspot.com/
I just found you from Coastal Charm, and really love your blog – I'm also in Texas (hill country) and we're trying to do some similar things at our house (though I think I have one blog post in 2 years or something). You have wonderful creative ideas, and I plan to steal, errr, borrow some from you, lol
Patty
OMG I just rescued the same exact rocker from goodwill for $8!!
http://cleverlyinspired.blogspot.com/2011/06/8-rocking-chairrevived.html
wow! way to transform!! great job! I love the pattern and colors!!
This looks absolutely gorgeous!
Please it with my girls over at my Sundae Shake Up link party! I'm sure they would love it, since my blog is a 1950's vintage theme!
Thanks,
Jacque @ Jacque's Soda Parlor
thesodaparlor.blogspot.com
Just a gorgeous transformation!! Love the fabric very much. Great work :)
Gasp- this is amazing!!
Gorgeous! I am fascinated by all things upholstery lately. I want to learn how to do it too! I believe your rocker might be an old sewing rocker. My grandmother had one too and they sit really low to the ground. I suppose so you can reach your supplies in a nearby sewing basket. You did a fabulous job! Deb
I cannot help but click on any link that starts out with the word “dumpster!” I love giving new life to unloved pieces!
I would love for you to link your rocker up at my Savvy HomeMade Monday blog party which is still going on at:
http://www.homesavvyatoz.com/2011/07/28/savvy-homemade-monday-party-1/
I am a new follower!
I can't believe how amazing your trash find looks!! So cheery now!! Not scary anymore. LOL
WOW…this transformation is stunning! The fabric is just fantastic…all my favorite colors. You did a really great job!
You did a beautiful job! Love the fabric!
My grandmother had one of these. Yours looks MUCH better! Thank you for linking to Wicked Awesome Wednesday!
Your rocker looks soooo good! You chose a fabulous fabric for the covers. I love it! I love that you kept it a nice white and didn't distress it. Its lovely.
have a great day…,
Judi
I love how this turned out!!! It's so bright and welcoming, I'm sure it looks lovely on the porch! And duh, of course rockers from dumpsters have to be taken!
I'm a new follower, too :)
-rachel w k
rwkrafts.blogspot.com
I'm amazed! I absolutely love it! And you have a very cute helper :)
I'm following your blog now – thanks for all the inspiration!
Wow, you definitely turned a frumpy old piece into something totally cute! Love the fabric, too.
awesome! that fabric is sooo fun and totally makes the chair stand out!
Awesome redo! I have the same rocker. (Mom bought it at a garage sale and gave it to me.) The wood is in bad shape, so I'm not sure if I can salvage it w/ just paint and fabric. :(
Btw, I did some research on mine. it's a sewing rocker from more than 100 years ago or something like that. It folded for easy transport to quilting bees and for moves in the wagon. It's low to the ground to maintain the quilt and reach supplies. And no arms so the sewer's arm could move freely for needlework. Interesting, no?
Perfect! I love everything about it.
(hopping over from a linky party) Have a great day!
What a really great redo on that chair. I LOVE THAT>
Would love to invite you to link your creative project up on our link party @ NothingButCountry.com We feature new blogs every Tuesday and start a new party. Hope you will join us!!
–Mary Beth
NothingButCountry.com
hello! Great job on the chair! I was shocked to see it, because I have the same one. Only mine does not have anything on the bottom – it's a hole like a toilet seat! I'm wondering if you could describe what supports the foam and cushion on the bottom? thanks!
WOW!! If I saw the 'before' chair in a thrift store I would've walked straight past it. Seeing what you turned it into has definitely opened my eye up to the potential!
Great transformation. I love the fabric you chose!
um Holy COW this is AMAZING! Great fabric choice. I am so jealous!
I have this EXACT rocker!!! My parents bought it for me at an antique store. They said it is a nursing rocker. I have debated painting and re-uphostering it and I think I will after seeing your redo!
I love little helpers but sometimes their a distraction because their so cute! I love the chair too!
caught my eye on Primitive and Proper! So adorable!
Fun challenge! I love the fabric on the rocker. I'm so glad you saved the chair! Great re-do! I'd love for you to share this on my link party today! http://www.alittleknickknack.com Have a great weekend!
lOVED THE CHAIR AND THE FABRIC. I AM DOING MY BEDROOM IN THOSE COLORS AND WONDERED WHERE YOU BOUGHT THE FABRIC. THIS IS ONE OF THE BEST CHAIRS I HAVE SEEN DONE IN A LONG TIME. FOUND YOUR BLOG FROM ANOTHER BLOGGER AND HAVE SAVED YOU ON MY FAVORITES. LOVED IT.
BETTY WHATLEY
[email protected]
So cute! Amazing transformation.
Looks amazing! What a great save!
Megan
http://www.CutTheCraft.com
I loooove this!!!
Nice make-over. I love the fabric you used.
Saw your link on 'Coastal Charm'. I am hosting my first Link-up party – Tea Time Thursdays. Would be glad to see some of your awesome posts there. Hope to see ya at the party :)
http://tanyaanurag.blogspot.com/2011/08/celebrating-one-party-time.html
This looks really good! Fabric glue is pretty much my best friend and I use it for everything.
This is amazing! I can't wait to see the rest of the porch for less than $100, I'm sure it will be fantastic.
Stopping by from Amanda's Weekend Bloggy Link Up!
UH-MAY-ZING!
This turned out absolutely incredible! Makes me want to go dumpster diving to find an old rocker!
Saw your amazing project on Nothing But Country!!
http://www.releasemecreations.com
Just to let you know, I featured your amazing rocker transformation today. Come grab a featured button if you'd like.
http://carolynshomework.blogspot.com/2011/08/inspiration-board-link-party-spotlight.html
Thanks again for the beautiful inspiration.
Hey Ashley,
Thanks for linking up your vintage chair at my Sundae Shake Up. I have taken the time to check out your blog and absolutely love your style!!!! I am your newest follower!!!!
Please stop by again on Sunday for another fun Link Party! Can’t wait to see you there, my friend!
Jacque @ Jacque’s Soda Parlor
thesodaparlor.blogspot.com
What a beautiful piece!! I love the fabric you chose, and the chair is so pretty in white. My only suggestion would be to size your photos up to Large so that readers can really get a good look! :)
Thanks so much for joining my Weekend Bloggy Reading party (and for linking back-I appreciate that!). :)
This is amazing! I love the fabric you chose!!
That chair and fabric are spectacular! I have a little foot stool that needs to be done. You have inspired me to get it done!
This looks just amazing! “I'm sure that's not how the professionals do it, but whatever.” You crack me up! So glad I found you!
I would love, love for you to come link up with me at Freestyle Friday.
happyhourprojects.blogspot.com – open all weekend!
Happy to be your newest follower ~ Adrianne
It's really nice. I like it!
I love the chair, the fabric and what you've done with it. What a beautiful transformation.
This is exactly the kind of pieces my daughter and I look for on Wednesday nite curbside hunting.Beautiful job!!!
[email protected]
Omigosh that is the cutest little chair ever! I love the fabric. It turned out so dang perfect! I hope you will come show this off at my VIP Party today. http://designergarden.blogspot.com/2011/08/vip-party-22.html
Absolutely adorable! Love the re-do!
Nice restyling !
Love it! I have the same rocker, which a friend of mine rescued at a garage sale. I didn't go so far as to strip and paint mine, but I did reupholster it in a toille fabric and trimmed it (using glue) and some brown ribbon. I love your take on it!
Absolutely gorgeous makeover!
It always astonishes me what people will chuck out, especially when a bit of TLC can turn old and worn into beautifully reborn! Thank goodness the world has people like you who can see the potential in worn out things :D
This is an A-mazing transformation! What a difference a little paint and fabric makes!
I can't believe this is the same chair! Great job and I love your blog design.
Wow that looks fantastic. Amazing the difference you've made with the rocker.
I LOVE THIS! The fabric…the paint…the trim…the price! Amazing!
I featured this on my blog today :) Come grab a “featured” button!
http://christinasadventures2010.blogspot.com/2011/08/sunday-features-32.html
I also “pinned” it on my Pinterest board!
http://pinterest.com/christinasadven/20-below-features/
This is amazing! The fabric is beyond beautiful!
By the way, I am hosting my very first giveaway–a blog redesign! Check it out!
http://southernlovely.blogspot.com/2011/08/first-giveaway.html
I can hardly believe it is the same rocker. Kudos to you. I will be featuring your lovely save this week on Motivated Monday at BeColorful
Pam
Hi, friend! You've got so much creativity and I'm admiring them all. Can you please share your creative posts at the Creative Bloggers' Party & Hop? Hope to see you there at the party :).
So awesome! I usually throw a furniture away when they're useless . I didn't expect you can make something out from an old stuff and make it look good as new!
AMAZING! I wish I could find treasures like that in the dumps around here. If you get a chance I would love you to link your chair up to More the Merrier Monday. It lasts through Wednesday so you have plenty of time to stop by. See you there. http://diyhshp.blogspot.com/
Hallo, It looks very nice! In Holland we call this chair a knitting-chair.
I have the same as yours. Only I painted mine blue. Yours is much better!! I like the idea two people so many miles apart, have the same chair!
Greetings from Holland!
Beautiful! I'm a sucker for chair makeovers, well done!
Molly
http://www.justalittlecreativity.blogspot.com
I just wanted to let you know that tomorrow (tuesday) we will be featuring your project on our blog. :)
Thanks so much for sharing it in the link party. Hope to see you back to our weekly link parties as well.
Kindest,
Mary Beth
NothingButCountry.com
I can't believe how great it looks! Love the new transformation!
This post made me smile. Thanks for inspiring me and many others to even attempt this feat. Really appreciate that you linked up at the Creative Bloggers' Party & Hop.
What a great makeover! Love it!
This is adorable! Great vision.
Great job!
I love your makeover so much that I am feauturing it tomorrow on my blog…
Thank you for visiting my party!
Thanks for linking. The party for this week – Tea Time Thursdays @ Kreative Korner – is on. Hope to see you there with latest posts.
http://tanyaanurag.blogspot.com/2011/08/tea-time-thursdays-2-and-features.html
Wow. You did an amazing makeover on this piece. Thank you for linking with air your laundry Friday!
xo
Jami
I love, love, love this! You did a great job, now I want to find a dumpster rocking chair too! ;)
I must say… ADORABLE !
Do you know that the fabric you used for this is being used on the couch and curtains of the main room of “The Bachelor Pad”. It is a new show taking the place of Bachelorette and Bachelor for the summer months. I almost bought this same fabric for my kitchen only in a different colorway. Your chair is gorgeous!
What is the name of the fabric?!?!?!
Ashley,
I have looked through your blog just barely, and I have got to say you are one crafty chick! I can't believe you redone your kitchen while you were pregnant. I've gotta give you kudos for that!
So hey, I've got some pretty exciting news for you. I have awarded you the “Versatile Blogger Award”. Please stop by my blog to snatch it up and wear it proud on your blog! You deserve it! Congrats!
Jacque @ Jacque's Soda Parlor
thesodaparlor.blogspot.com
I, like most of the other commentors, LOVE the fabric you chose! Where did you find it??
Love the chair! Can't wait to see your finished front porch, i'm sure it'll be beautiful.
What a transformation! I love the fabric and can't wait to see how your $100 porch turns out!
Um, WOW!
So obviously everyone loves this rocker since I'm commenter #99!!! This is such a great transformation!!
i want!
I am so glad I found your blog! This chair is adorable!!! My daughter has one in her closet that she doesn’t know what to do w/. Once I show her this, that chair will have a new life! Thanks for posting this transformation, it will save an old, unused chair!
What you have is an antique (YES, at least 100 years old) folding, sewing rocker. WOW. Love the redo. I have one in ugly shape that if I can take time to clean it up, I’ll be trying to get at least $100 out of it. Actually the original material looked to be in pretty good shape. GULP I know, to see what you have done to yours, who would have thought! Ours has pretty much the same material, edging and all only mine is REALLY filthy.
So glad to see one upcycled and looking good!
What can I say that hasnt already been said? Its a keeper!! Beautifully done:)
I know a great deal about ALL Types of Antiques………I am on the money as far as pricing them…..What you actually do have is an OLD Antique Sewing Chair. I think that the Material more than likely was the Original fabric!! Also, the dark wood is original to the piece!!
This chair was made orginally to fit beside a Fireplace, where a lady could sew. I have a solid Tiger Oak Sewing Chair, which I striped, to show the natural wood. I have been offered more than $250.00 for my chair, but I will not sell it, due to it belonging to my Grandparents!!!
Holy Cow, $250? That makes me feel bad about messing with it. Except that hindsight is 20/20 and I had no idea at the time (and it was found in a dumpster.) Thanks for the info!
I was very surprised to see the picture of your chair, i bought the same chair 3 months ago.i bought mine in a second hand store for 25 euro’s.The fabric was so ugly ,but there was something about this chair.I also painted it white and put on a new fabric ,with grey white and black colors,but i like your fabric alot.
So funny- I have this chair too! A friend gave it to me and it had been in their family for years. Just a few days ago I was trying to figure out how to reupholster it- so thanks!
Oh my goodness I have got the same old rocking chair from a second hand store a few months back. Have been waiting for my friend, who is a professional in these things to redo it. I had no idea it is going to be this easy, so I am going to do it myself soon. Funny to read that some other people also have the same chair.
Thanks for this if nothing else!
I wanna know what your aunt as well as your husband had to say about the after. Once they picked their jaws up off the ground that is.
I too have this folding rocker which once had a cane seat. After looking into replacing it I was mortified at what they charge to recane it. It’s not easy to do and even the supplies are very costly. I was determined to do something similar but strong and cheaper too.
What I came up with (in a daydream) was very strong cord (string) bought in a hardware store. I wove it through the holes that the original cane came through. Did you ever make potholders when you were a kid? I used the same technic basically, weaving horizontally across vertical lengths of cord. It took days but I’m not a quitter. The results are very nice, strong and creative. The chair was refinished first and stained a medium walnut. The contrasting white cord stands out nicely. IS THERE A WAY TO SEND YOU A PICTURE?
Adorable make over of the rocking chair! It is a real keeper! I love the fabric too. Where did you find it?
Adorable make over of the sweet rocker! Please tell me where you found the fabric. Thank you.
Omg LOVE LOVE THIS!!
I JUST had this exact same chair given to me on a giveaway site!! I’m so glad I got to see your finished piece… hope mine turns out just as nice as yours!!
Beautiful
Wow – it’s amazing these old rockers are around at this price still in 2017 – my wife picked this up a maxsold auction at the weekend for $10 – pretty rough, and with a small amount of work they easily become a usable piece of furniture again!
Why would anyone throw away such a useful rocker?
https://ibb.co/dbGrqv
Hi!! Love this chair that you did! I have one exactly like this! What did you do for the screws at the joints? The chair is wobbly and I’m trying to figure out a solution. Any help??
Thanks!
Thank you for such a beautifully fresh idea! I have an almost exact old folding rocker from my grandparents’ home here in Iowa. No one in my family wanted it, due to its horrible old fabric. I could appreciate the shape of it and envisioned a fresh & modern revamp. I have yet to attempt my project, but couldn’t stand giving away a piece that was my grandparents. It to is very short and folds, just like yours…a 3/4 rocker. The wood structure is in beautiful shape, just needs sanding and popping modern fabric! Like you, I just glue my decorative braiding around the edges of other reupholstered projects to cover my nails and freshen the seam. My family is almost all over six feet tall, so it may not wind up being sat it, but with your idea, it could look really cute is a corner of a room – Thank You! Carrie