
Small Master Bathroom Remodel (on an even smaller budget)
A few weeks ago I was working on my linen closet makeover and taking pictures of the finished product. I was perched on the vanity counter, pressed up again the mirror, when I looked around and realized that I had never posted a reveal of my master bathroom remodel. You know, that I started in 2013 and haven’t worked on in over a year? Obviously, you remember it perfectly.
I never posted the reveal because there is still things I want to do to it, so I’ve never had that awesome “it’s finished” feeling. Now that we’re building a new house I’m not going to put any more effort into it …it’s good enough. Let’s get to the reveal already and cross this room off the list.
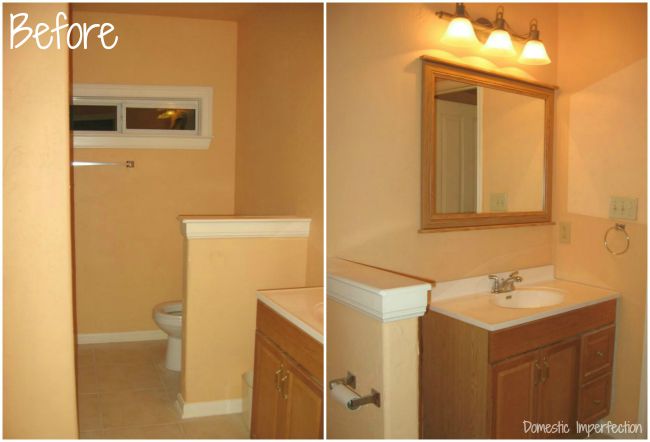
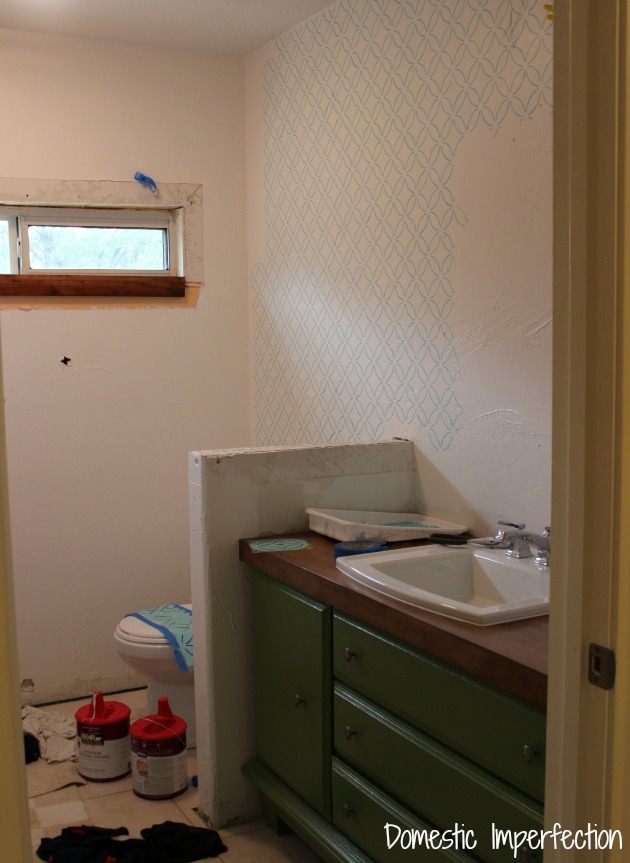
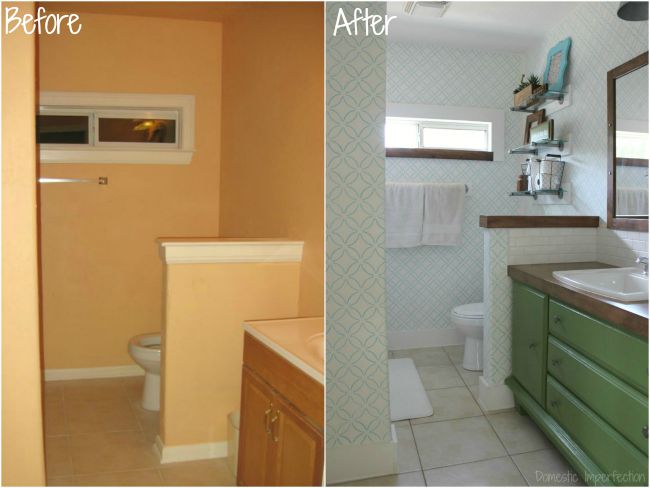
So here’s the master bathroom when we bought the house…
And here it is today…
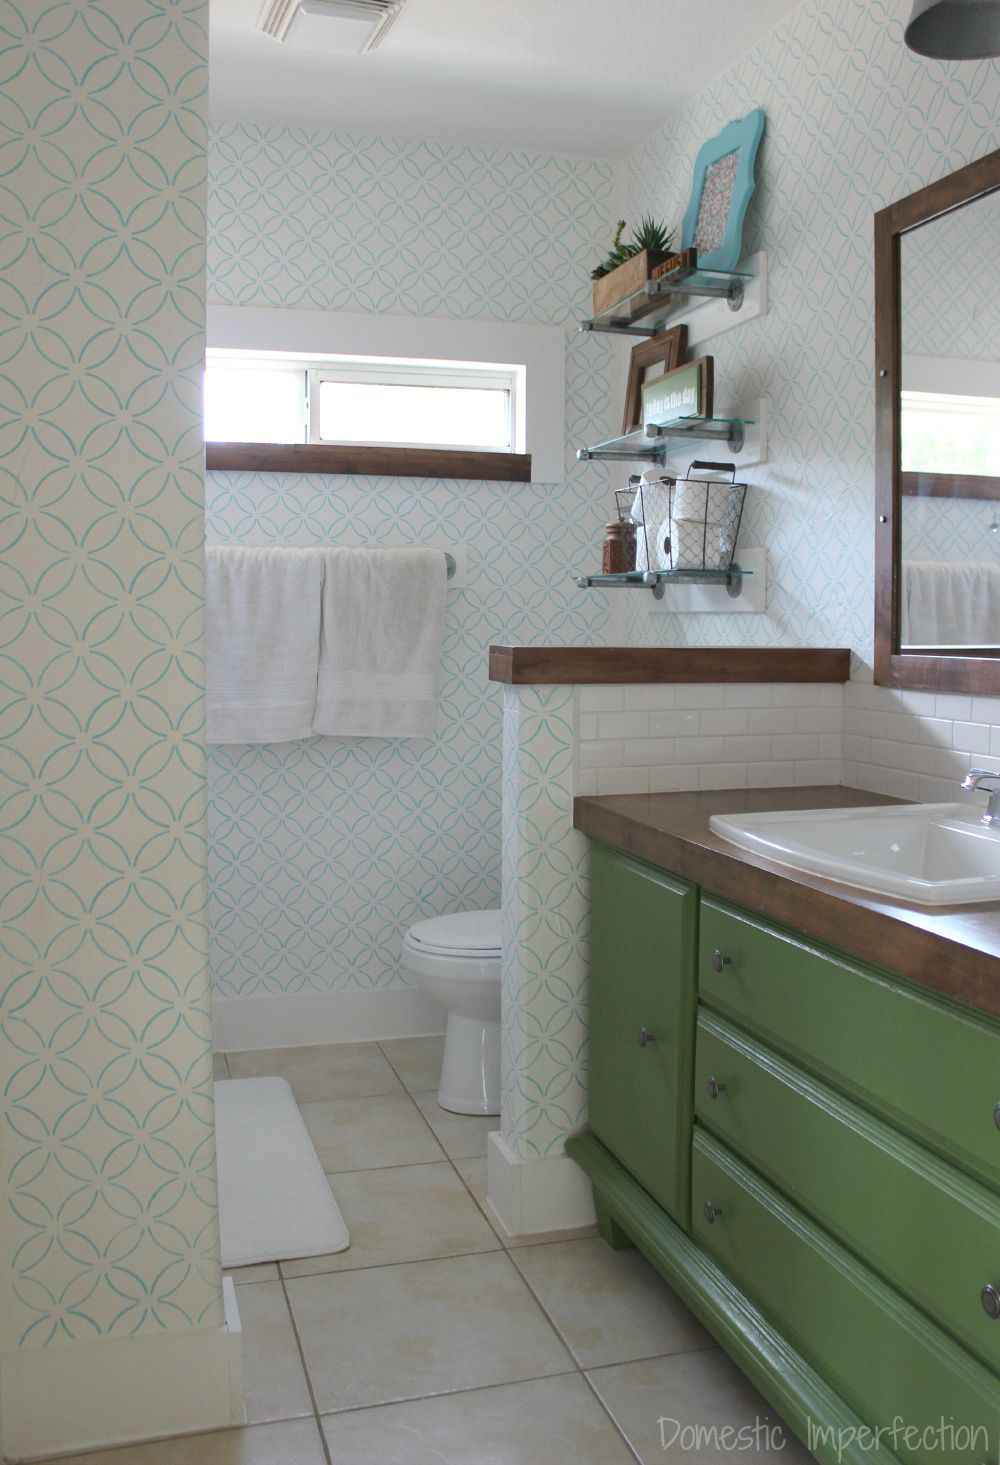
Ahhh, so much better.
Let’s work our way around the room (and through the years).
(BTW – I’ll put links to all the tutorials and products used at the end of the post, that way I don’t get all link crazy and annoying in the actual text.)
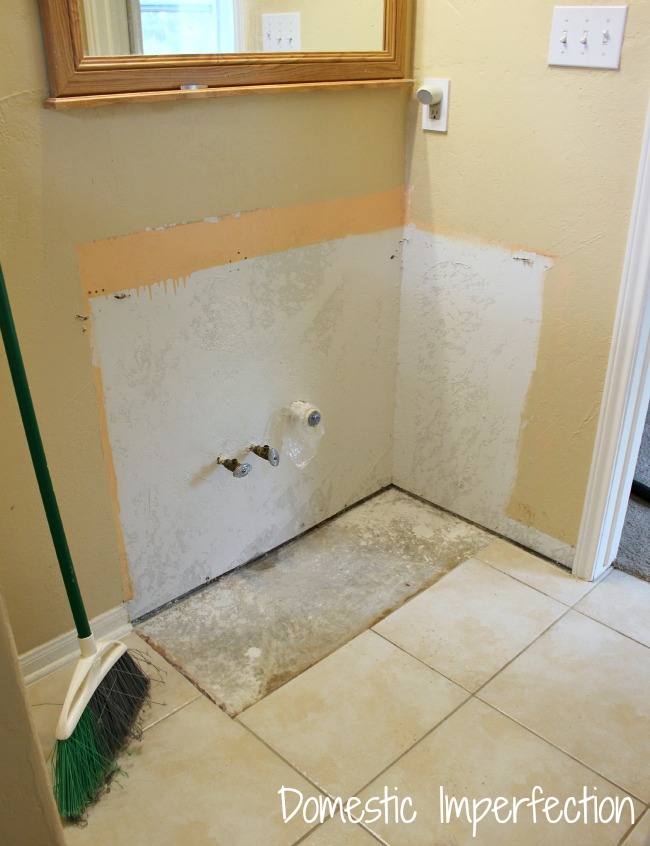
This whole thing started back in 2013 because of Moen. One day they offered me a free faucet and I was all “heck yes I want a faucet!”. But I wasn’t going to put a shiny new faucet on my crappy old vanity in my horribly ugly bathroom. No, that would be putting lipstick on a pig…so out came the vanity.
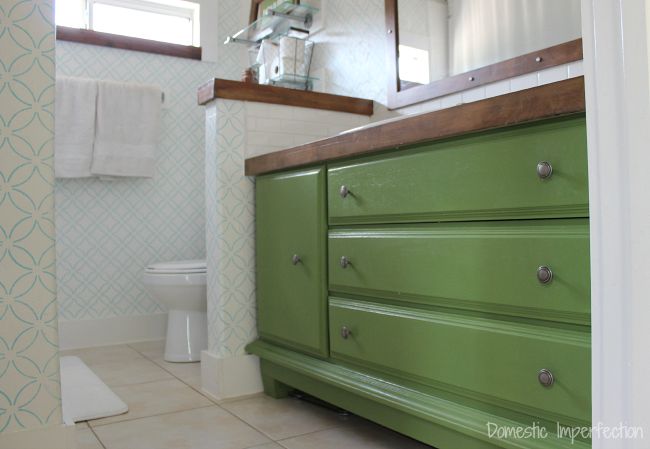
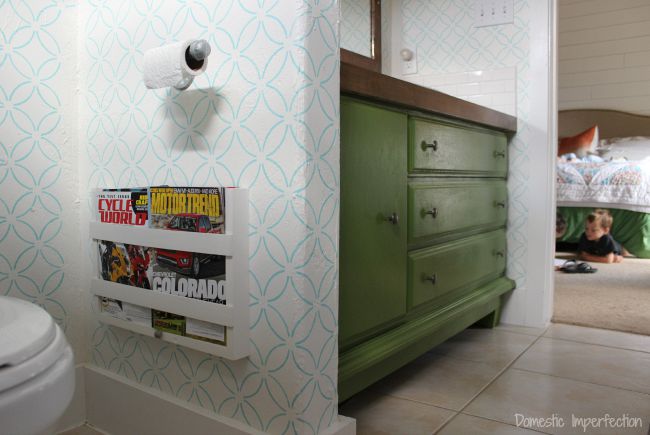
And in went a dresser that I had recently given a makeover.
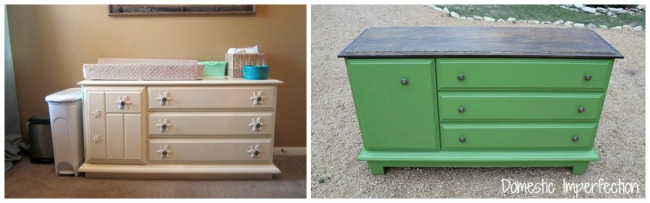
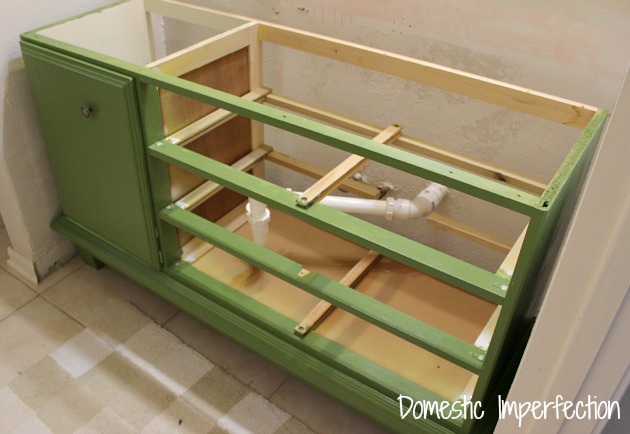
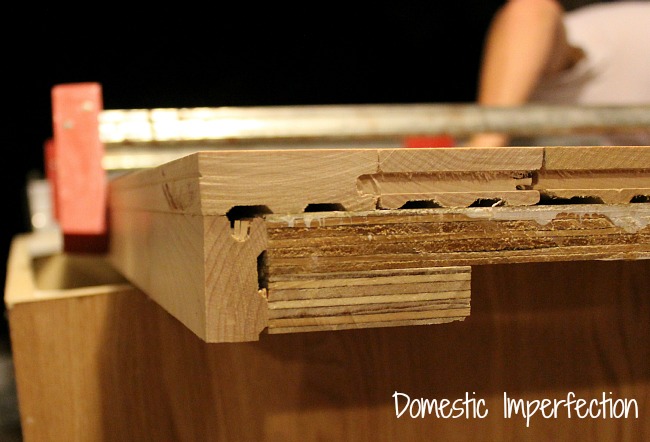
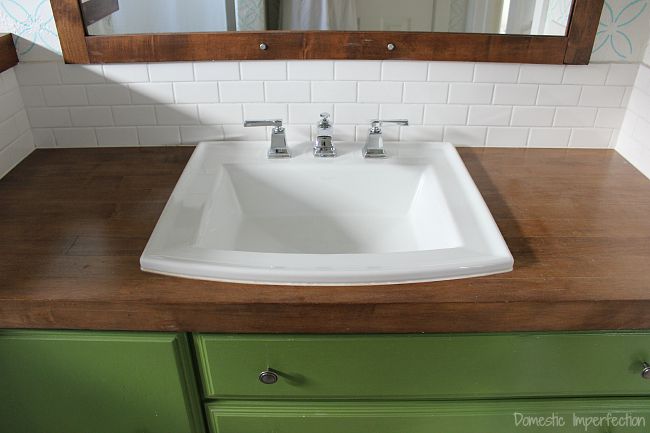
Then Adam made a countertop for it out of wood flooring. He somehow managed to get a leftover box for free since he worked in construction at the time (the office job side of construction). We had to do this remodel cheap because we hadn’t really been planning on doing it. So far so good!
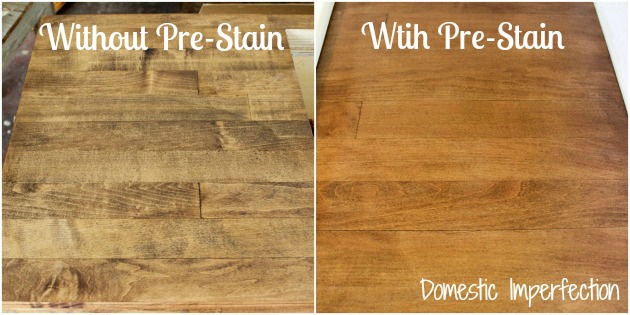
After Adam finished the countertop I proceeded to completely jack it up trying to stain it….I must have sanded that thing down and started over at least five times. I learned a lot trying to stain that dang thing.
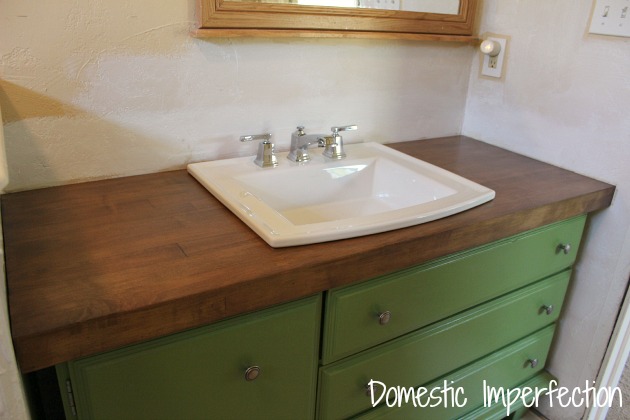
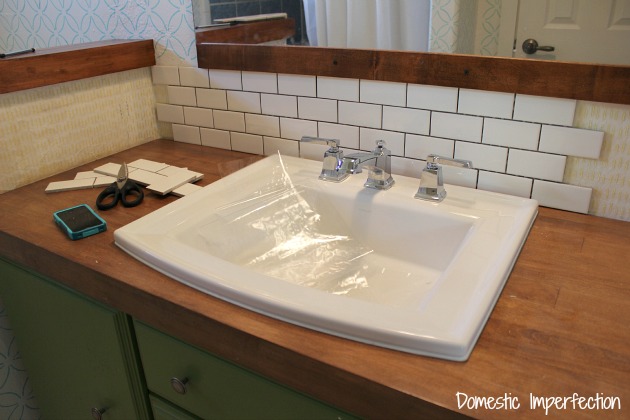
Then in went the sink and my shiny new Moen faucet.
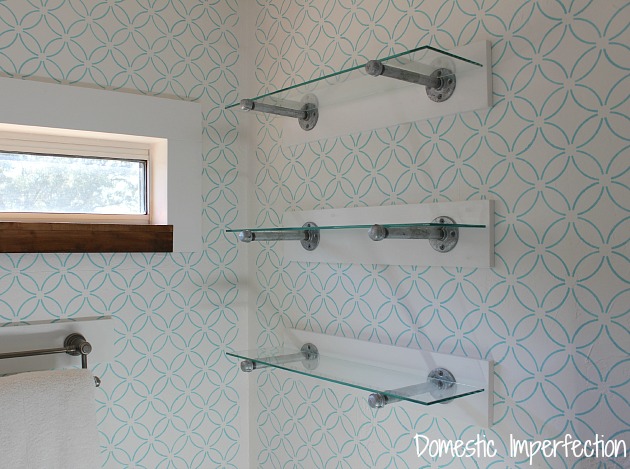
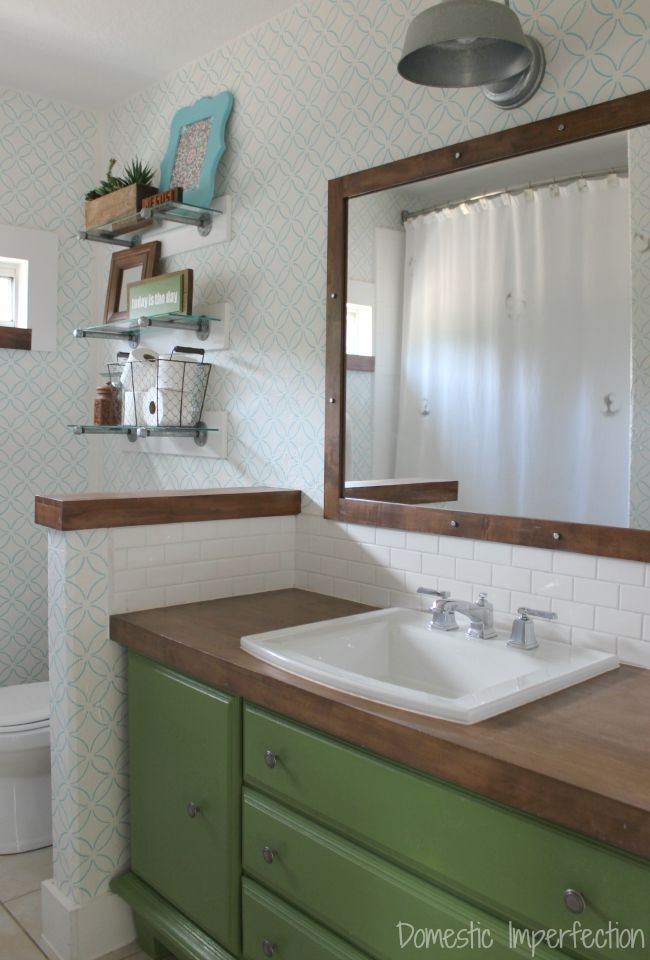
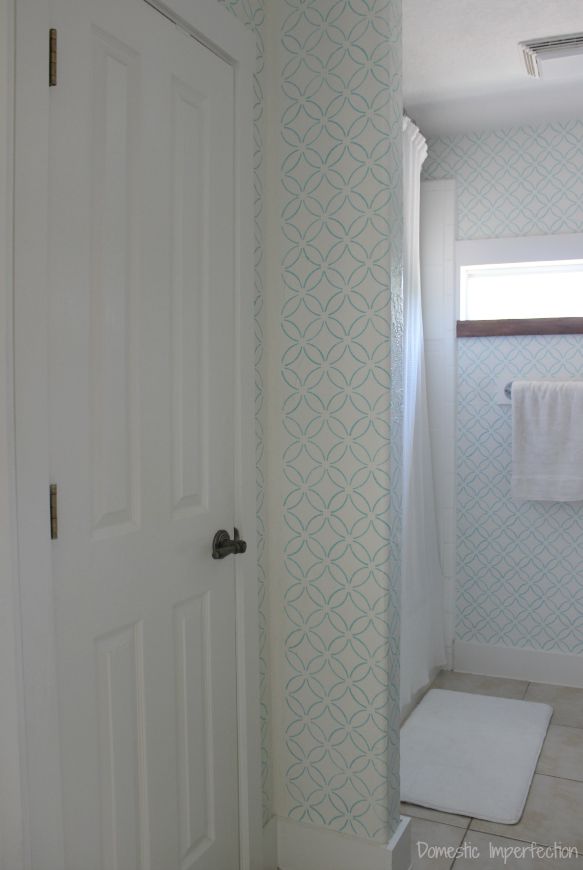
Then it was time to focus on the walls. It’s a fairly small and dark bathroom, so I painted it white to brighten it up and then stenciled it with a subtle turquoise design.
(Do you like how I said that all casually, like it wasn’t the most tedious thing I have ever done?)
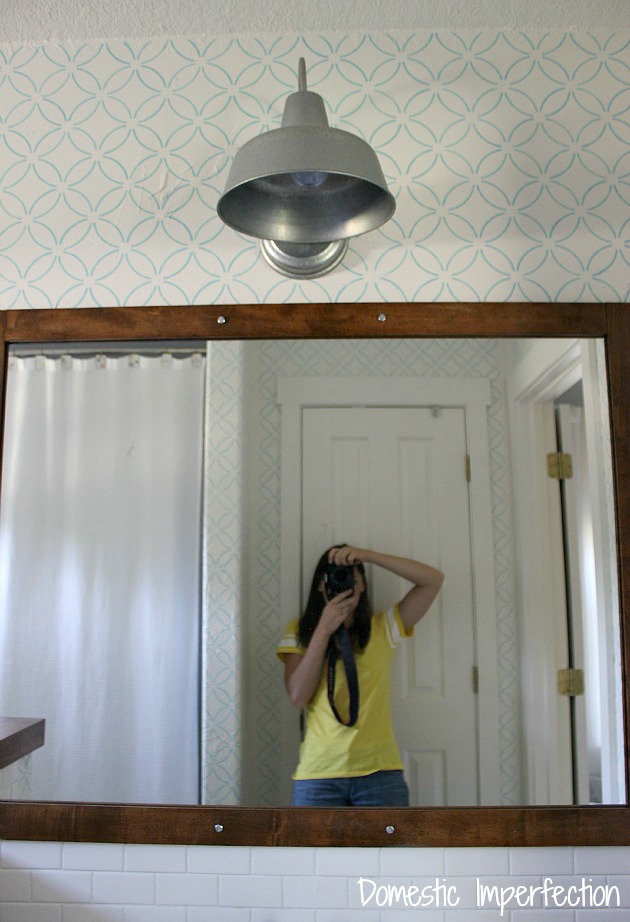
Next came the backsplash, mirror, light, and trim…and it finally started to feel like a bathroom again.
Then this happened…
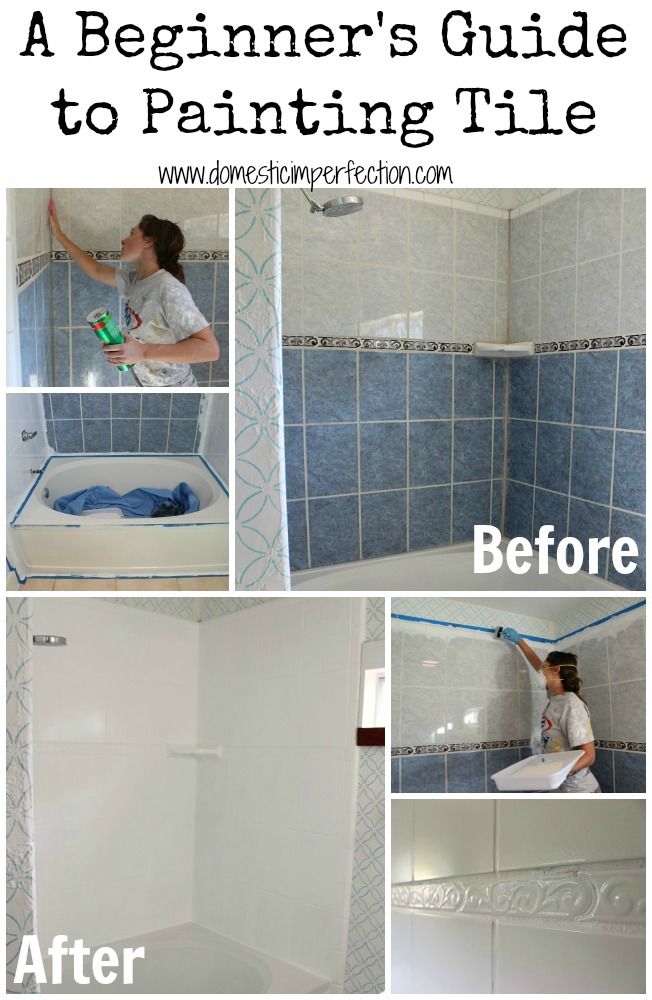
I painted the shower. It was originally a blue and gray and not terrible by any means, but I wanted it to be clean and white. It worked really well and is still holding up great after almost two years of hard use. Also, that tutorial has been the most popular post on my site this year, which can only mean that there is a whole lot of bathrooms with ugly tile out there.
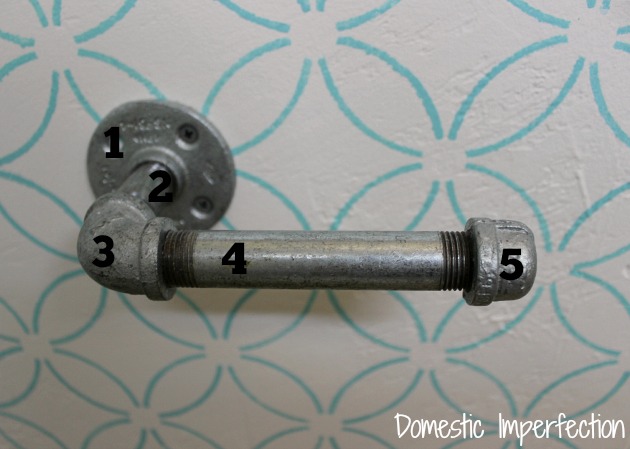
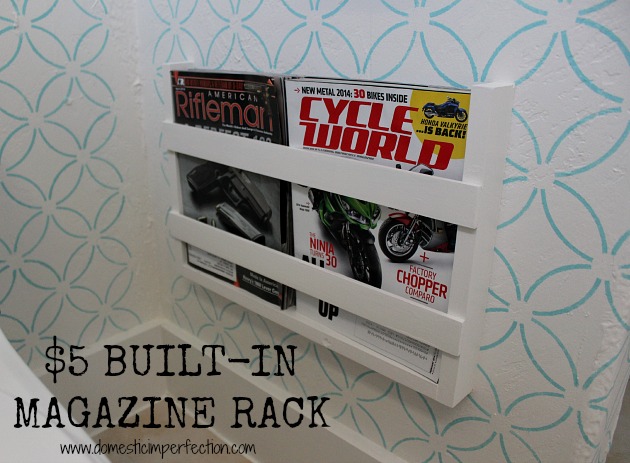
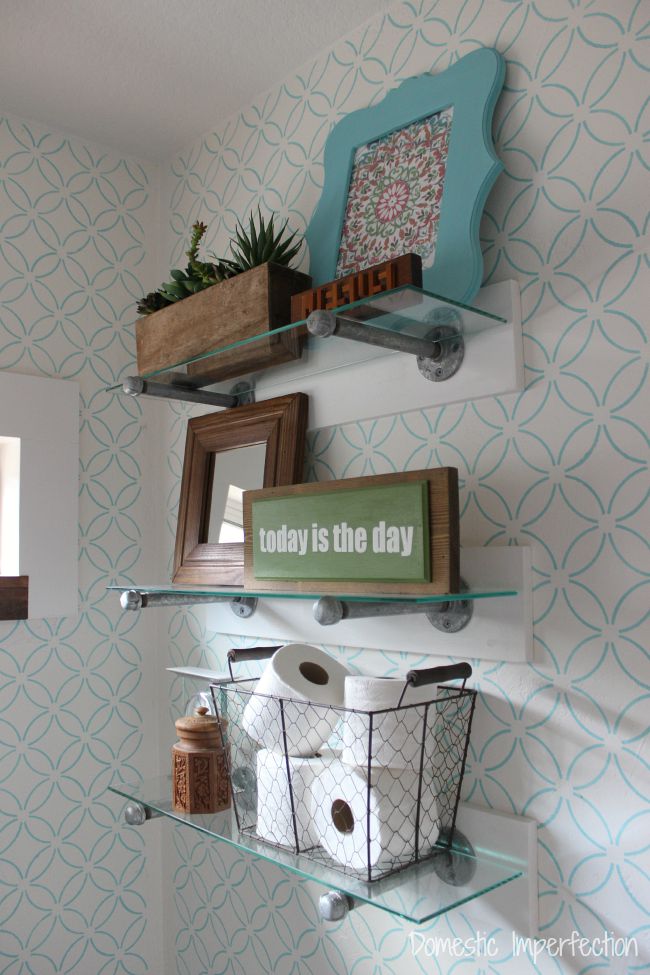
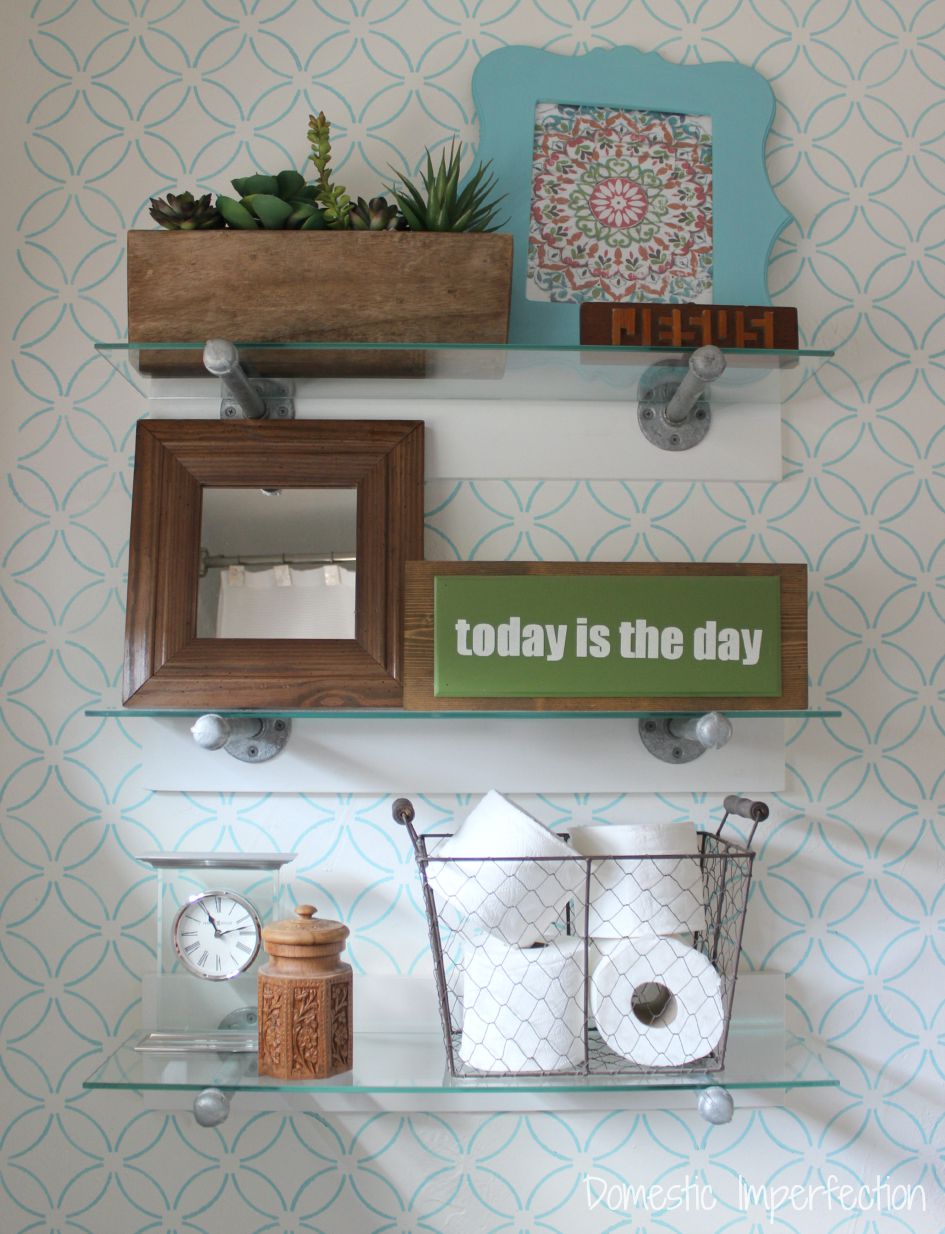
Lastly Adam and I added the finishing touches – industrial shelving and fixtures, a magazine rack, decor…
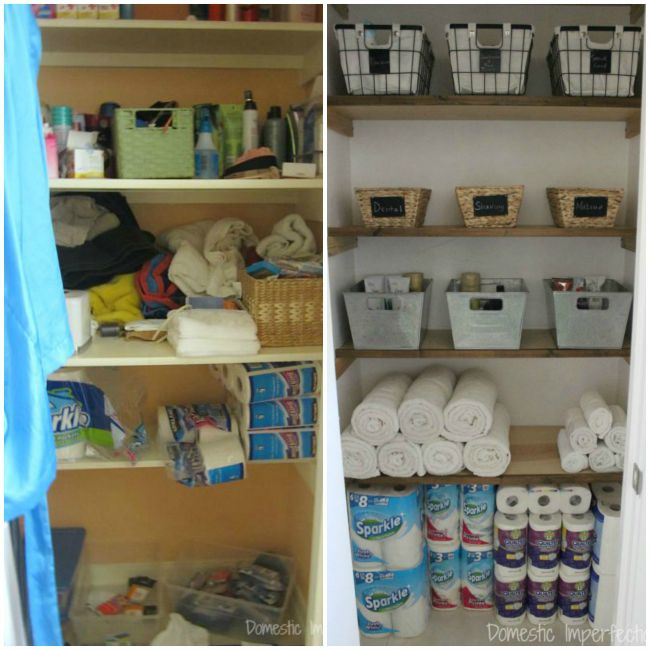
And we can’t forget the closet that I (finally!) organized earlier this month.
Now for the pretty pictures.

So how much did this transformation end up costing us? About $525 (I broke down prices below). We got quite a few things for free, either because Adams had connections through his job, sponsors sent me things to use and write about, or because we repurposed something we already had. Anything I purchased is linked so that you can find it if you are interested.
Cost Breakdown
- Paint -$80
- Stencil – free (Cutting Edge Stencils – $40 value)
- Industrial shelves and decor – $100
- bath mat – $20 (Amazon)
- closet shelves – free (scrap wood we already had)
- Closet baskets – free (BHG – $75 value)
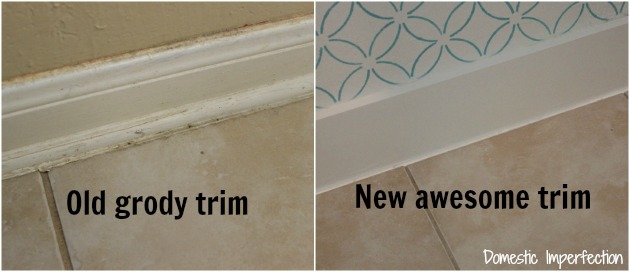
- Trim – $20
- Dresser turned vanity – free (hand me down)
- wood flooring for counter and accents – free (Adam connection)
- sink – $100 (Kohler – Amazon)
- faucet – free (Moen – $160 value)
- light – $30 (Lowes)
- Industrial towel bar and TP holder – $50
- mirror – free (Adam connection)
- Shower paint – free (Rustoleum – $50 value)
- Shower painting supplies – $30
- magazine rack – $5
- backsplash – $40
- random supplies (caulk, paintbrushes, poly, screws etc.) – $50
Total price – $525
Total price including value of sponsored items – $850
I think it’s a huge change for that amount of money and I’m really happy with it. Like I said earlier, there are a few things I would still like to do…like mirror needs to be replaced. The glue we used on the back burned through and it now has a five big black circles on it. Also, I would replace the closet door with a wooden one. Two small wooden ones actually, that way when the closet is open the entrance to the bathroom wouldn’t be completely blocked. Plus I just think the wood against the white would look pretty great. But hey, I’ve gotta leave a few projects for the future homeowners, right? I wouldn’t want them to be bored or anything.
I love the dresser, and the stenciling, though I don’t think I would ever have the patience to do a good job on something like that, I always start with good intentions and end up rushing things at the end and ruining them! I also really want new trim now after seeing yours!
I love how the painted shower turned out. We just painted the backsplash and floor in our kitchen, and while the backsplash turned out awesome (even though I totally winged it and just used gloss paint) I have my doubts about the floor lasting, even though we used the special paint, grr, frustrating. Oh well, it’s a million times better than it was I guess, even if I have to touch up scuffs now and again!
I love your bath. We redid our master bath a year ago . I wasn’t fortunate to have some items, ours was a total gut job including plumbing issues that came up. I bought the same sink and did black walnut flooring for my countertop and love them. Enjoy your new bath!!
I love your bathroom. What material did you use for trim? MDF?
It’s a pine 1X6. We used MDF for trim in a few other rooms and it hasn’t held up well.
I hope the future owners of your home can see how much work went into this room (and the rest of your home!!). You should put together a little binder or before and after pictures (or just give them the link to your blog…. :) ) I know as a homeowner I’d love to see what it looked like before!! It’s so pretty. Love the shot with your kiddos in the background too:) As always, I love what you do!
Hey you posted a reveal! haha Wow, what a difference. I really like the wood elements you incorporated and the green vanity. Boy does piping for the towel bar and toilet paper and shelving brackets cost a lot. yikes I really like your thrify-ness the most and your sense of humor is not bad either :)
If one day you come home and the dresser turned vanity is missing, don’t ask me where it went. The whole thing is just amazing! Great job, lady!
It’s funny that you mention the tile painting post being your most popular this year, because I just sent it to a co-worker a few days ago! She ended up printing it out so that she could reference it while she works on the bathroom in her new house. :)
Ashley, Wow! i really like you bathroom. And i am thinking to place table or rack for holding magazine and stuff. My wife and i are thinking to redesign out bath and we also have similar budget to work with. ( perhaps a bit more )
Nice Post!
I luuuurve that green vanity! The colour is so rich, with so much depth. I should go back and reread that post, see how you got that.
Also, I’m in the process of refinishing my son and daughter-in-law’s table and chairs and realized that I too need to try a pre-stain treatment. Gosh, what a difference! I looked it up and I’m thinking it’s just what I need. (Will have to re-sand down two seats, but oh well.)
How’s it going with the horde of little guys? :)
Wow Ahsley! You did such a great job in here! I love the pattern on the wall and the fun color on the cabinets. Way to go girl!
Nice…Go ahead for Online Decoration Products and Accessories for the Home, Kitchen and Office. Shop today for renovation of home and offices.
http://novaturedecor.com.pk/kitchen-interior-design
The whole room just looks…brighter. And somehow more spacious. Something about the colors used gives that effect. But great job, I really like it. I’m mid way through sorting my bathroom out too!
Wow, Awesome. Your information is really Awesome. I think it will be very helpful who wants to decorate his bathroom.
I love your new bathroom, from the new sink to the beautiful stenciling. It’s a real dream.