This isn’t one of those blog posts where I show a picture of a fugly piece of furniture and then a the beautiful after picture and say “ta-da, look what I did!” That’s not my style, so this is a straight up illustrated story.
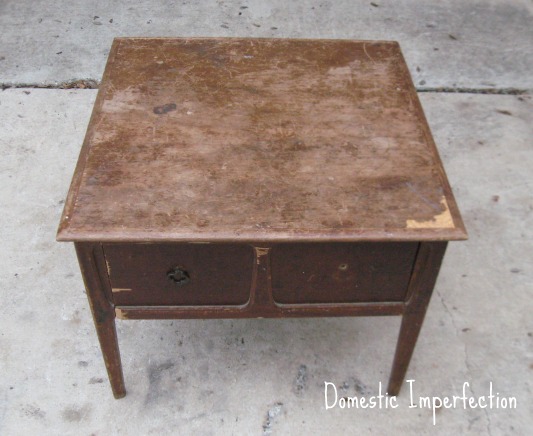
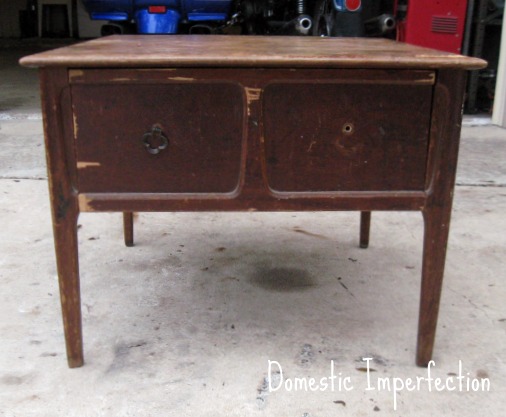
It all began one day when I found a beat up end table at a estate sale for five bucks. I’ve been on the lookout for some tables for awhile, we need two for the living room and two for the master bedroom. Currently we are using extra chairs as nightstands in the bedroom. Classy, I know. Perhaps one day I’ll show y’all a picture when I get around to decorating the master bedroom. Anyway, here’s the table. It’s in rough shape, but pretty sturdy.
.
.
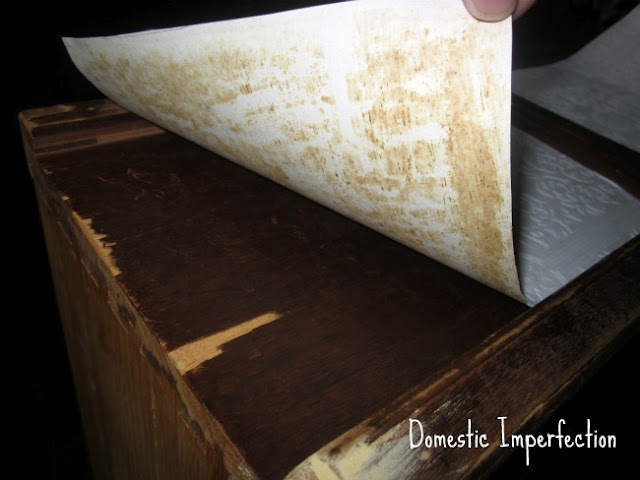
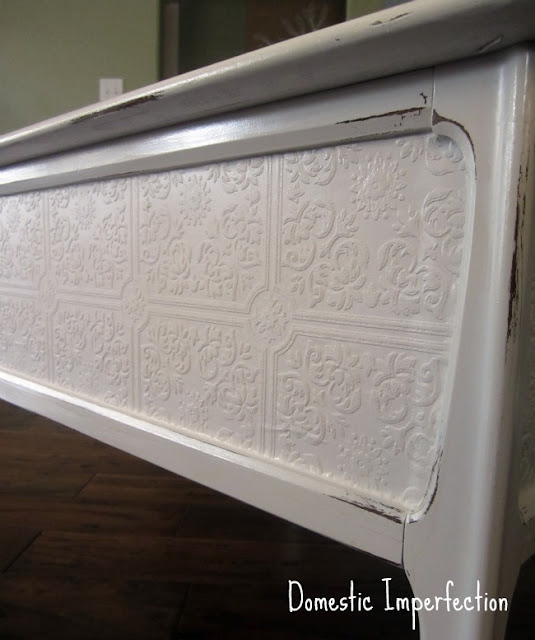
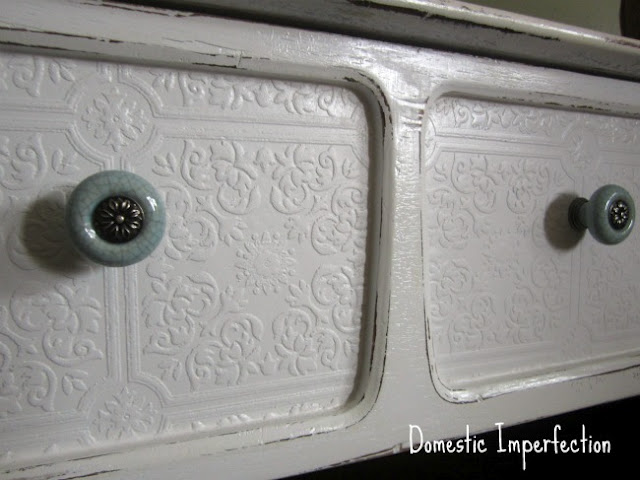
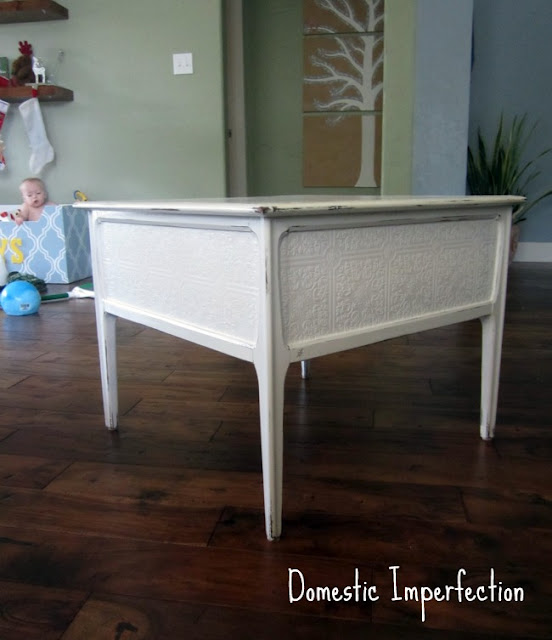
I decided pretty early on that I wanted to put some paintable wallpaper in the insets for some subtle texture. I bought a pre-pasted roll for about $11 bucks from Home Depot (or you can buy some on
Amazon, they have a way better selection). I made a template out of computer paper, then traced it onto the wallpaper.
.
Since it was prepasted, I just wet it thoroughly and smoothed onto my table. I let it sit overnight, and in the morning it did this…
.
Totally did not stick…Mod Podge to the rescue! You can use this stuff for anything.
.
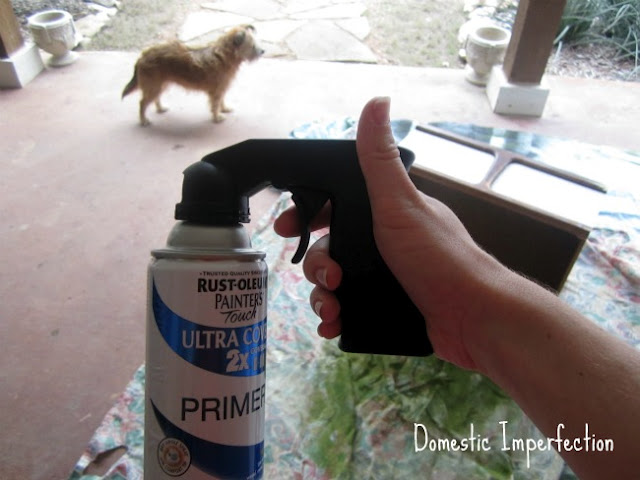
Next I set out to prime the table. I used spray primer because it wasn’t naptime and I had to be quick.
Also, if you don’t have one of these spray paint trigger things, go and get one. There like $3 and save your fingers. Gone are the days of cramped and permanently indented pointer fingers (then trying to use your thumb…anyone else?).
.
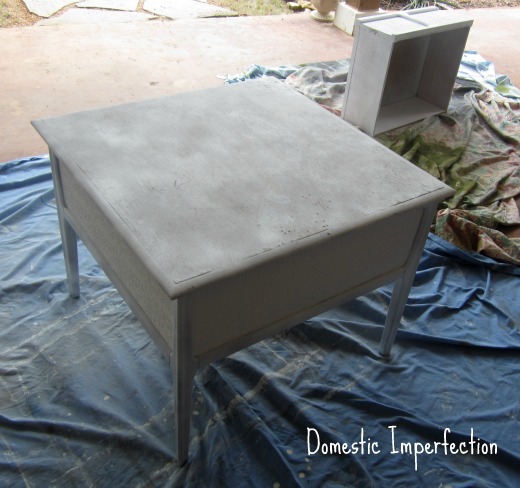
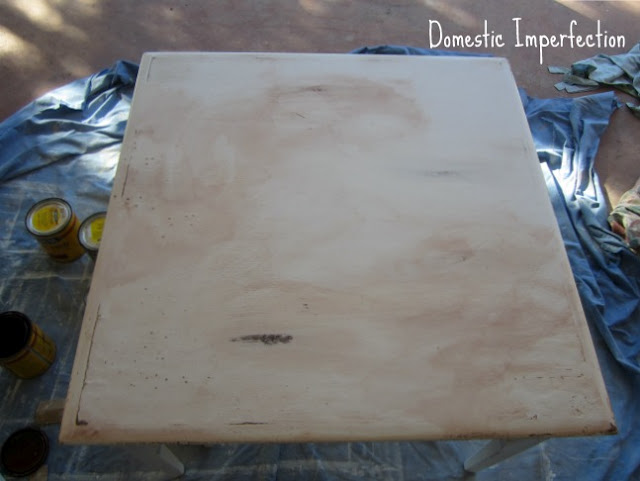
Here it is all primed….
.
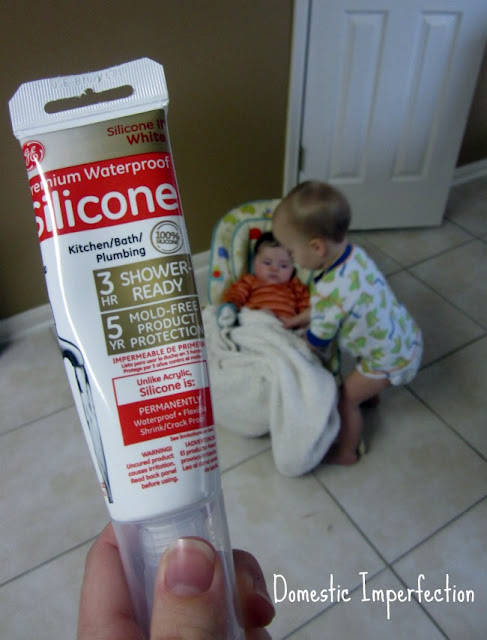
After priming I realized that the tiny gaps between the wallpaper and the table weren’t filling in, so I caulked them to perfection.
.
Another one of my favorite products….these little tubes of caulk.
.
The big tubes of caulk just don’t cut it for little projects. They are messy and if you don’t use the whole giant tube (you won’t) then it always dries out and I end up having to throw them away. These little tubes are more expensive, but there clean and easy and never dry out. Which actually makes them cheaper, because you get to use the whole thing.
.
Back to my tale.
.
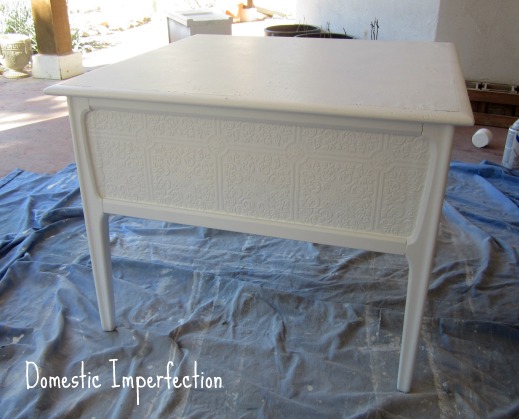
So I finished painting the table…
.
The top still looked wavy and dented and whatnot, so I knew I had to distresses it to make it look good crappy instead if bad crappy. Now I have never distressed anything before. Why would you want to? You taking something from looking terrible to awesome, and then ruin it? Actually I usually like the way other peoples distressing turns out, but I was way to scared to actually ruin something I worked so hard on. Free time is precious when you have small kids. I didn’t have a choice with this piece though, so I got out my sandpaper and started lightly sanding the corners. And you know what? Damned if I wasn’t enjoying myself.
.
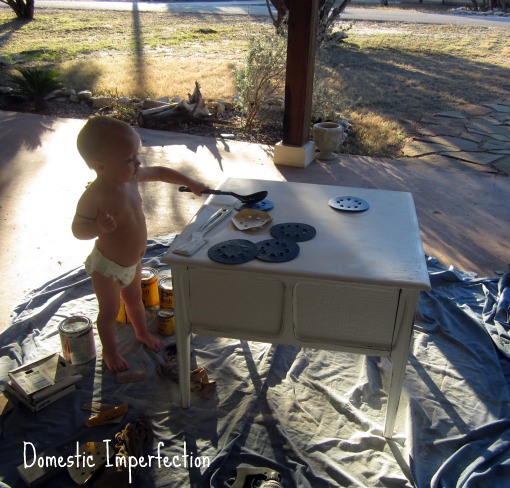
Elijah too…
(look at that weather….gotta love late December in South Texas.)
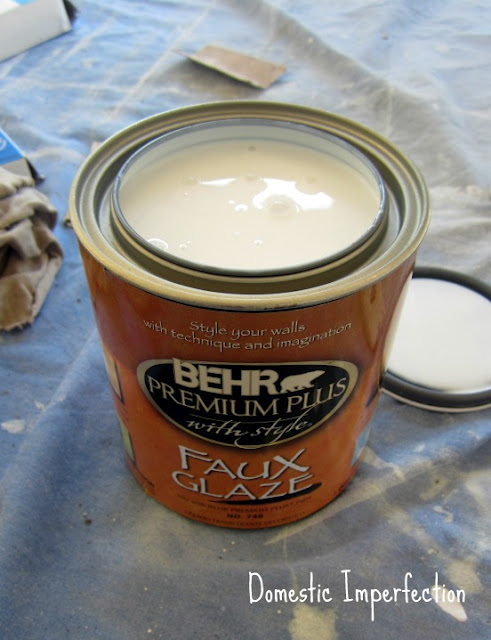
I wanted to make it look even more distressed so I got out some glaze to bring out the dents and scratches. I popped that puppy open and CRAP…it was clear. Bought the wrong kind.
.
I live pretty far from…everything…so there was no way I was going back to the store. I decided to improvise and use stain. I rubbed it on and wiped it off with a damp rag as fast as possible.
Nope, didn’t work. Ruined it.
.
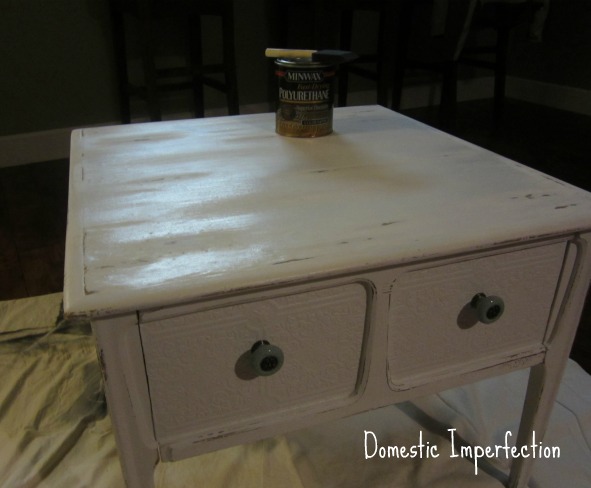
So I repainted it and re-distressed the top. Blah….it’s not quite as much fun the second time. Almost done though! All that was left was to add some knobs (picked them up for $2.50 a piece at Hobby Lobby) and slap a coat of polyurethane on.
.
Here it is all finished! I’m really liking the distressed look…I just might do it more often.
.
And some close up shots..
.
.
.
.
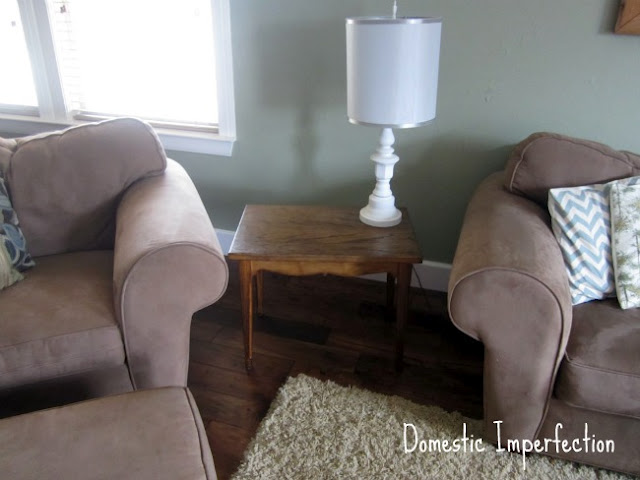
I decided that this table would look best in the living room (too big for a nightstand) so the current end table got moved to the bedroom, so now only Adam has a chair as a nightstand.
.
So here is the previous table…
(it and the lamp were both pre blog projects)
.
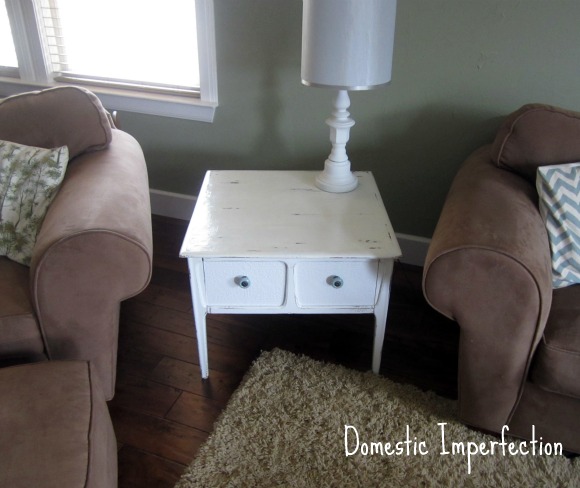
And here is the new one! I really like it, it brightens up the room a bunch. Sometimes I feel like I’m drowning in a sea of brown and tan.
.
Total for the whole project was…
Table – $5
Wallpaper – used about a dollars worth
Spray primer – $3
Knobs – $5
Everything else I already had.
.
…and that is the tale of the crappy $5 table turned $14 awesome table.
.
The end.
.
PS…my husband doesn’t see it, but I feel like the table is staring at me…anyone else?

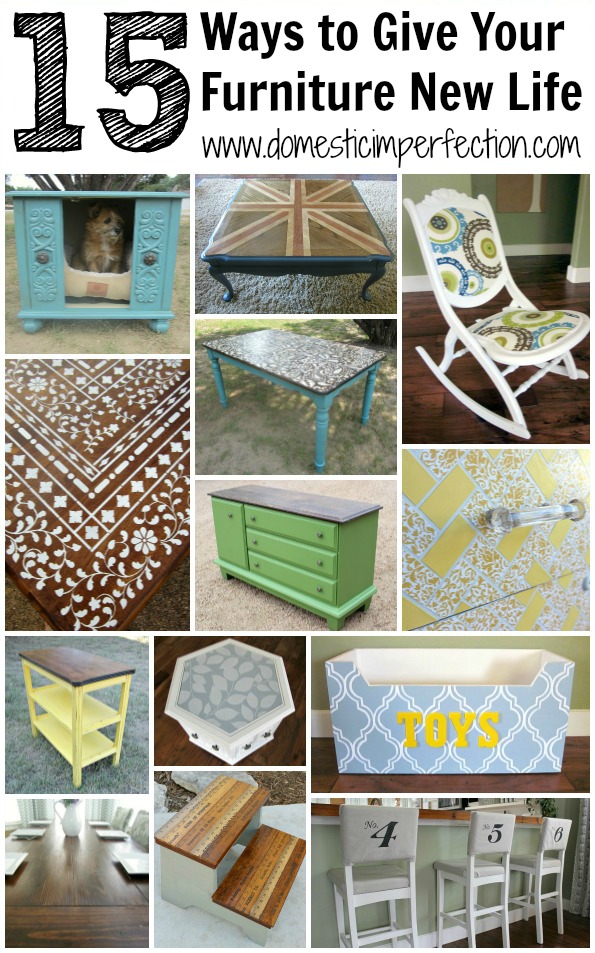
Looking for more furniture ideas? Check out
THIS POST.


This is seriously amazing. I love everything and I didn't think the table was staring until you mentioned it but… yeah, I see it. :-)
This is awesome Ashley! I love that style taable! I like the paintable wrapping paper too – I might have to try some of that one day! Great job!
Saw this on the P & P linky party! AH- MAZING! Wish I would have thought to use this type of thing with my recent hutch makeover. Used bead board instead. Will keep this in mind for future ideas. Excited to start following your blog and see your future exciting creations. Great job!!!
Love this redo! I especially like the idea of using paintable wall paper to add texture. I'm on the hunt for a nightstand as well and think I'd love something like this in charcoal for our bedroom. thanks for the tutorial!
i love the wallpaper and i love the lighter look this table adds to the room! great job!
That is some before and after. What a transformation. I am seriously impressed. Thanks for sharing at DIYbyDesign.
Very cute story, lots of tips and hints and your kids are too cute (your older of the two is funny too)
Oh yeah, and the table is great!
Visiting from Wow Us Wednesday,
Smiles, and thanks for sharing :D
~Suzanne in NW Illinois
I am so impressed! I love how it turned out.
This came out great! I love the use of the paintable wall paper to cover up dents and damage you couldn't otherwise fix. The distressing is the perfect touch. And yes, that table is totally checking you out. I'm amazing you can get this work done with all of your “help”. :)
Karah @ thespacebetweenblog
Love the idea of the wall paper on the sides. Very nice redo! And with a baby running around too! You must be super woman!
Hahahah, this post cracked me up :) It kind of is staring at me too…but I totally love the look! You did an amazing job, I love the idea to use wallpaper!
My favorite quote from the entire post:
Gone are the days of cramped and permanently indented pointer fingers (then trying to use your thumb…anyone else?).
Yes, I sure do!
mrsvolnoff.blogspot.com
Way to keep at it until you got the finish you wanted! It's so hard to do projects with the littles around. But you kept your sense of humor, which is so important! I guess it's staring at you a little… maybe it needs a friend…another light colored object in that space :)
Kim
http://www.todayismysome-day.blogspot.com
WOW! I love the table!! Your first distressing job was a complete success!! Awesome job!! Your newest follower!!
Yes I see the “stare”!
The table is really cute and did not end up a total waste of time ;) Don't you hate it when you get all excited and then realize you got the wrong stuff???
WHOA!! Quite the Before and After!! You should be proud! STUPENDOUS!!! Deidre~ your newest follower:) Stop by sometime and chat,http://simplysimplisticated4.blogspot.com
amazing transformation! a lot of effort paid off big time!
Great Job on the table, and for 5 bucks thats amazing!
It looks amazing! I love the shabby, aged look. It opens up endless possibilities.
CAS
VERY nice! I love the texture the wallpaper gives to the inset panels! I, like you, was hesitant about the whole distressing thing till I started it for the first time. It was indeed a little difficult to convince myself that scratching away the paint I JUST put down would make it look better but what do ya know? It actually does. Weird, right? Anyway, thanks for showing all the steps of this. It's easy to get discouraged as a crafter when you see blog after blog of perfectly formed furniture that looked effortless when your own attempts are a picture book of trial and error. It's nice to know I'm not the only one going “Hrm…yeah, that doesn't look good. Time to re-paint it…again.”
Gone are the days of cramped and permanently indented pointer fingers (then trying to use your thumb…anyone else?). Lol all the time ;)
Your table came out so lovely. I am in love with the distressing you did, and it looks perfect in your living room {even if it is staring at you lol}
Love the table…love your blog too! I'm a new follower so I don't miss any makeovers. Stop by anytime and follow too if you like. Keep up the creative work. Warm wishes, Lori
What an impressive table overhaul…I mean, make-over!! I never would've thought to use the wallpaper like you did. It really adds such great texture and personality to the table. You should be so proud of this beautiful piece!
I love the wallpaper texture – I may have to try that on my next salvage piece.
I have some leftover textured wallpaper from my kitchen backsplash project. Now I know what to do with it. That was a great idea and you did wonderful job. Your tutorial was nice and yes, I agree, the table definitely has eyes to watch you now!
Awesome transformation. Good job on the distressing, it came out great.
Hi Ashley I found you through Southern Lovely – this is a project after my own heart – I love white furniture and distressed is the best. My poor husband looks dismayed every time I buy a can of white paint… Please come visit me – Iv only been blogging for 6 weeks and Im loving it. Have a Fab New Year . Nat
http://northshoredays.blogspot.com/
i can totally see it. It almost looks like Wall-E. Super cute though.
I love your little table redo! The wallpaper inserts is genius!
Tania
Ok. So, I'm new here, thanks to the MMS link party, but doesn't it seem strange that no one commented about the photo of your son going poo-poo! This is a riot! Oh, and by the way, the table's cute.
You're welcome to stop by my place anytime. But you need to know there won't be any pooping children, since mine are finally grown and out of the house!
Best to you!!
Wow what a transformation!!
I love the table redo but my favorite parts are the kiddos and the dog in the background, “helping”!
Happy New Year!
Kerry at HouseTalkN
The table turned out great and what a fabulous snap shot of crafting with small kiddos around. I love those sweet boys of yours in the background. What big helpers!
Table look fabulous, I would love it if you shared your table project here:
http://juliejewels1.blogspot.com/2011/12/show-your-stuff-4.html
this turned out great I wouldn't have thought that table was salvageable I'd love you to add this (and any other posts you like) to my What We Wore and Made Party over at http://raegunwear.blogspot.com/search/label/WWWMW
That is an amazing transformation! Thank you for sharing. Found you thru the blog party!
What a transformation! And P.S. I live in South Texas, pretty much far away from everything too! Haha we should be friends.
http://www.everydaywiththejays.blogspot.com
Truthfully, the very name of your post reeled me in! Love the redo!!! How adorable and beautiful it turned out. Great job!!
I love how this turned out! I was looking for inspiration for new end tables and I believe I just found it! Thank you!
WELL DONE!
You did a fabulous job!
And really the best part WAS your children in the pics! Now those are two awesome jobs! : – )
looks awesome love the table sides and the detail in it come see me at http://shopannies.blogspot.com
Wow ! This table looks great ! I hope that you will share this tutorial at my new party, Some Good Stuff:http://some-good-times.blogspot.com/2012/01/some-good-stuff-1.html
Megan
wow you really turned this piece around! love everything about it. My
Gosh, I think your little guy stole your thunder. Even on the can he is cute. But that table is great too :)
I love this post, I enjoyed reading your tale! I loved all the pictures and I'm glad you didn't just do the before and after. Love the project, turned out great, also glad to see the trials you went through so we know it isn't always quick and perfect…and finally I do see the table staring at me, hehehe.
Newest follower!
Love your post. Made me giggle. I totally love the outcome. I want to try something like this, but I get nervous and decide not to…
But seriously. I love this.
I loved reading the whole tale, and you found the perfect spot too. I hope twenty twelve is everything you wish for and more. Thank you so much for sharing. I will follow on my way out so I can revisit. I hope you can find the time to come visit me and do the same. HAPPY NEW YEAR!!! Cheers SpecialK XoXo
Gorgeous. Thanks for the detailed tutorial….including the “oopses” along the way. Very entertaining. :)
Very Cute! Love the wall paper idea! *One of your other commentors may have said this but the Faux Glaze that you were going to use is meant to be used with your choice of paint. So if you want a brown glaze, you use brown paint. Want black glaze, use black paint and so on. I think it's one part paint to 4 parts glaze, it says on the back. I've used it before and sometimes it turns out really really well and other times not so much but. I use stain a lot also cause sometimes it's easier to work with then the glaze. Hope that helps! :)
I loved reading the whole post, love how you put the textured wall paper in the front. the first time you glaze something it can be overwhelming! The tutorial is great, and will help many out. Your table is perfect now, great color and right size. Now GFC following you. Thanks for sharing your creativity over at Sunday's Best!
I really enjoy the way that you write and the love the job that you have done. i love the way you show what went wrong and how to fix it. Just fabulous.
I'll be back for sure!
Lou
This is amazing!!! I would kill to find a piece of furniture like this… needless to say $5. It seems to me that no one has any decent furniture they want to get rid of near me!
Comment 1: very cute table! Comment 2: are you sure you are not my long-lost kid? Because you sound just like me. (I always wanted grandchildren. Right now I just have cats.)
Wow great table, I love it! So glad I found you on uncommon slice of suburbia ! You have a great blog and I have become one of your newest followers. Please stop by and visit me at simplyhomecents.blogspot.com.
WOW. I am seriously amazed. I never would have thought to use the paintable wallpaper! Genius!!! I'm tweeting this right now :)
This just turned out great. I wouldn't have given that table a second look if I saw it in a yard sale, but I really must learn to look beyond the “before” and start imagining what the “after” could be. Thanks so much for the inspiration!
Love it! Thanks for linking up! Check out my giveaway….
XO, Aimee
That photo of your son on the pot is totally cracking me up right now! I love how it turned out (and I'm totally scared to distress stuff too).I think I might have your table's sister on my blog today – the “before” hardware is the same!
I don't believe you will have a problem with this project because the areas that you had to caulk were very small – but you don't want to use silicone caulk (tub or any version) that you will put paint over. The paint won't stick. Buy a tube of siliconeized acrylic caulk (it will say “PAINTABLE”) to use on projects that will be painted. Siliconeized acrylic caulk has just enough silicone so it stays flexible and doesn't shrink. But the acrylic base means you can paint over it and the paint won't just peel off. Another bonus is that the acrylic caulk stores better than silicone (which cures in the tube before you can use it up). And you are right, the small reclosable tubes are SO much easier to use.
Keep up the good work. We'll be watching for more inspiration!
looks great in your living room. Those blue-ish knobs are a nice touch to blend in with the lamp. Well done!
Thanks for linking it up with us at http://www.finecraftguild.com/party/
There's always a party going on there, although we open a new one each Wednesday!
R
Love the staring table. I'm now following you on the Linky Followers, would like it if you follow me back. Found you on a link party you joined.
Diddie
Hi. Very nice transformation! Good job! Nice determination! As for the table staring at you, yes, but one of the kidlets will add to it someday by marking in a smiley mouth, then it will be smiling at you!
I just found your blog and wanted to comment on your ” crappy little table” which turned out so well, by the way. My Mom bought this one and it’s companion pieces at Ethan Allen in 1964 and was SOOO proud of them. I still have the narrow version of this table and am planning to rehab it this week. (The side tables were not meant to match in those days. ). Any way, I am enjoying your blog so much. Thank you
You are adorable! Loven your suggestions and reading your commentaries.
I love this!! What type of paint did you use?
o wow!. this is a great idea and very creative. Loved it!Thanks for sharing